6
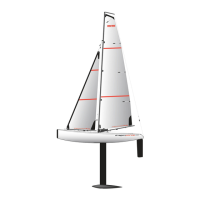
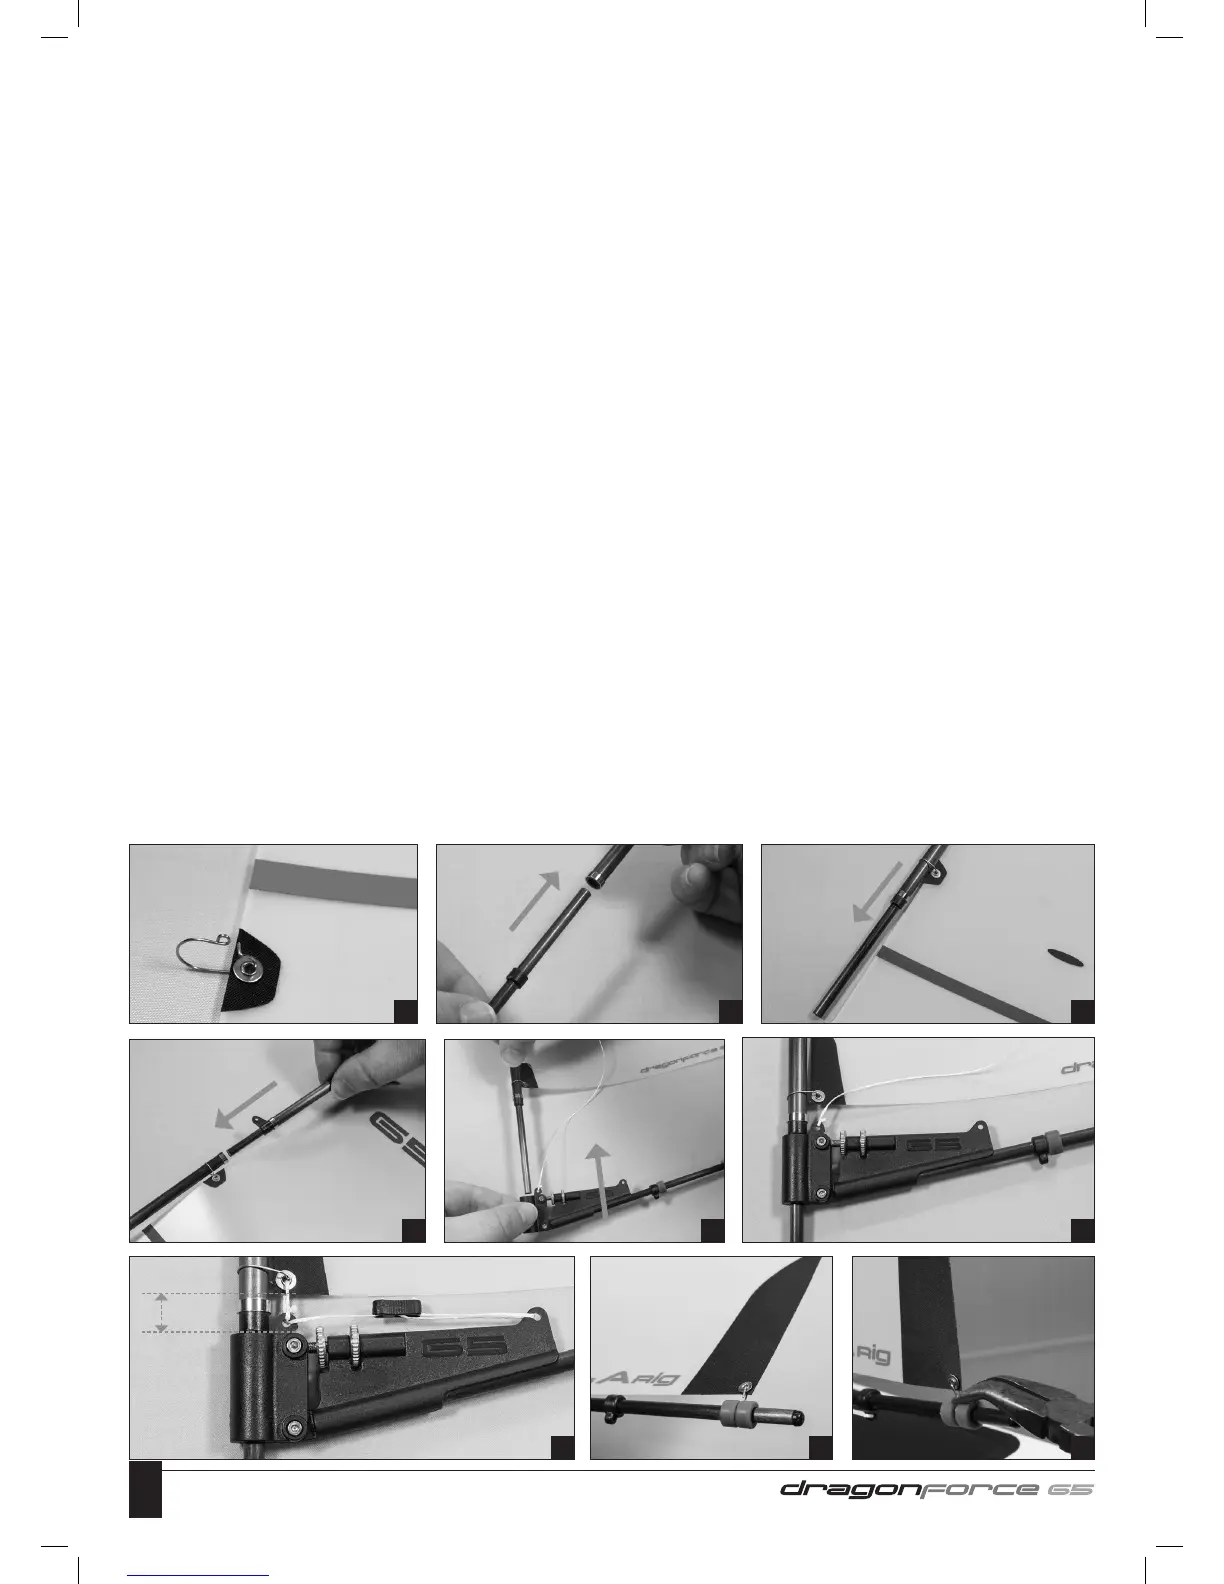
3 Fit the wire Mainsail Luff Rings to all five eyelets down the Mainsail Luff (front edge). Leave the rings open at this stage.
4 Slide the Mast Stub into the base of the Long Mast section, taking care that the bevelled edge of the plastic collar is facing downwards.
A spot of CA glue on the upper section of the Mast Stub before assembly will hold these two parts together for a permanent fix.
5 Starting with the second Luff Ring from the top of the Mainsail, slide the Mast Stub/Mast assembly down through all the other rings.
6 Take the Mast Joiner from the fittings pack and slide one end of the Short Mast section over the top half of the Joiner, taking care that
the Forestay Fitting flange is pointing downwards. Again, this joint can be secured with a spot of CA glue.
Slide the lower section of the Mast Joiner down in to the top of the Longer Mast, secure this joint with a spot of CA glue. Slide the top
Luff Ring over the top of the Mast and then close all Luff Rings.
7 Cut a 130mm length of Dyneema and tie one end to Hole A on the Boom Vang (this will form an adjustment known as the
Cunningham). Slide the whole Main Boom assembly over the lower section of the Mast Stub.
8 Thread the Cunningham cord up through the eyelet in the sail, back through Hole A, through a Bowsie, through Hole B and back to the
remaining hole in the Bowsie. Adjust so you have the Bowsie midway between A & B with a gap of 8mm between the top of the
Gooseneck and the bottom edge of the sail, tie off at the Bowsie and cut off the spare tail.
9 Clip the Sail Clew Hook through the Clew Eye in the rear corner of the Mainsail. Once fitted, close up the hook with a pair of thin nosed
pliers to prevent the sail slipping off the hook.
10 From the fittings pack locate the the Masthead Plug and carbon Backstay Crane. Fit the two pieces together ensuring the top edge
of the carbon Backstay Crane is flush with the top of the Masthead Plug (they can be glued together with a spot of CA glue) and slide
the assembly into the top of the Mast tube.
11 Cut a 130mm length of Dyneema and tie to the eyelet in the head of the Mainsail. Tension the Luff (front edge) of the Mainsail slightly
and tie up to the small slot in the Backstay Crane. Note: Tie this with only a single strand of Dyneema, this will allow the head of the sail
to swivel easily when the boat is running with the wind and the booms are sheeted out to their full extent. Mainsail luff tension can then be
adjusted with the Cunningham Bowsie above the Boom Vang.
12 Cut a 900mm length of Dyneema for the Backstay. Tie one end to the end hole in the Backstay Crane (see photo 12). Tie one of the
supplied 6mm metal rings to the other end at a distance of approximately 770mm from the hole in the Backstay Crane(see diagram
opposite). Slide the Mast and rigged Mainsail into the Mast Socket in the deck.
13 To make the adjustable lower section of the Backstay, cut a 500mm length of Dyneema, tie a loop in one end, thread the other end
through the first two holes in a Bowsie, then through the metal ring at the bottom of the Backstay and finish of back at the Bowsie. Hook
the loop into the metal hook in the Transom (back edge of the hull), apply a light tension to the Backstay, position the Bowsie roughly
midway along the lower cord and tie it off.
14 Adjust the Boom Vang so that the Leech (back edge) of the Mainsail is under light tension and then back it off a turn to allow the
Leech to twist open slightly. Adjust the Cunnigham to apply very light tension down the Luff of the sail.
15 Set the length of the Backstay as shown in the diagram opposite.
16 Adjust position of Clew Hook and silicone rings so the Mainsail Foot can form a curve with a distance of approximately 20mm between
the centre of the boom tube and the sail foot at its midpoint.
3 4 5
6 7 7
8 9 9
8mm gap
 Loading...