Page 8
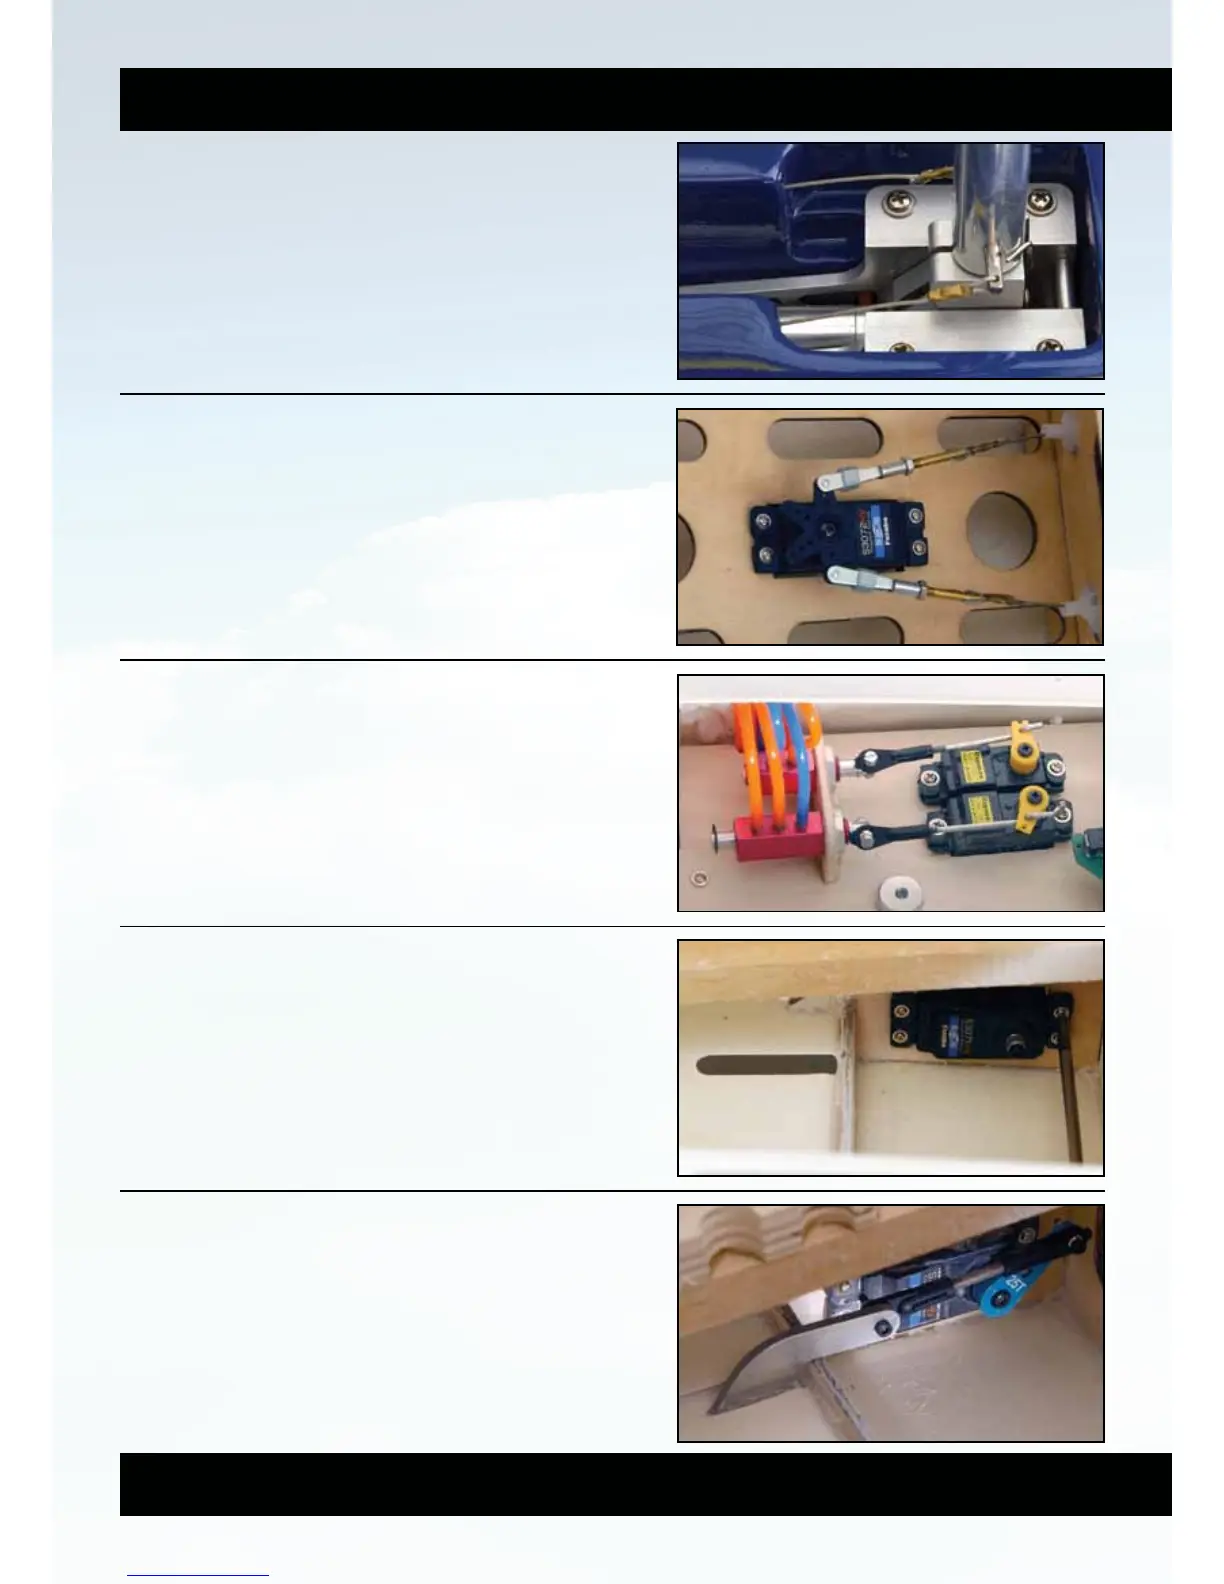
Holes need to be drilled in the retract bay for the
steering cables to run into the fuselage. Attach the
closed loop cables to the nose leg and crimp firmly to
secure.
Fit the clevises and closed loop adapters to the
centred servo arm and attach the closed loop cables
to the adapters, crimping securely. It can be
helpful to have someone hold the noseleg straight
while you remove slack from the cables.
Install the retract and brakes valves/servos as shown
on the left hand equipment plate, and connect up the
air lines. The fill valve can also be fitted to this plate.
The air tanks are fitted beneath the equipment plates
and are secured in place with some small dabs of
silicon sealant.
Install the flap servo with the output arm towards the
front of the fuselage.
Fit the flap to the fuselage using hinges in a similar
manner to that illustrated for the elevator, hold the flap
in correct position with tape whilst the glue cures, to
ensure free movement without jamming. Connect the
linkage as shown.
Step 30
Step 31
Step 32
Step 33
Step 34