30 31
JBP-RC-MANUAL |
©
2021 JUICED BIKESJBP-RC-MANUAL |
©
2021 JUICED BIKES
• Do not short-circuit the baery pack’s terminals.
• Do not charge the baery pack if the temperature is over
140ºF (60ºC).
• Do not disassemble the baery pack.
• Do not submerge the baery pack in liquid or use it in
wet areas.
• Do not place the baery pack near re or heat.
• Do not expose the baery pack to freezing temperatures
for an extended period. Do not charge a frozen baery
pack. Allow it to reach room temperature.
The e-bike features a high-capacity lithium ion rechargeable
baery pack. The lithium baery pack does not have a “memory
eect” associated with older baery technologies. It is highly
recommended you charge the baery pack aer every ride,
even if the baery pack is only lightly used.
An onboard circuit prevents the baery pack from overcharging.
The baery pack can achieve 500-700 full charge cycles. As
the baery pack receives more charge cycles, the capacity will
decrease. Charging a parally discharged baery pack is not
considered a full charge cycle.
NOTICE
Recharge the battery pack at least once every month. A battery pack left unused for
several months may result in permanent capacity loss.
Cold environments temporaily reduce the baery pack’s
capacity. Avoid using the electric bicycle in very hot weather.
Store the e-bike in a sheltered place.
Fully charge the baery pack before your rst use. The charger
included with the e-bike recognizes the baery pack’s inial
charge and will automacally cease charging when the baery
pack is fully charged. Always charge the baery pack before a
long trip.
• Be sure the e-bike is powered o.
• Be sure to use the proper 48 VDC or 52 VDC charging
prole if using the Cycle Saator
®
charger.
• The baery pack can be charged while connected to the
e-bike or while removed from the e-bike. (See “Removing
the Baery Pack” on page 29.)
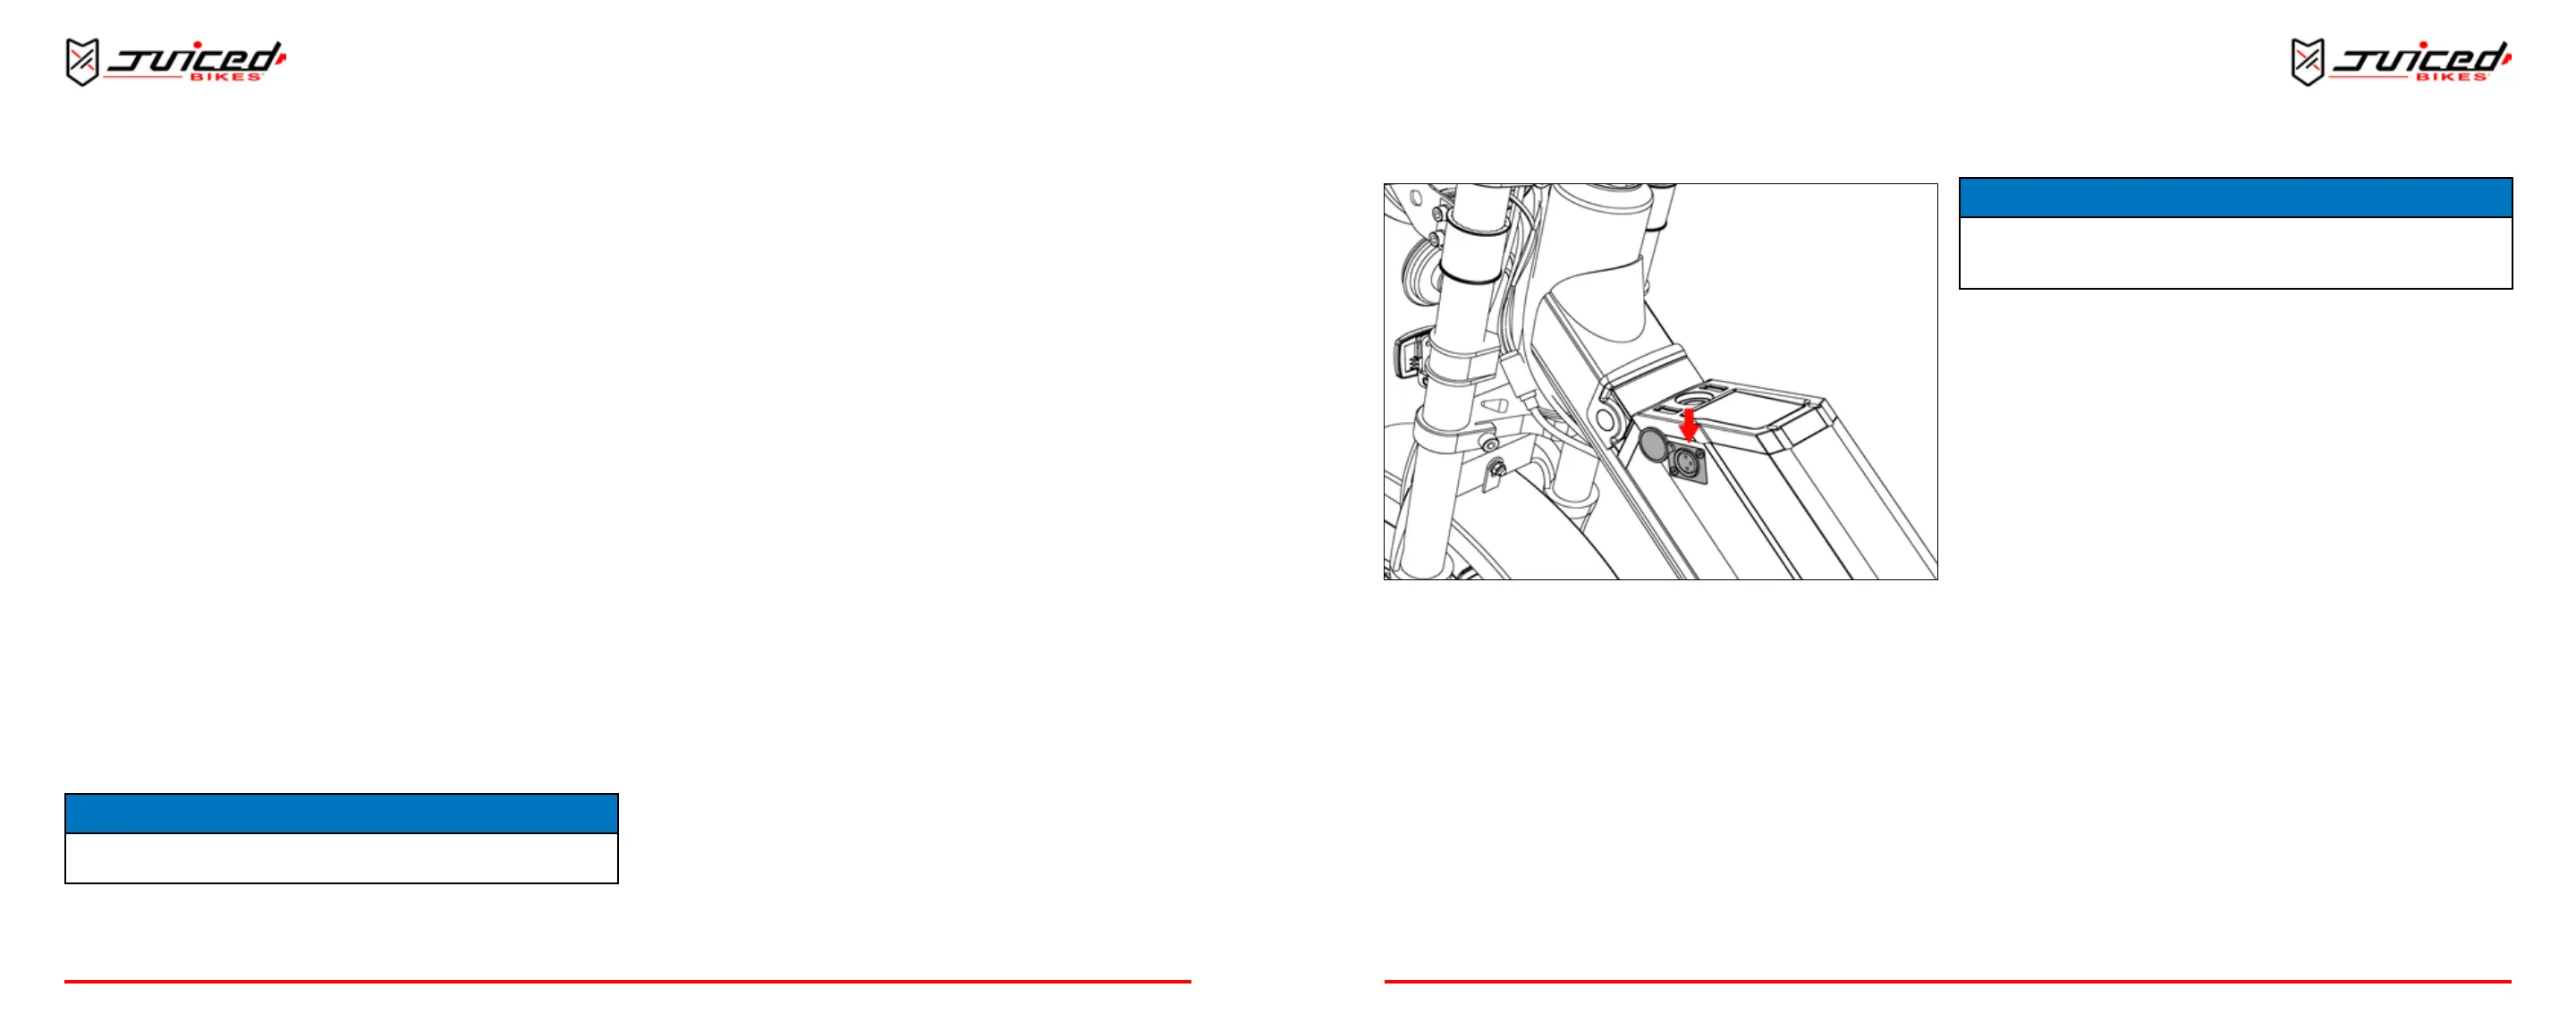
ONBOARD CHARGING
1. Stand on the le side and locate the charge port dust cover
on the top of the baery pack.
2. Rotate the dust cover to expose the DC charge port.
Fig. 26 -
Charge Port
3. Carefully plug the charger into the charge port.
4. Connect the AC power cable into the charger and plug the
cable into the power outlet. The charger will automacally
start charging the baery pack.
5. When the charger is charging the baery pack, the
indicator LED will turn red. When the baery pack is
fully charged, the light will turn green and the baery will
automacally stop charging. Charging takes 1-8 hours,
depending on baery size and inial charge level. (See
“Reading the Baery Pack Level” on page 19.)
6. Disconnect the charger from the wall.
7. Remove the charger plug from the DC charge port. Rotate
the dust cover to protect the port.
NOTICE
If you charge your battery while it’s on the bike, be sure to remove and re-seat your
pack every couple of rides. Road vibration and rough terrain may make the battery
come loose.
HYDRAULIC BRAKES
There are several components that make up your braking
system. The hydraulic part needs to be inspected and serviced
to check for wear and tear. If the hydraulic brakes are worn,
replacement will be needed. When a replacement is needed
varies by amount of me riding, mileage, riding style and
locaon.
We recommend inspecng your brakes before every ride.
Noce: If there appears to be any issue with your braking
system (or any other item) do not use your bike and contact our
Support Team or visit an authorized mechanic.
MINERAL OIL CUPS
Have a trained mechanic service the mineral oil cups on the
handlebars.
MAINTENANCEMAINTENANCE