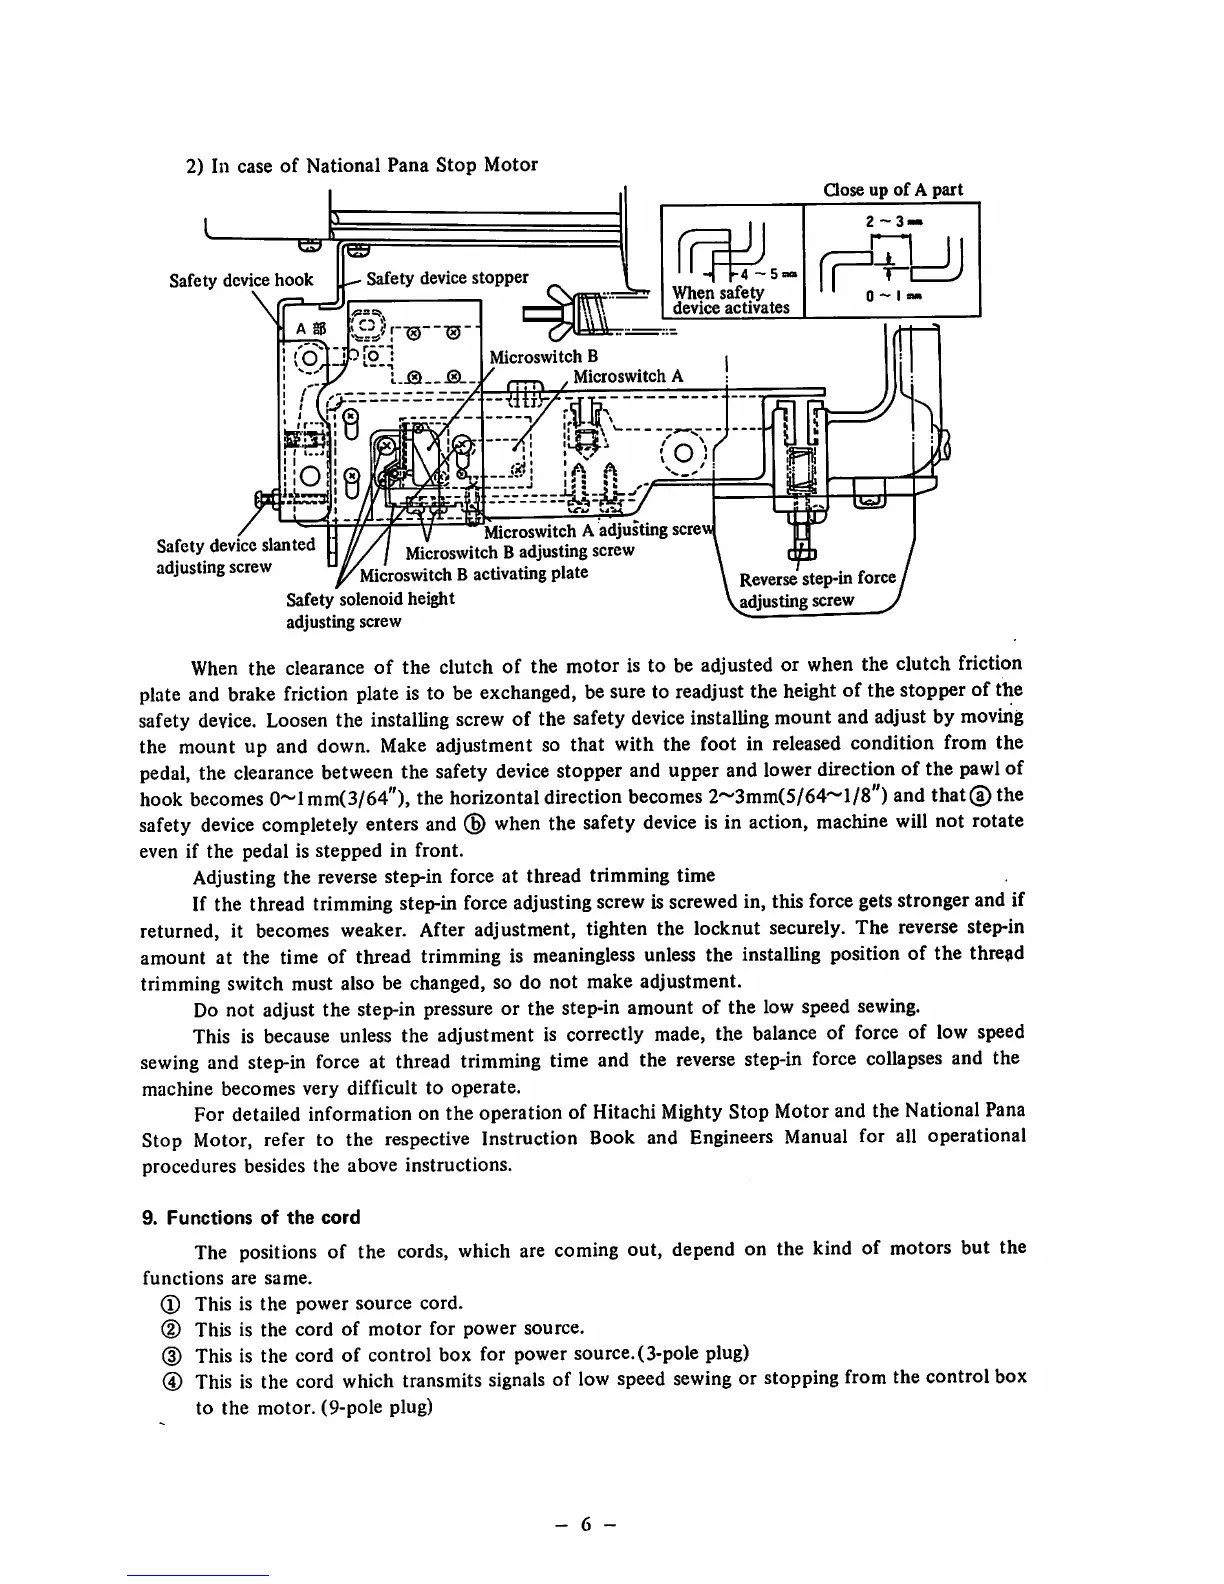
2) In case
of
National
Pana
Stop
Motor
Safety device
hook
\
Safety device slanted
adjusting
screw
Safety
device
stopper
Microswitch
B
Microswitch
A
Qose
up
of
A
part
When
Si
device
s
>-4 — 5 not
ifety
ictivates
2-3.
0 - 1 «
m
Microswitch A adjusting screw
Microswitch B adjusting screw
Microswitch B activating plate
Safety solenoid height
adjusting screw
Reverse step-in force
adjusting screw
When the clearance
of
the clutch of the motor is to be adjusted or when the clutch friction
plate and brake friction plate is to be
exchanged,
besureto readjust the
height
of the stopperof the
safety
device.
Loosen
the installing
screw
of the safety
device
installing mount and adjust by
moving
the mount up and
down.
Make
adjustment so that with the foot in
released
condition from the
pedal,
the
clearance
between
the safety
device
stopper and upper and
lower
direction of the
pawl
of
hook
becomes
0~lmm(3/64"), the
horizontal
direction
becomes
2~3mm(5/64~l/8")
and
that@ the
safety
device
completely enters and
(B)
when
the safety
device
is in action,
machine
will
not rotate
even if the pedal is
stepped
in front.
Adjusting
the
reverse step-in force at thread trimming time
If the thread trimming step-inforce adjustingscrewisscrewedin, this force gets stronger and if
returned, it
becomes
weaker.
After adjustment, tighten the locknut securely. The
reverse
step-in
amount at the time of thread trimming is meaningless unless the installing position of the thread
trimming switch must also be changed, so do
not
make adjustment.
Do not adjust the step-in pressure or the step-in amount of the low speed sewing.
This is because unless the adjustment is correctly made, the balance of force of low speed
sewing
and
step-in
force
at thread trimming time and the
reverse
step-in force
collapses
and the
machine
becomes
very
difficult
to
operate.
For detailed information on the operation of Hitachi MightyStop Motor and the National Pana
Stop
Motor,
refer to the
respective
Instruction
Book
and
Engineers
Manual
for all operational
procedures besides the above instructions.
9.
Functions
of
the
cord
The positions of the
cords,
which are
coming
out, depend on the kind of motors but the
functions
are
same.
(l)
This
is
the
power
source
cord.
(D This is the
cord
of
motor
for
power
source.
(D This is the cord of control box for power source.(3-pole plug)
@ This is the cord which transmits
signals
of low speed
sewing
or stopping from the control box
to the motor. (9-pole plug)
- 6 -
 Loading...