Do you have a question about the JUKI DLN-5410N and is the answer not in the manual?
Explains DANGER, WARNING, and CAUTION risk levels.
Details various warning symbols and their meanings.
Warning for immediate danger of death or serious injury.
Warning for medium to minor injury.
General advice for using the machine and manual.
Importance of checking and maintaining safety devices and labels.
Prohibits unauthorized use and modification.
Emphasizes operator training for safe operation.
Lists operations requiring the power to be turned off.
Safe lifting and moving procedures for the machine.
Procedures for safely unpacking the sewing machine.
Guidance on setting up the sewing machine.
Using genuine table/stand and securing casters.
Preventing electrical hazards from cables and wiring.
Importance of proper grounding for electrical safety.
Using specified motors and protective covers.
Checks before powering on the machine.
Safety measures to take while the machine is running.
Using genuine oils and handling them safely.
Safety during repair, adjustment, and cleaning.
Conditions for safe and proper machine operation.
General safety warnings for operating the machine.
Notes on safety devices like eye protection and finger guards.
How to install the oil pan on the machine table.
How to fit the machine head onto the table.
How to fix abnormal sounds from the belt cover.
How to adjust the presser foot lift height.
How to fix the thread stand securely.
Routing power cord for ceiling wiring.
How to fill and check the oil pan.
Break-in procedures for new or long-unused machines.
Adjusting oil flow to face plate parts via a screw.
Adjusting oil amount in the hook via adjustment screw.
Step-by-step guide for installing the sewing needle.
How to insert the bobbin into the bobbin case.
How to adjust the stitch length dial and lever.
How to adjust the presser foot pressure.
Step-by-step instructions for threading the machine head.
Adjusting the upper thread tension.
Adjusting the bobbin thread tension.
Changing the stroke of the thread take-up spring.
Changing the pressure of the thread take-up spring.
Adjusting thread take-up stroke based on material thickness.
How to stop the machine with the presser foot raised.
How to adjust the needle bar height.
How to adjust the hook installation position.
How to adjust the feed timing.
How to achieve the standard feed dog tilt.
How to adjust the height of the feed dog.
How to adjust the presser foot height and angle.
How to obtain standard stitch width.
How to increase or decrease needle feed amount.
Adjusting needle stop position after thread trimming.
Adjusting lower needle stop position.
Adjusting pressure to depress pedal.
Adjusting pressure to depress pedal back.
Adjusting pedal stroke.
Installing connecting rod for pedal adjustment.
Adjusting the pedal angle.
How to operate pedal for different sewing speeds.
Adjusting the height of the switch lever.
Adjusting the wiper position based on material thickness.
How to operate the one-touch reverse feed stitching.
Adjusting the height of the switch lever.
How to resharpen and reinstall the counter knife.
| Operation | Automatic |
|---|---|
| Max. stitch length | 5 mm |
| Lubrication | Automatic |
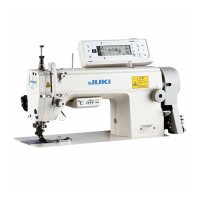
| Model | DLN-5410N |
| Max Sewing Speed | 5000 stitches per minute |
| Needle Type | DPx5 |
| Hook | Rotary Hook |
| Type | Industrial Lockstitch Sewing Machine |
| Stitch Type | Single Needle Lockstitch |