Do you have a question about the JUKI LU-1560N and is the answer not in the manual?
Specifies the correct vertical position of the needle in relation to the throat plate.
Details the correct fore-and-aft positioning of the feed dog relative to the needle.
Explains how to adjust the side-to-side position of the feed dog.
Defines the correct vertical height of the feed dog relative to the throat plate.
Specifies the correct vertical clearance between the hook and the needle.
Guides on setting the position of the inner hook guide for proper hook timing.
Critical adjustment for synchronizing needle and hook movement for stitch formation.
Details the adjustment for the vertical movement of the presser foot.
Adjustment for synchronizing the rotation of the upper and lower shafts.
Adjustment of timing for the feed cam mechanisms for proper feed dog movement.
Adjustments related to the alternate vertical movement and momentum of the feed mechanism.
Adjustment of the needle's lateral movement, related to bottom feed amount.
Procedure to ensure correct stitch length for both forward and reverse feeding.
Balancing adjustment for the machine, specifically without a thread trimmer.
Adjustment of the vertical position of the needle bar rocking frame assembly.
Specifies the dimension for the needle stop adjusting slide shaft assembly.
Adjustment of the position of the change lever for various machine functions.
Setting the correct position for the reverse feed control lever.
Information on the safety clutch, including resetting and torque adjustment.
Adjustment related to the reverse feed cylinder mechanism.
Guidelines for manual and automatic lubrication of the sewing machine.
Adjustments for the thread trimmer device, including knives, cams, and timing.
Installation and adjustment of the alternate vertical dial and its detection switch.
Installation of the DL device for machines equipped with a thread trimmer.
Installation of the Thread trimmer Ver.UP set for specific LU models.
Installation of the device to detect the remaining amount of bobbin thread.
Detailed steps for installing the automatic reverse feed device and its components.
Instructions for installing the automatic presser foot lifter and its pneumatic components.
Wiring details for connectors originating from the sewing machine head.
Wiring specifications for connectors from the pneumatic device.
Wiring information for relay cable connectors to the control box.
Troubleshooting guide for common sewing issues like thread breakage and skipped stitches.
Troubleshooting guide for thread trimming problems, including skips and failures.
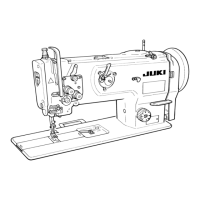
| Operation Class | Industrial |
|---|---|
| Stitch Type | Lockstitch |
| Max Stitch Length | 5 mm |
| Needle bar stroke | 36.5 mm |
| Hook | Rotary hook |
| Motor Type | Clutch motor or servo motor |
| Motor | Servo Motor |