Do you have a question about the JUKI LU-1508NH and is the answer not in the manual?
Read safety instructions carefully and understand them before using. Retain this manual for future reference.
Explanation of danger levels (Danger, Warning, Caution) and warning pictograms used on the machine.
Fundamental safety guidelines for machine operation, including basic precautions and safety devices.
Guidelines on proper usage, operator training, power shutdown, transport, and unpacking.
Instructions for installing machine components like hinge seats and oil pan.
Safety guidelines for cables, wiring, grounding, motor, and electrical components.
Safe practices for lubrication and maintenance, emphasizing correct procedures and qualified personnel.
Guidelines for safe maintenance, adjustments, part replacement, and fuse replacement.
Specifications for temperature, humidity, noise, and voltage for safe machine operation.
Precautions against condensation and lightning to protect electrical components.
General safety rules and specific actions for safe machine usage.
Identification of warning symbols used to alert operators to potential hazards.
Specific warnings regarding keeping hands away from moving parts and operating the machine safely.
Descriptions and illustrations of key safety devices like belt cover and finger guard.
Instructions for safe operation, emphasizing keeping hands away from needle and moving parts.
Cautionary notes on safety devices potentially omitted from illustrations but essential for operation.
Important checks, cleaning, and oiling procedures before initial machine operation.
Specific instructions for first-time operation, including voltage, power connection, and speed limits.
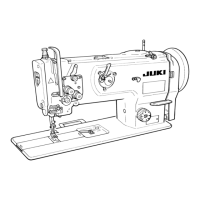
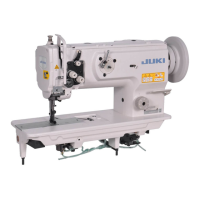
Detailed technical specifications for models, including speed, dimensions, needle, thread, and noise.
Instructions for installing hinge seats, head support rubbers, and the oil pan onto the machine table.
Steps for assembling the oil pan with drain plug, seal, and washer.
Procedure for securing the oil reservoir to the table using nails or screws.
Instructions for assembling the knee lifter mechanism components.
Adjusting the direction of the knee pad using setscrews.
Procedure to adjust belt tension by motor height for a 15mm sag under 9.8N load.
Step-by-step instructions for attaching the belt cover parts, including cover stud and auxiliary plate.
Detailed steps for inserting and securing the needle correctly.
Verifying clearance between needle and hook after replacement to prevent damage.
Instructions for removing and inserting the bobbin, including latch operation.
Warning against operating the machine idle with a bobbin to prevent damage.
Guidance on daily and weekly lubrication points and amounts.
Instructions for lubricating after initial setup or long periods of disuse.
Instructions for filling the oil reservoir and checking the oil level.
Procedure for adjusting the oil amount in the hook for proper lubrication.
Precise steps for attaching the needle, including setting needle bar height.
Checking clearance between needle and hook after replacement to prevent damage.
Step-by-step instructions for threading the lower thread through the inner hook and tension spring.
Verifying correct bobbin rotation when drawing thread for proper threading.
Instructions for attaching the bobbin winder thread guide to the top cover.
Procedure for striking the bobbin thread guide rod into the machine arm.
Instructions for threading and winding the bobbin, including tension and capacity adjustments.
Guidance on adjusting the thread guide to fix uneven bobbin winding.
Instructions for attaching the arm thread guide to the top cover.
Step-by-step guide for threading the upper thread through the machine head.
Instructions for attaching the arm thread guide for NH models.
Threading procedure for NH models, including thin thread precautions.
How to adjust stitch length using the dial and aligning numbers.
Instructions for performing reverse feed stitching using the control lever.
Procedure to adjust upper thread tension using the second tension nut.
How to adjust bobbin thread tension using the tension adjustment screw.
Adjusting the movement range of the thread take-up spring by moving the stopper.
Adjusting the tension of the thread take-up spring.
Instructions on using the hand lifter to control the presser foot lift.
Procedure for lowering the presser foot using the hand lifter.
How to adjust presser foot pressure using the dial and nut.
Note to use minimum pressure while ensuring secure material holding.
How to check the distance between the needle eyelet and hook blade point.
Steps for adjusting needle bar and hook for proper alignment and clearance.
Verifying hook needle guard position after hook replacement.
How to bend the hook needle guard inward or outward for correct alignment.
Moving the bobbin case opening lever to its back end position.
Adjusting the gap between the lever and bobbin case protrusion.
How to adjust the lift amount of presser foot and walking foot.
Table indicating engraved marker lines for lift amount adjustment.
Table specifying maximum sewing speeds based on operating conditions.
Information on the required V belt type and motor pulley specifications.
Table correlating motor pulley size, speed, and V belt size with machine models.
Explanation of when the safety clutch engages and its purpose.
Step-by-step instructions for resetting the safety clutch after activation.
Troubleshooting thread breakage causes like rough edges, tension, or timing.
Troubleshooting stitch skipping due to incorrect timing, presser foot pressure, or needle issues.
Troubleshooting loose stitches related to bobbin threading, tension, or winding.
| Brand | JUKI |
|---|---|
| Model | LU-1508NH |
| Category | Sewing Machine |
| Language | English |