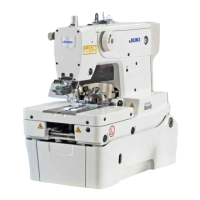
Do you have a question about the JUKI MEB-3810N Series and is the answer not in the manual?
Preparing the table for machine installation.
Steps for installing and positioning the control box.
Mounting and wiring the power switch.
Procedures for placing the sewing machine head onto the table.
Safe methods for lifting and lowering the sewing machine head.
Installing safety guards for user protection.
Detailed instructions on lubricating various machine parts for optimal performance.
Correct procedure for installing a sewing machine needle.
Step-by-step guide for threading the upper thread of the machine head.
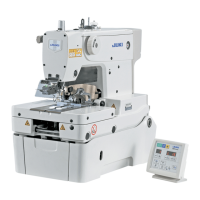
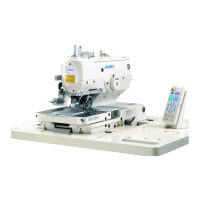
Overview of the operation panel's buttons, LEDs, and their functions.
Steps for basic machine operation, including pattern selection and starting.
Guide on adjusting thread tension values for optimal stitching.
Steps for threading the machine, including needle bar positioning.
How to set the number corresponding to the type of cloth cutting knife.
Procedure for setting the length of the cloth cut by the knife.
How to select between before-cut and after-cut knife operations.
Setting the needle throwing width for the right side of the eyelet bottom.
Selecting the type of bartack to be performed.
Setting the overall sewing speed of the machine.
How to adjust the air pressure for the cloth trimming knife.
Procedure for adjusting the stitch bite width of the sewing machine.
How to check and adjust the cloth opener's opening amount.
How to individually adjust thread tension for different parts of a buttonhole.
Procedure for copying pattern data from one pattern number to another.
Steps for deleting stored pattern data from the machine.
Adjusting the timing relationship between the needle and the looper.
Steps for adjusting the height of the needle bar.
Adjusting the clearance between the needle and the looper components.
Procedures for replacing common wear parts like knives and hammers.
Information on various throat plates and their specifications.
Specifications and part numbers for cloth cutting knives.
Step-by-step guide for operating and setting memory switches.
A comprehensive list of memory switches, functions, ranges, and initial values.
| Brand | JUKI |
|---|---|
| Model | MEB-3810N Series |
| Category | Sewing Machine |
| Language | English |