EasyManua.ls Logo

JUKI MO-51e User Manual

JUKI MO-51e
46 pages
To Next Page IconTo Next Page
Page #1 background imageLoading...
Page #1 background image
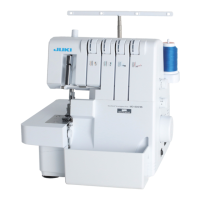
2-Needle,3/4-Thread Overlock Sewing Machine
Surjeteuse-Raseuse 2 Aiguilles, 3/4Fils
Maquina de coser Sobreorilladora da 2 Agujas, 3/4 Hilos
Instruction Manual
Manual de instrucciones
Manuel d instructions
2 agulhas, chuleado de 3/4 Linhas máquina
Instruções
MO-50e/51e
IMPORTANT:
Read all safety regulations carefully and
understand them before using your sewing
machine.
Retain this instruction manual for future reference.
IMPORTANTE:
Lea cuidadosamente todas las recomendaciones
con respecto a la seguridad y comprendalas
perfectamente antes de usar su maquina.
Guarde este libro de instrucciones para
referencias futuras.
INSTRUÇÕES:
Leia todas as instruções, antes de utillizar esta
máquina.
IMPORTANT:
Avant de mettre la machine en marche, lire
attentivement et assimiler les regles de securite
de ce manuel.
Conserver le manuel afin de pouvoir le consulter
ul terieurement.

Other manuals for JUKI MO-51e

Questions and Answers:

JUKI MO-51e Specifications

General IconGeneral
TypeOverlock
Stitch Length1-4 mm
Differential Feed Ratio0.7-2.0
Needle Type130/705H
Presser Foot Lift5 mm
Motor Power90 W
Number of Threads3/4
Needle Size11, 14
Weight7.0 kg

Summary

Safety and Operation Guidelines

Critical Safety Precautions

Essential safety warnings to prevent electric shock, burns, fire, and injury during operation.

Machine Components Overview

Key Machine Part Identification

Visual guide identifying and labeling all external parts of the sewing machine.

Machine Setup and Preparation

Accessory Contents and Storage

Lists and describes standard accessories and how to store them in the accessory box.

Waste Collector and Covers

Instructions for attaching the waste collector and opening/closing protective covers.

Operating the Sewing Machine

Connecting Peripherals and Controls

Guidance on attaching the foot control, thread stand, and managing thread cones.

Power and Light Switch Operation

Location and function of the power switch and its light indicator.

Handwheel and Presser Foot Lifter

How to operate the handwheel and raise/lower the presser foot.

Changing the Presser Foot

Step-by-step procedure for removing and attaching different presser feet.

Needle Insertion and Upper Knife Adjustment

Instructions for inserting needles and adjusting the upper knife.

Threading the Machine

Threading Preparation Steps

Initial steps before threading, including disconnecting power and raising components.

Upper Looper Threading Guide

Detailed instructions for threading the upper looper with blue thread.

Lower Looper Threading Guide

Detailed instructions for threading the lower looper with red thread.

Right Needle Threading Guide

Detailed instructions for threading the right needle with green thread.

Left Needle Threading Guide

Detailed instructions for threading the left needle with yellow thread.

Post-Threading Procedures

Final steps after threading, including lowering presser foot and closing covers.

Stitch Formation and Thread Tension

Performing a Trial Sewing Test

How to conduct a test run to check stitch formation and thread tension.

Evaluating Stitch Formation

Criteria for assessing correct stitch formation and thread balance.

Fine-Tuning Thread Tension

Left Needle Tension Adjustment

Adjusting the left needle thread tension based on loop formation on the underside.

Right Needle Tension Adjustment

Adjusting the right needle thread tension based on loop formation on the underside.

Looper Tension Adjustment (Underside Loops)

Adjusting upper/lower looper tensions for correct underside loop formation.

Looper Tension Adjustment (Upper Side Loops)

Adjusting upper/lower looper tensions for correct upper side loop formation.

Machine Adjustments and Settings

Stitch Length Adjustment

How to adjust stitch length from 1 to 4 mm for desired stitch density.

Cutting Width Adjustment

How to adjust the cutting width based on fabric type and desired seam finish.

Needle Plate Selection for Hems

Using the lever to choose between regular, rolled, and narrow hem sewing.

Differential Feed Functionality

Fabric Stretching Effects

Adjusting differential feed for stretching fabric and preventing puckering.

Fabric Gathering and Pushing Effects

Using differential feed for gathering or managing wavy fabric.

Practical Sewing Techniques

3-Thread Overlock Sewing

Guides for performing 3-thread overlock stitches with specific needle configurations.

3-Thread Roll Hem

Instructions for setting up and executing a 3-thread roll hem.

Unpicking Seams

Method for safely unpicking stitches by cutting loops and pulling threads.

Machine Maintenance and Care

Changing the Light Bulb

Step-by-step instructions for safely replacing the machine's light bulb.

Cleaning and Lubrication Procedures

Routine cleaning of dust/fluff and lubrication points for optimal machine performance.

Troubleshooting Common Issues

Thread Breakage Solutions

Common causes and remedies for thread breaking during sewing operations.

Needle Problems and Solutions

Troubleshooting bent, blunt, or improperly inserted needles.

Stitch Formation Issues

Addressing problems like skipped stitches, irregular stitches, and fabric puckering.

Machine Not Sewing or Loose Threads

Solutions for when the machine fails to sew or threads are loose.

Technical Specifications and Accessories

Machine Specifications Overview

Key technical details including stitch types, dimensions, speed, and weight.

Accessory Guide

Lists and illustrates standard and optional accessories available for the machine.

Related product manuals