Do you have a question about the JUKI MO-644DN and is the answer not in the manual?
Instructions for servicing double-insulated sewing machines, emphasizing care and qualified personnel.
Explains the meaning of warning marks and pictographs used in the manual and on the machine.
Details precautions regarding sunlight, humidity, temperature, and needle/thread combinations.
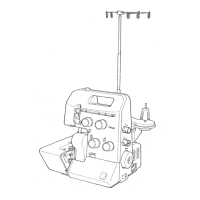
Identifies key components visible when the looper cover is opened.
Identifies key components visible when the cloth plate is opened.
Lists all the accessories provided with the sewing machine.
Instructions for raising the retractable support rod until it locks into place.
Guides on inserting the thread guide onto the support rod with correct orientation.
Steps for attaching the separately packed spool holders to the fixed spool holder.
Shows how to place overlock spools on the thread stand.
Instructions for positioning large spools with anti-vibration cones.
Guidance on using house-use spools, including removing cones and using spool caps.
Steps for connecting and using the foot controller for speed control.
Explains how to turn the machine on/off and operate the sewing light.
Describes the correct direction and usage of the handwheel for threading and sewing.
Instructions on how to open and close the looper cover safely.
Steps for opening and closing the cloth plate for access and sewing.
Explains how to use the presser foot lifter for different material weights.
Detailed steps for safely removing and attaching the presser foot.
Instructions on how to safely raise the upper knife using the adjustment knob.
Guidance on using the knob to adjust the lower knife position for cutting width.
How to adjust the stitch length using the dedicated knob.
How to adjust the differential feed for gathering or stretching fabrics.
How to select the overlocking width by aligning the knob with throat plate markings.
Adjusting the presser foot pressure for different fabric types.
Step-by-step guide on how to safely replace the sewing machine needles.
Initial steps required before starting the threading process.
Outlines the recommended order for threading the machine.
Proper technique for threading the thread through the tension dials.
Instructions on how to use the needle threader for easier needle eye threading.
Detailed steps for threading the upper looper with blue thread.
Advice on using nets with thread spools to prevent tangling.
Specific instructions for threading the lower looper on the MO-654DEN model.
Specific instructions for threading the lower looper on the MO-644DN model.
Detailed steps for threading the right-hand needle with green thread.
Detailed steps for threading the left-hand needle with yellow thread.
Instructions for setting up the machine for 4mm wide 3-thread overlocking.
Instructions for setting up the machine for 6mm wide 3-thread overlocking.
Visual example of the 2-thread flatlock stitch.
Visual example of the 2-thread wrapped overlock stitch.
Step-by-step instructions for installing and using the 2/3 thread converter attachment.
Guide on conducting a trial sewing to check seam and thread tension adequacy.
How to adjust thread tension using the dials and a reference table.
Explains how to correct thread tension based on stitch appearance on the fabric.
Explains the function of the built-in roll hemmer for fine edge finishing.
Steps to prepare the machine for performing a roll hem.
Recommended thread tensions for rolled hems and narrow overlock stitches.
Instructions for sewing with tape to prevent stretching of stretchy fabrics.
Table and guide for setting differential feed to prevent waves or puckering.
Steps for gathering lightweight fabric using stitch length and differential feed.
Method for unpicking 4 or 3-thread overlock seams by cutting threads.
Procedures to follow when thread breaks during the sewing process.
Techniques for creating secure thread chains at the beginning and end of seams.
When and how to replace the upper knife, and who to contact for replacement.
Steps for removing and installing the lower knife.
Guidance on regular cleaning and points requiring lubrication, including oil precautions.
A table listing common sewing problems, their causes, and corrective measures.
| Brand | JUKI |
|---|---|
| Model | MO-644DN |
| Category | Sewing Machine |
| Language | English |