lYSi56'LWl
No.
01
r
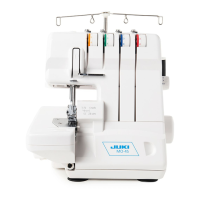
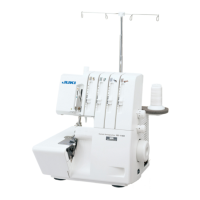
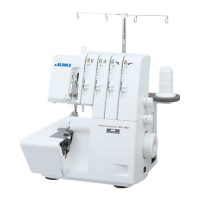
Thank you for buying the JUKI MOJ/MOK-2500N
BEFORE OPERATION
1.
Do not hold the cloth plate cover when carrying the
machine.
2.
Resupply oil if the red color in the oil gauge is not seen
when the oil gauge
is
observed from the top or the side.
3.
Apply
a
few drops of oil to the needle bar guide
and
upper looper guide before operating your
new
rnach~ne
or
starting your machine for
the
first time
~n
a
ioog time.
Also,
lubricate
the
oil holi:
sf
link
(A)
and
ttre
top
feed
presser bar. (Refer
?o
"2,
LUBRiCATiUN".i
4.
Never allow
the
sewing
machine
to
sun
in
the
reverse
directioi!.
The
hdndwhrei
shrjr;ld
rcirr.
clockwise
as
1
series sewing machine. The MOJIMOK-2500N series
I
models have basically the &me mechanism
as
those of MOG-2500N series models except that the
top feed mechanism has been incorporated
in
MOJ/MOK-2500N series models. For this reason,
I
thl Instruction Manual mainly deals with
the
too
I
feed mechanism only.
he
customers are re-
quested to refer to separate instruction Manuals of
MOG-2500N series models for the common instruc-
tions omitted from
this
manual.
MOJ
1
(Example) For
MOK
-
25
16N
Top feed mechanism
I
CAUTIONS IN OPERATION
I
1.
Do not put your hand under or near the needle when
turning the power switch
ON
or while the machine
is
operating.
2.
Do not put your fingers into the face plate cover while the
machine
is
operating.
3.
Be sure to turn the power switch
OFF
when removing the
V
belt.
4
Dor~ng operation, be careful not to allow your or any
other person's head or hands to come, or place anything
close to the pulley,
V
belt or motor. Any of these actions
may
develop dangerous conditions.
"
if
vour machine
is
provided with a belt cover, finger guard
CJT
any other protectors, never operate your machine with
any
of these removed.
F.
Do
not wlpe off the surface of the machine head using
racouer thinner.
.-
-
-
-
--
1
-
.-
--
--
.-.
..~
--.
...-.-.----.--.-".A
....
.-
1
.,;:).:~:..;::*
-:,.~
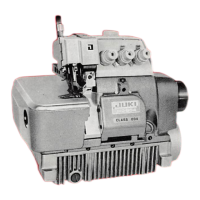
MOK-3500N
series
.
~-
~~
~.
-
.;j,-:.:-
l%.,
.
~..
~.
~~-~
~-
~
7,
.
.
h
;,
: :
i:~~:!?.
,,!.t:':;
,!li,kL,
.
,.-
.
:
-
,-'
,..
.
r:
.;j
,
.>
t.
..:
i,
6
:,i.:,.;.
f,(;l;<j
.
:-
j,i.
I
\
:
i
/:
i
+,
,
!.
fi<:1::
:9!!.3;
,(;,>kc,
of
Max.
6000
s.p.m.
..-
.
.,
.
.
:::.
if:.
\
'(11
if;
,
:cr>
~
~
~-
~ ~
~
~
..
.
I
:
i
:
>r
.i,,:.~:-,,:i
1:
:
<
.i:
...
.-
i
.i
i:
.
'
:
,.
/
,
:.
*..;
~
.
~.
,
:,
,
~~-~
-~
i
1
!;[
{,<t:.,:
!.
:>-,.:
,'\,C
~~
<
----
,
-
'
Y;:~I
,<,2i
x?:c,kL,
L,+
!<j?
:
;
,,
,!,
,!
4
-,
8-,;:~:,,
-
.--
~
.
~
5
-
6.5
mm
-
----
-
-
--
-
j
1
~lr~.~~?~~,li::al
\:rok\>
<)t
::;~j
ic,
J
..its
3
;I!;,;
-
~-~
~
-
-
Max.
6
mm
1
Lift
oi
;?ri.\cr
f~o!
Y
i;rr,
8
mm
I
*
i
Zleans the
ratio
,it
!hi:
rndi!l
red
3oi.r
i!:~:giru.lii?:~l
.trok.r
t,?
the
!op
feed dog longitudinal stroke.
This ratio
is
factory-
adjusted
to
1
:l
.I
-.
1
::.8
for
the
blOJ-:(
136,
a~id
i
:0.7
-
!
:
1.8
for
the
MOJ-2516N.
("2)
The top
feed
dog
has
3
long
end
for
betre:
<titchine
perforn:ance.
When the maximum longitudinal stroke
of
8.5
mm of the
top feed dug
is
nece.;sar)~.
out the end
ot
the
top
feed
dog
bl
3
mm
by
a maximum.
12.
LUBRICATION
~p~
-~
-
-
-
Before operating a new machine or a machine which has
not been used for an extended period of time, apply a
few drops of lubricating oil to oil hole of link
(A)
0
(lubricate the bushing from the front knife driving arm
shaft) and top feed presser bar
@
.