•
Two mounting rails
•
Two mounting blades
What Else Do I Need?
You’ll also need:
•
Someone to help you do the installation
•
Eight rack mount screws appropriate for your rack
•
A number two Phillips (+) screwdriver
Rack It
Here’s how to install the SRX380 in a rack:
1. Review General Safety Guidelines and Warnings
2. Wrap and fasten one end of the electrostatic discharge (ESD) grounding strap around your bare wrist, and connect the
other end to a site ESD point.
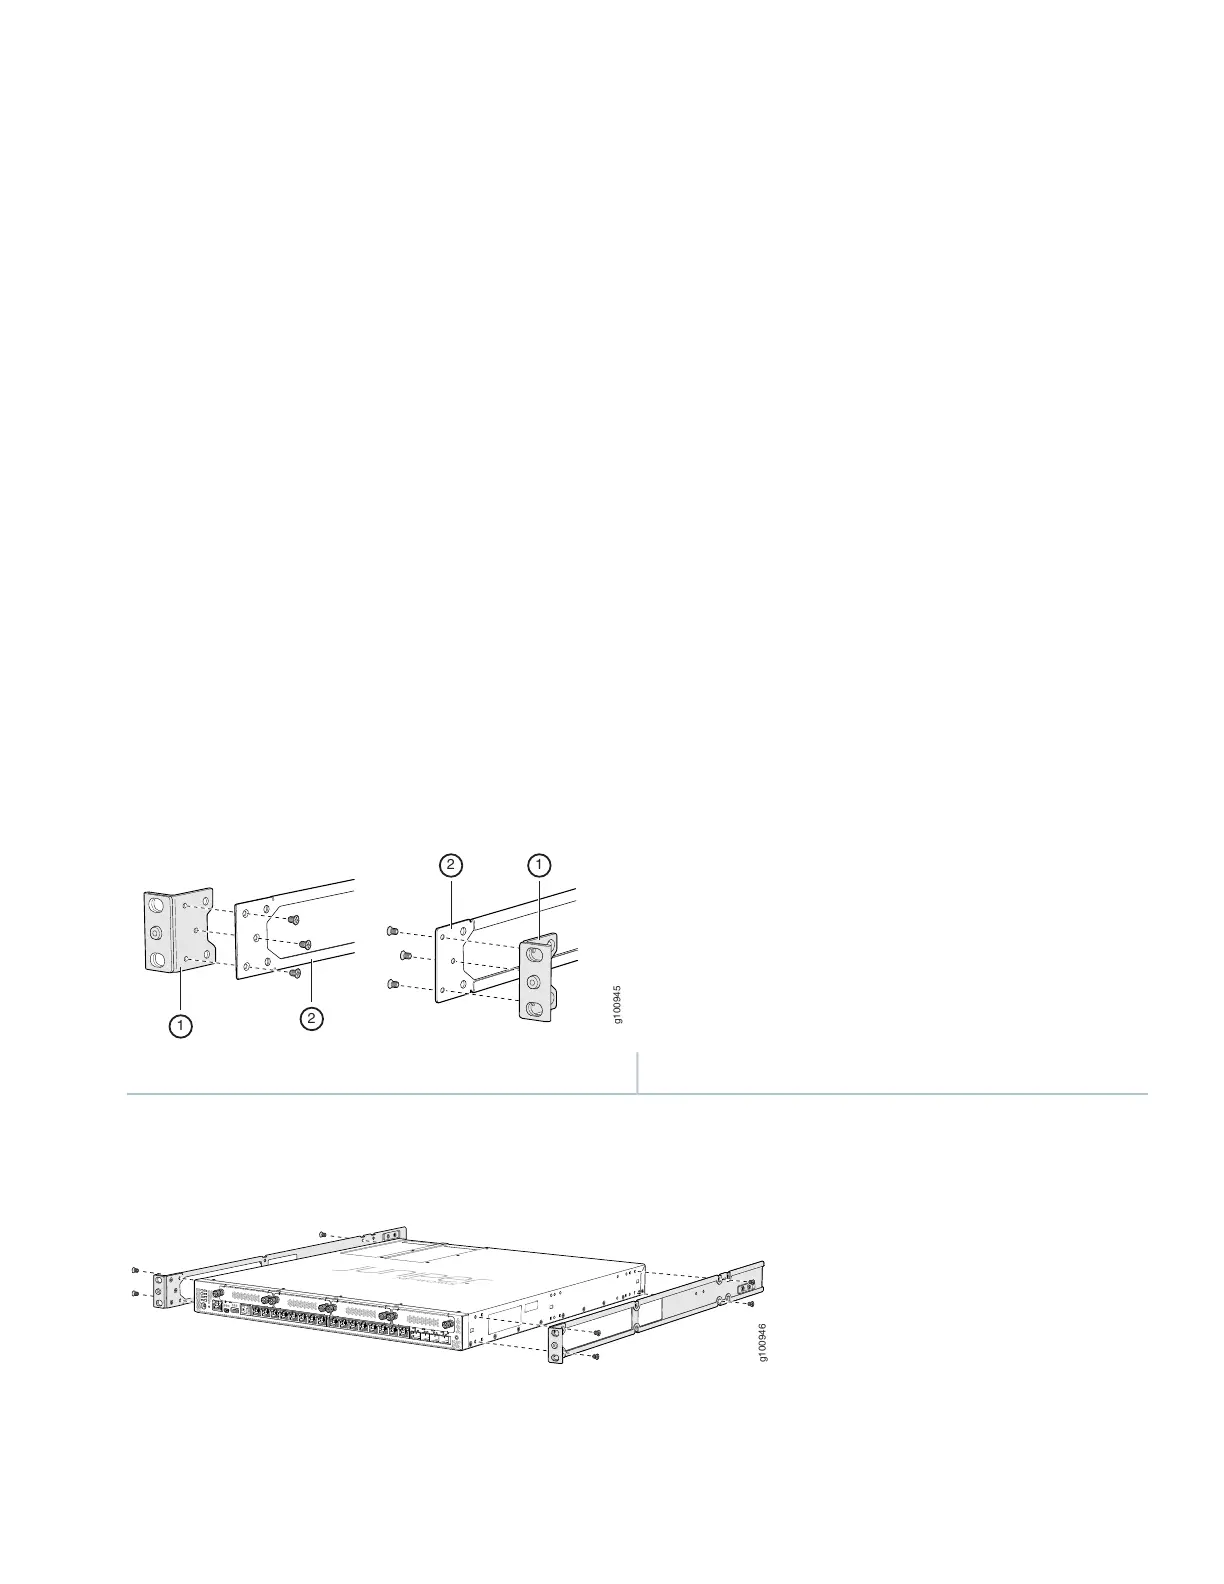
3. Attach the mounting brackets to the side mounting rails using the six flat-head mounting screws.
2—1— Mounting railMounting bracket
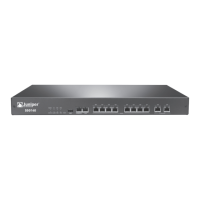
4. Attach the mounting rails to the sides of the SRX380 using the M4x6-mm Phillips flat-head mounting screws.
5. Lift the SRX380 and position it in the rack. Line up the bottom hole in each mounting bracket with a hole in each rack
rail, making sure the SRX380 is level.
3