EasyManuals Logo

Juniper MX960 Instructions

Juniper MX960
9 pages
To Next Page IconTo Next Page
To Previous Page IconTo Previous Page
Page #2 background imageLoading...
Page #2 background image
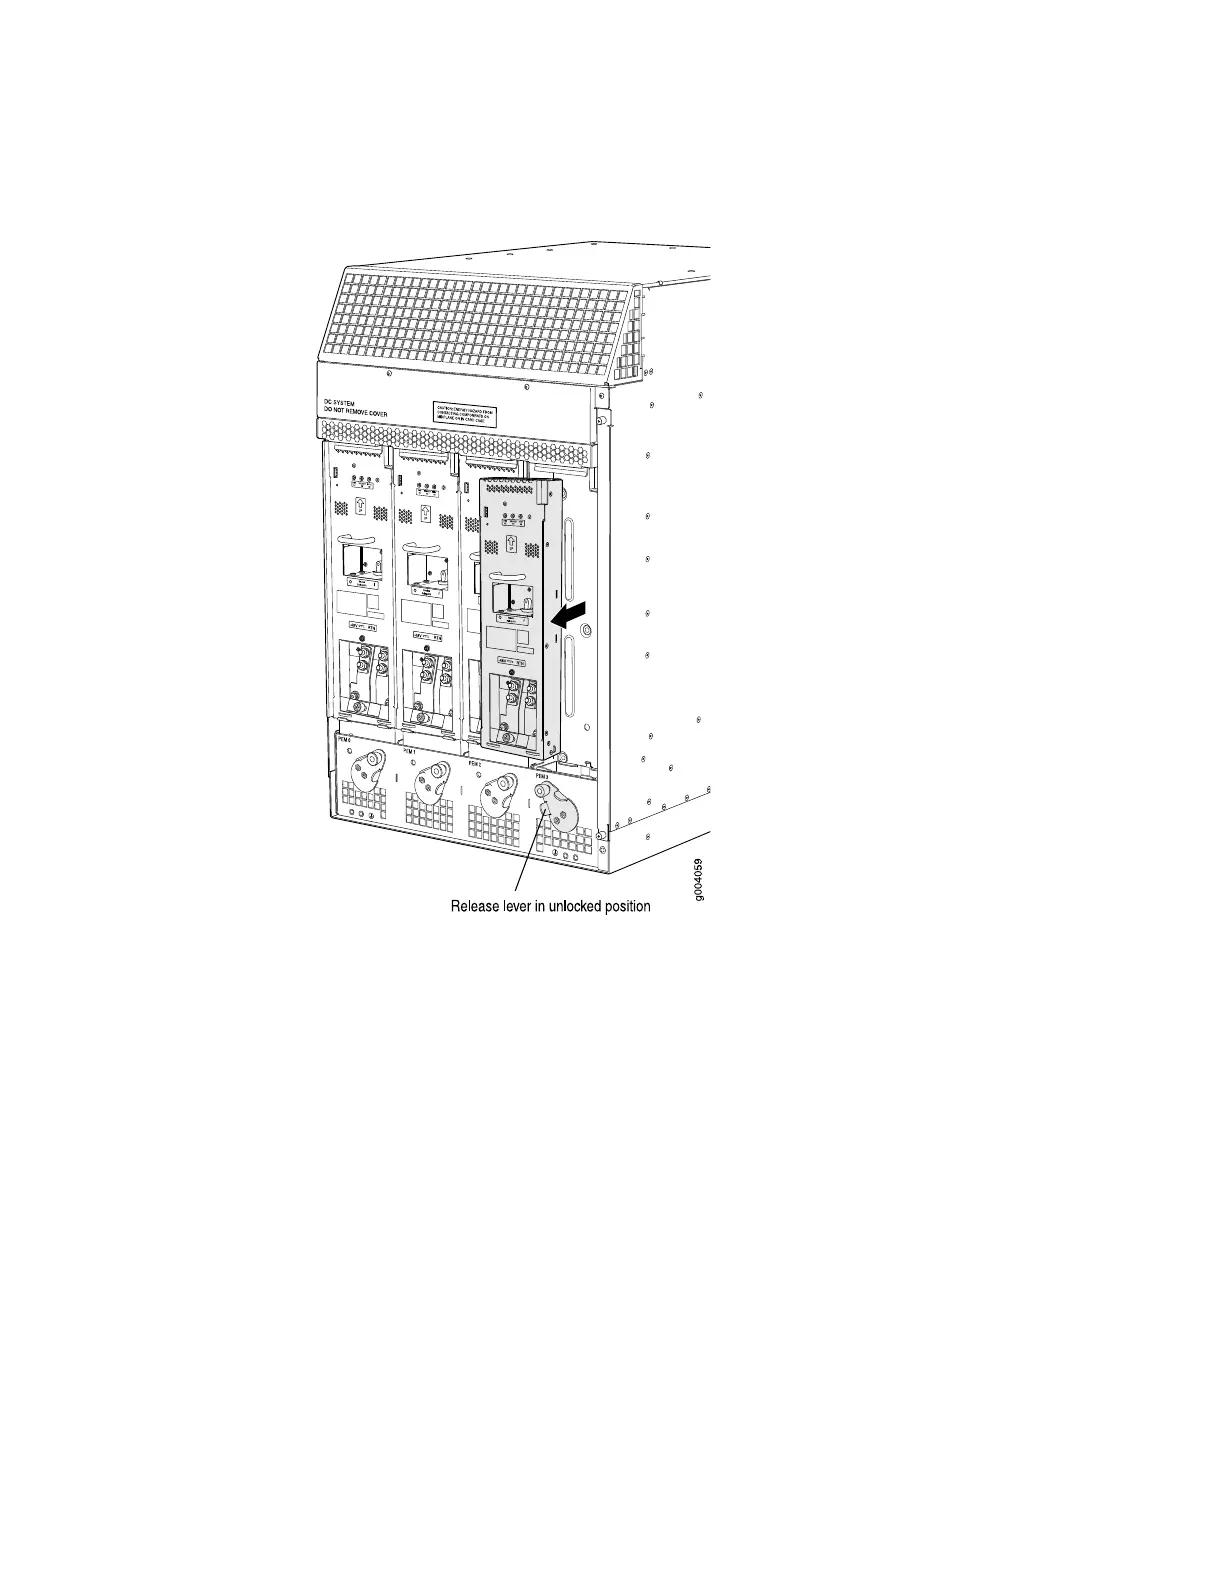
Figure 1: Removing a Power Supply Before Installing the MX960 Router
Removing the Standard Cable Manager Before Installing an MX960 Router Without a Lift
To remove the standard cable manager (see Figure 2):
1. Attach an electrostatic discharge (ESD) grounding strap to your bare wrist, and
connect the strap to one of the ESD points on the chassis.For more information
about ESD, see Preventing Electrostatic Discharge Damage to an M Series, MX
Series, or T Series Router.
2. Using a 7/16-in. (11 mm) nut driver, unscrew the nuts on the corners of the
standard cable manager.
3. Grasp the bottom of the standard cable manager and pull it straight out from
the studs on the front of the chassis.
2 Removing the Standard Cable Manager Before Installing an MX960 Router Without a Lift

Other manuals for Juniper MX960

Questions and Answers:

Question and Answer IconNeed help?

Do you have a question about the Juniper MX960 and is the answer not in the manual?

Juniper MX960 Specifications

General IconGeneral
Power SupplyAC or DC
RedundancyYes
Operating SystemJunos OS
Form FactorRack-mountable
Operating Humidity5% to 90% non-condensing
Chassis TypeModular
Slots12
Interfaces/PortsVaries with line cards
Operating Temperature0°C to 40°C (32°F to 104°F)
Routing EngineRedundant Routing Engines
InterfacesSupports various interface modules

Related product manuals