Chapter 1 Connecting the Device
2 User’s Guide
In addition to a NetScreen-5GT, rack-mount kit, and equipment rack, you also need the
following:
• Phillips-head screwdriver
• Four screws that match the thread size of the equipment rack
To mount the device in a rack:
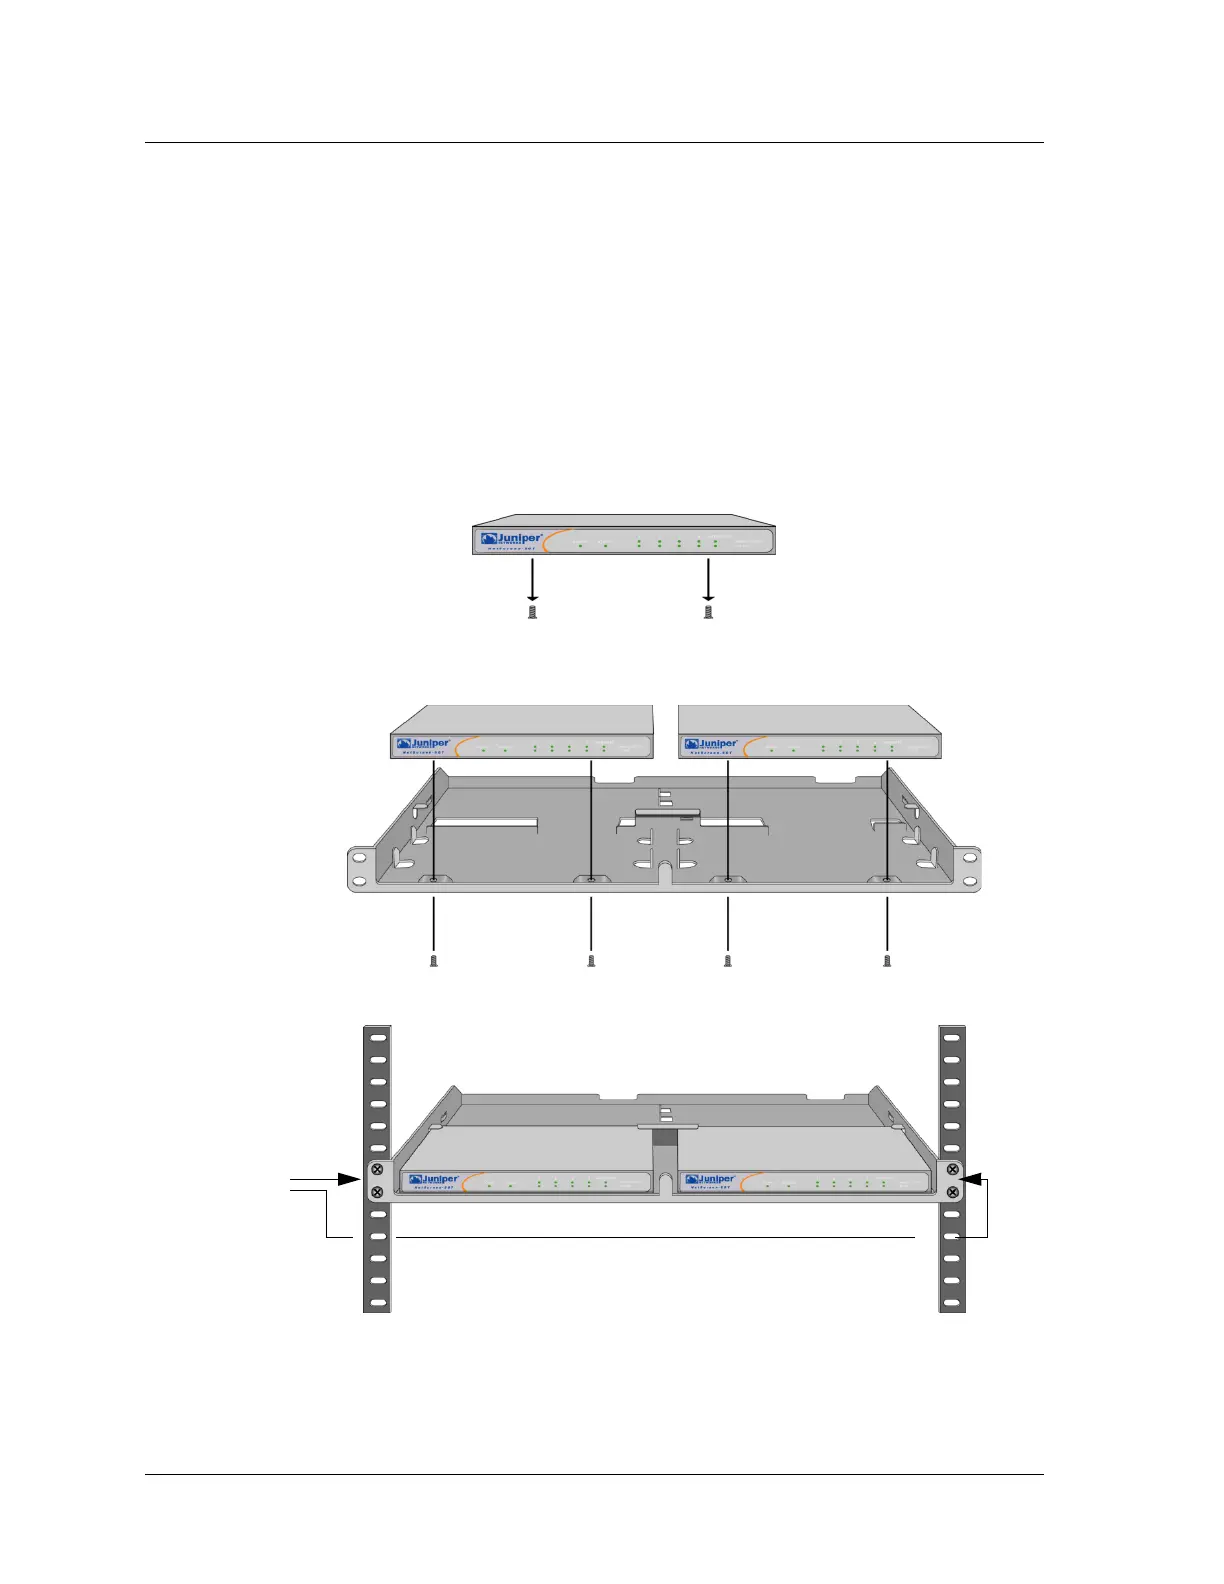
1. Use the Phillips-head screwdriver to remove the two screws from the underside
of each NetScreen-5GT that you intend to mount. The screws are located on the
underside of the NetScreen-5GT near the front panel. (Keep the screws for use
in the next step.)
2. Insert the NetScreen-5GT devices on the rack-mount tray and screw them to the
tray with the screws that you removed in step 1.
3. Screw the left and right tray plates to the equipment rack.
You can run power cords and ethernet cables through the openings in the floor of the tray
or out the depressions in the back wall. You can also use the space behind the devices to
hold power supplies. The switching power supplies, which you can order separately, fit
easily in a 1-RU height space.
Remove the screws.
Insert the devices
on the tray.
Screw the devices
to the tray.
Screw the tray
to the rack.
Artisan Technology Group - Quality Instrumentation ... Guaranteed | (888) 88-SOURCE | www.artisantg.com