To install the front panel:
1. Attach an ESD grounding strap to your bare wrist and connect the strap to one of the ESD points on the chassis.
2. Remove the plastic bag that is taped to the front panel, which holds the brackets and screws.
3. Use the Phillips screwdriver to attach two mounting screws to the left base bracket at the bottom left side of the
chassis frame. The base brackets are larger than the latch brackets.
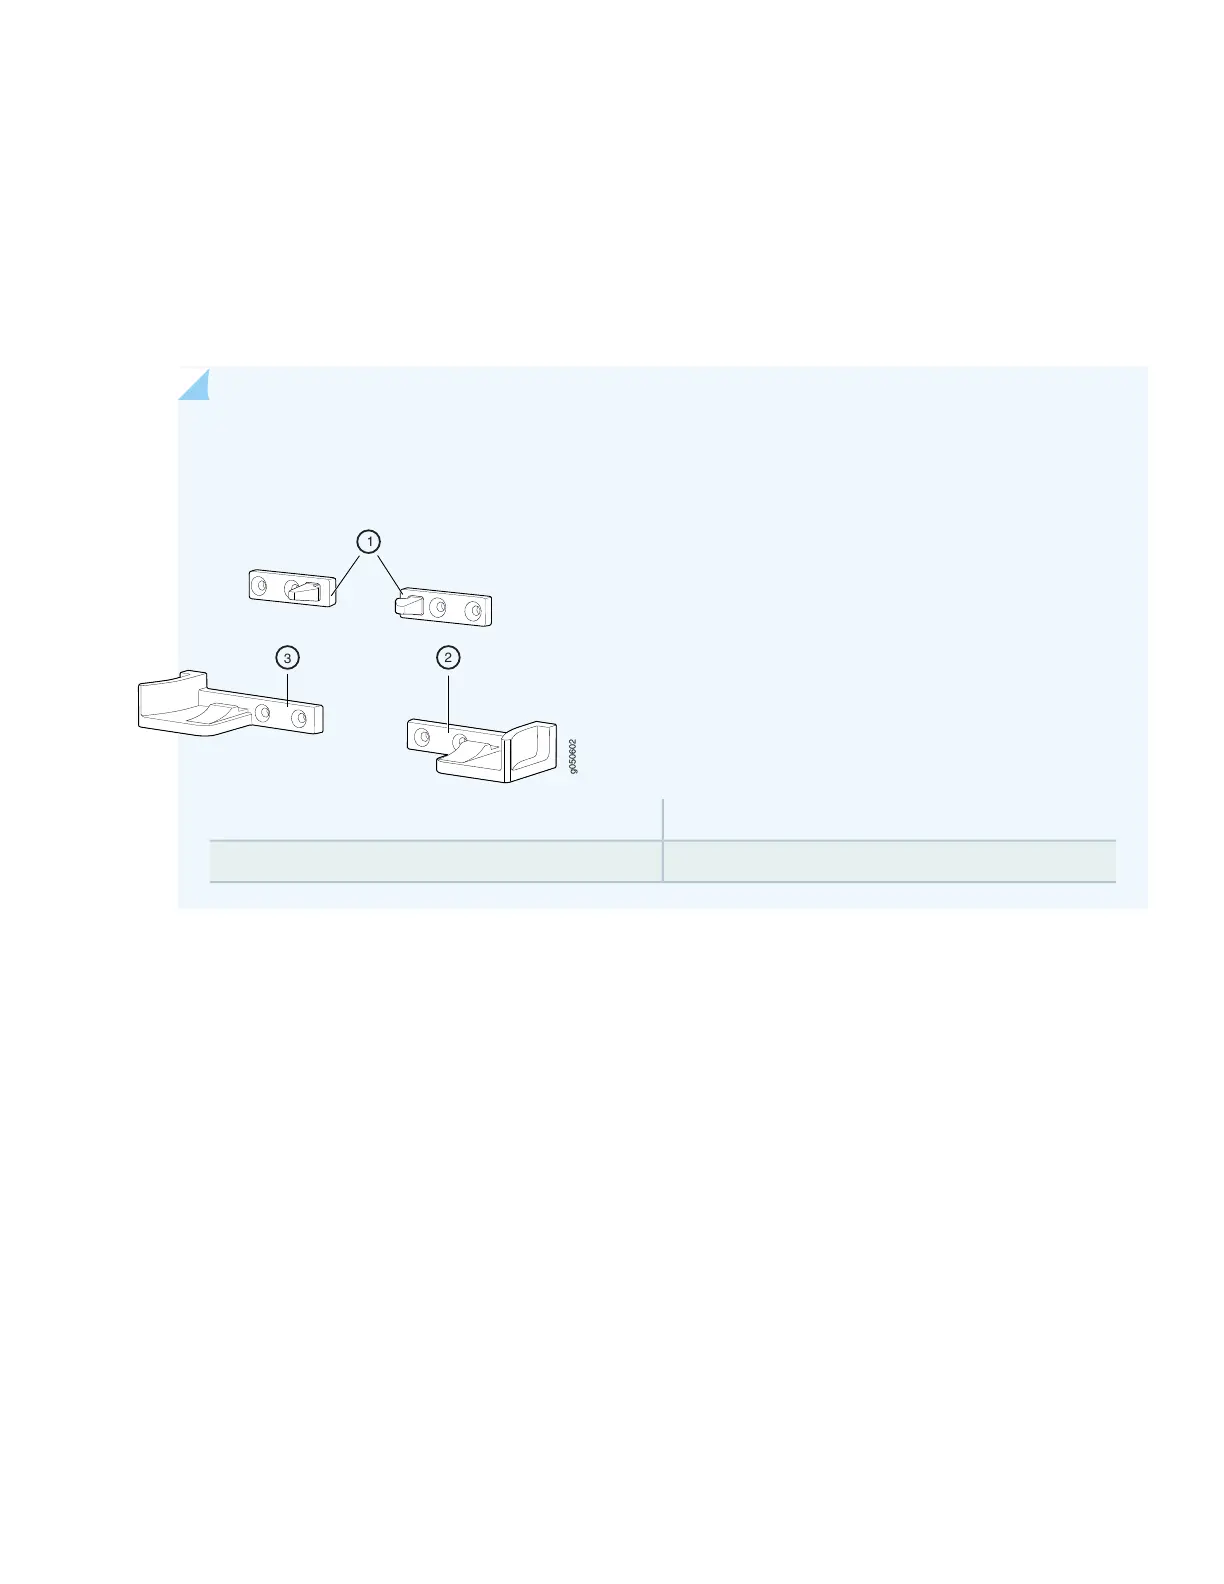
NOTE: The right and left base bracket cannot be interchanged (see Figure 14).
Figure 14: Front Panel Mounting Hardware
3—1— Left base bracketLatch brackets
2—Right base bracket
4. Use the Phillips screwdriver to attach two mounting screws to the right base bracket at the bottom right side of the
chassis frame.
5. Use the Phillips screwdriver to attach two mounting screws to the latch bracket at the top left of the chassis frame
(see Figure 15).
15