You can use the console port on the SRX to do the initial configuration. This section assumes you start from a factory
default configuration. See SRX320 Firewall Hardware Guide for details on the SRX320 factory default configuration.
After you configure the SRX320, you can log in on a local LAN port, or remotely over the WAN interface, to manage and
configure the SRX using the CLI or J-Web.
We recommend that you use the ge-0/0/0 interface for WAN connectivity on the SRX320. By default this interface is
set to receive its Internet access configuration from the service provider.
NOTE: This examples assumes you are using DHCP to configure the WAN interface. If the WAN provider does
not support DHCP ypu’ll need to manually configure the WAN interface and related static routing. See Junos
Initial Configuration.
Have this information handy before you begin the initial configuration:
•
Root password
•
Hostname
Connect to the Serial Console Port
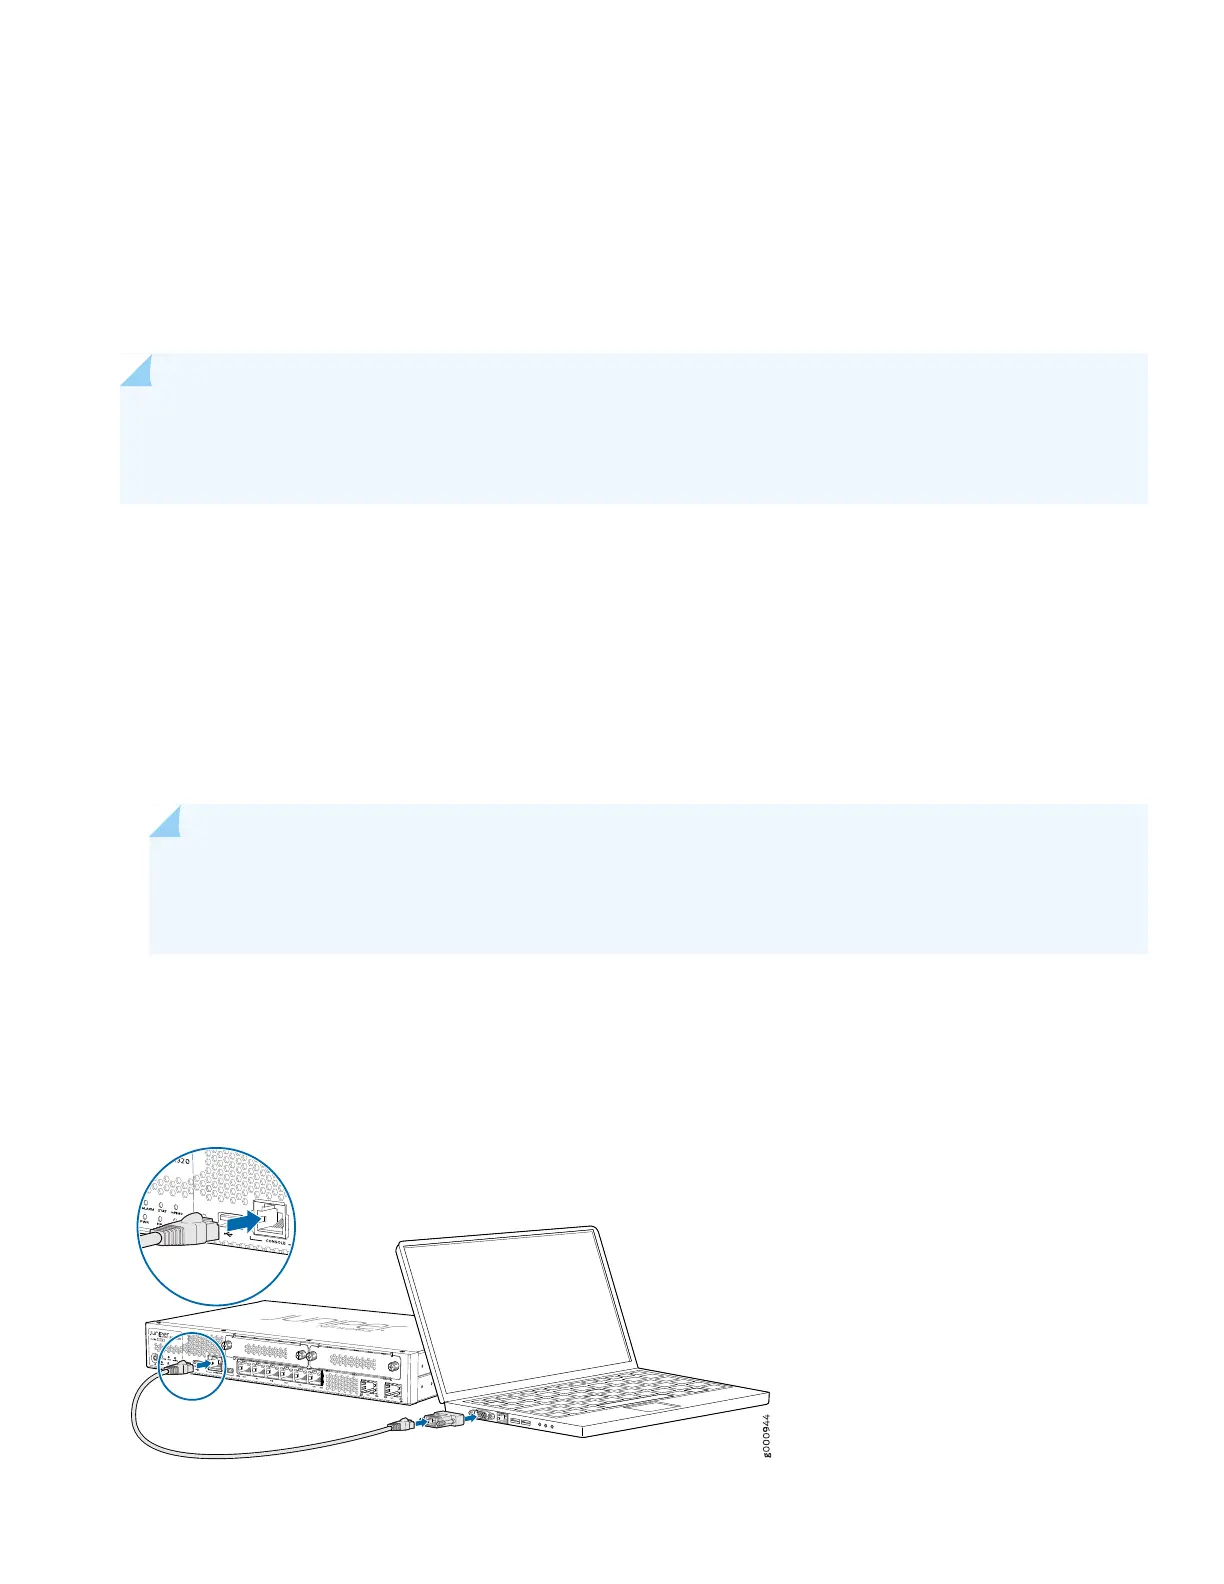
1. Plug one end of the Ethernet cable into the RJ-45 to DB-9 serial port adapter for your SRX320.
NOTE: We no longer include a DB-9 to RJ-45 cable or a DB-9 to RJ-45 adapter with a CAT5E copper cable
as part of the device package. If you require a console cable, you can order it separately with the part number
JNP-CBL-RJ45-DB9 (DB-9 to RJ-45 adapter with a CAT5E copper cable).
2. Plug the RJ-45 to DB-9 serial port adapter into the serial port on the management device.
3. Connect the other end of the Ethernet cable to the serial console port on the SRX320.
8