• Connect an RJ-45 cable from the console port to the DB-9 adapter,
which then connects to the serial port on the management device.
(Serial port settings: 9600 8-N-1-N)
If you are using this method to connect, proceed with the CLI
configuration instructions available in the Quickstart Guide for
Branch SRX Series Services Gateways at
http://www.juniper.net/us/en/local/pdf/app-notes/3500153-en.pdf.
Step 3
After connecting the management device to the services gateway, the
DHCP server process on the services gateway will assign an IP address
automatically to the management device.
Note: If an IP address is not assigned to the management device,
manually configure an IP address in the 192.168.1.0/24 subnetwork
while the management device is still connected to the ge-0/0/1 port .
Step 4
Access the J-Web interface:
1. Launch a Web browser on the management device.
2. Enter http://192.168.1.1 in the URL address field.
3. Specify the default username as root. Do not enter any value in the
Password field.
4. Click Log In. The J-Web Initial Setup is displayed.
Step 5
1. Configure the basic settings, such as Host Name, Domain Name,
Root Password, and IP Address, for your services gateway.
Important: Ensure that you have configured the IP address, root
authentication, and default gateway before you apply the
configuration.
2. Click Apply to apply the configuration.
Note: All network and management access settings are optional.
Step 6
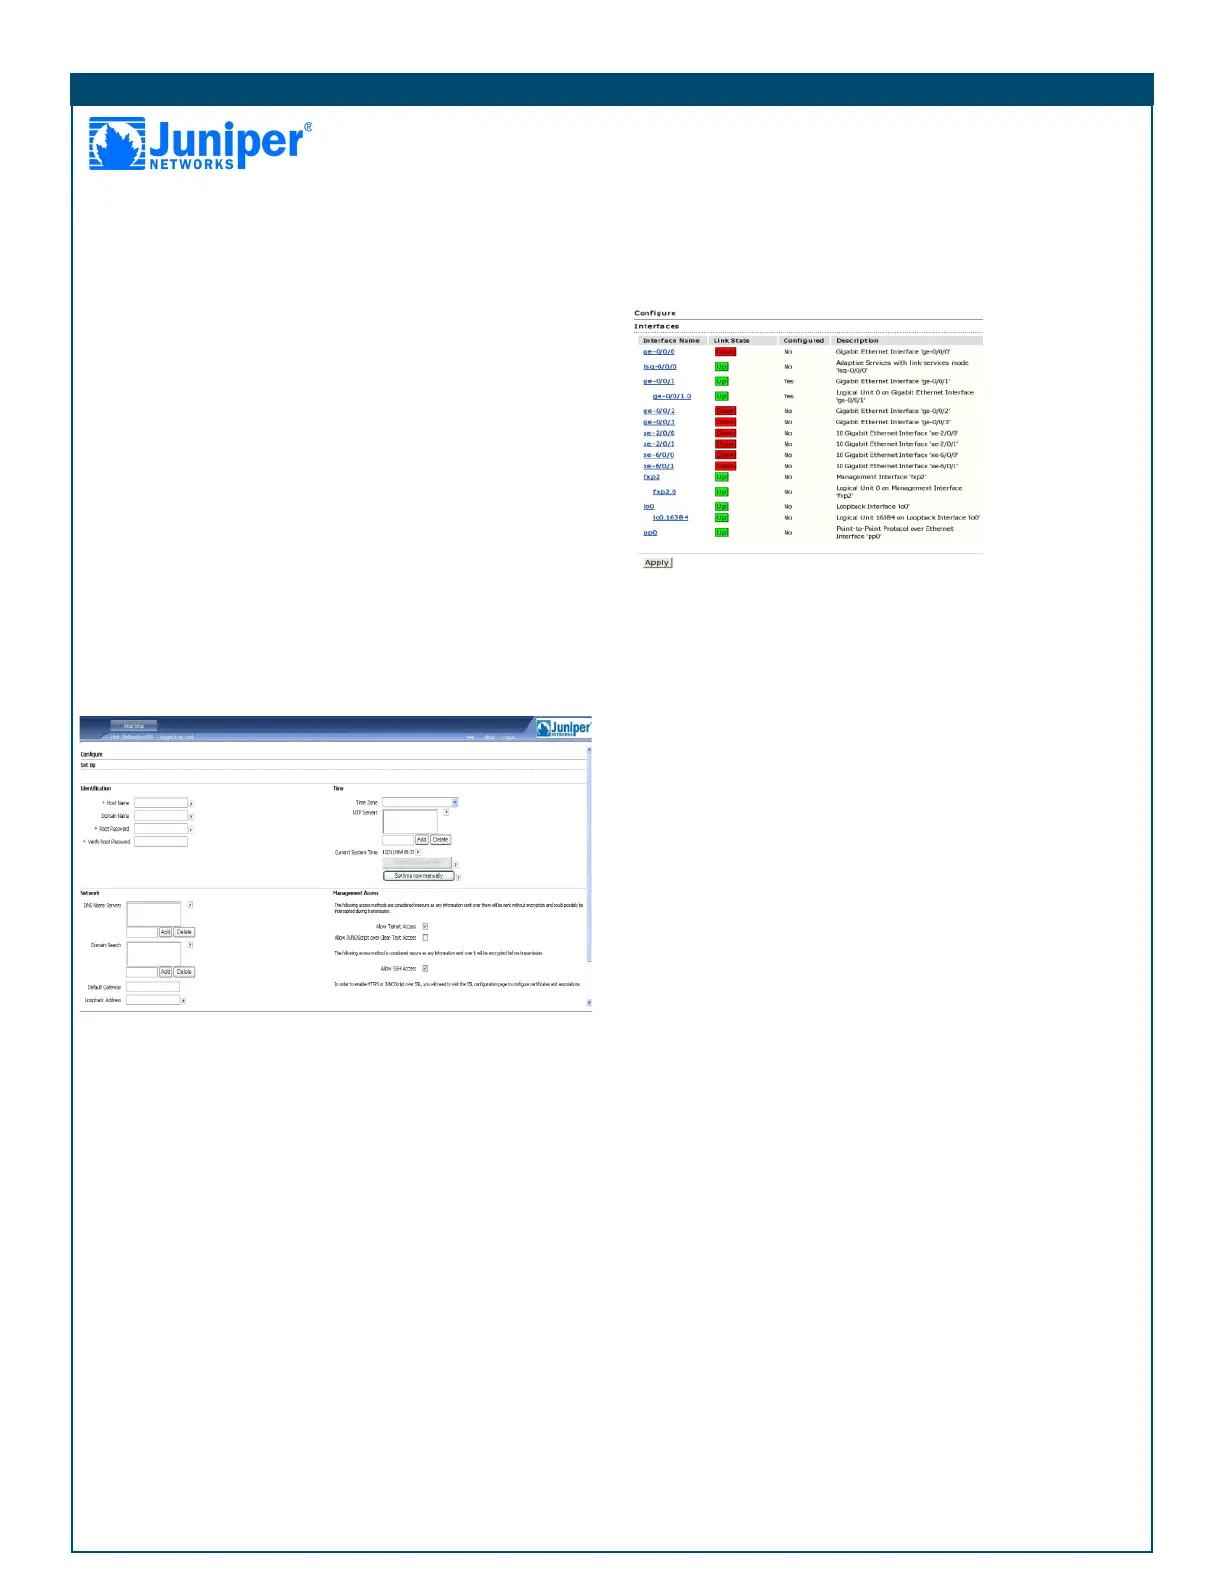
Configure an interface as follows:
1. In the J-Web interface, click the Configuration tab at the top and
click Interfaces on the side bar. The Interfaces page is displayed.
2. Under the Interface Name column, click on the interface you want
to configure.
3. Under Logical Interfaces, click Add.
4. Under IPv4 Addresses and Prefixes, click Add.
5. In the IPv4 Address and Prefix field, enter an IP address and a
subnet mask.
6. Click OK. The configured IP address is included in the Address
Prefix column.
For additional configuration information, see the Quickstart Guide for
Branch SRX Series Services Gateways at
http://www.juniper.net/us/en/local/pdf/app-notes/3500153-en.pdf.
For detailed software configuration information, see the software
documentation available at
http://www.juniper.net/techpubs/software/junos-srx/index.html.
PART 2 - POWERING OFF THE DEVICE
To shut down the operating system on the Services and Routing Engine (SRE), perform a graceful shutdown by pressing and
releasing the Power button. The device begins gracefully shutting down the operating system on the SRE.
To rescue the configuration or return the services gateway to its factory default configuration, press the Reset Config button.
Note: You can reboot or halt the system in the J-Web interface by selecting Manage > Reboot.
Copyright Notice
Copyright © 2009 Juniper Networks, Inc. All rights reserved. Juniper Networks, the Juniper Networks logo, JUNOS, NetScreen, ScreenOS, and Steel-Belted Radius are registered trademarks of Juniper
Networks, Inc. in the United States and other countries. JUNOSe is a trademark of Juniper Networks, Inc. All other trademarks, service marks, registered trademarks, or registered service marks in this
document are the property of Juniper Networks or their respective owners. All specifications are subject to change without notice. Juniper Networks assumes no responsibility for any inaccuracies in this
document or for any obligation to update information in this document. Juniper Networks reserves the right to change, modify, transfer, or otherwise revise this publication without notice.
P/N 530-032522 Rev. 01
 Loading...