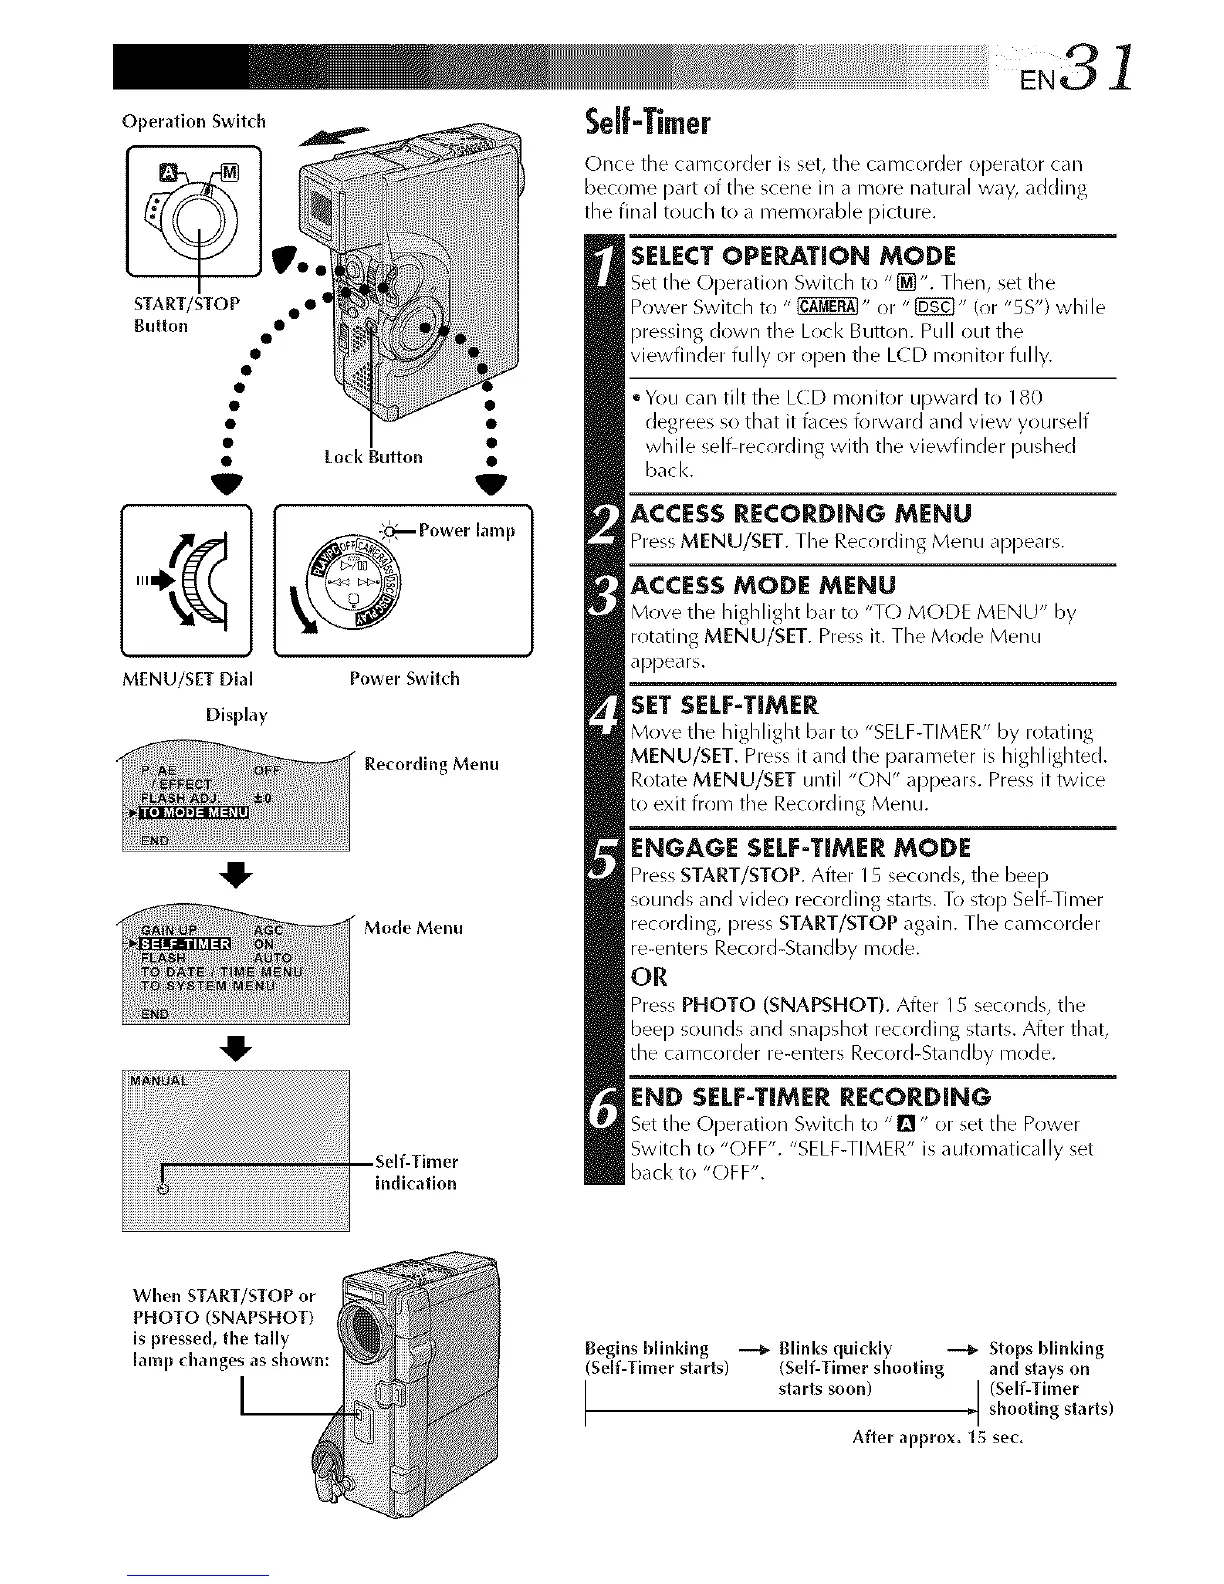
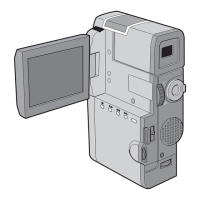
OperationSwitch
START/STOP• • I
Button •
V
MENU/SET Dial
Display
Lock Button •
V
_ Power lamp
Power Switch
Recording Menu
Mode Menu
indication
Once tile camcorder is set, tile camcorder operator can
become part of the scene in a more natural way, adding
the final touch to a memorable picture.
SELECT OPERATION MODE
Set the Operation Switch to "[_". Them%set tile
Power Switch to " _" or "[_" (or "5S") while
pressing down tile Loci< ButtOl3. Pull out the
viewfinder fully or open the LCD monitor fully.
• You can tilt the LCD monitor upward to 180
degrees so that it t\lces forward and view yourself
while self-recording with the viewfinder pushed
back.
ACCESS RECORDING MENU
Press MENU/SET. The Rec_rding Menu appears.
ACCESS MODE MENU
Move the highlight bat to "T() MODE MENU" by
rotating MENU/SET. Press it. The Mode Menu
appears.
SET SELF-TIMER
Move the highlight bat to "SELF-TIMER" by rotating
MENU/SET. Press it and the parameter is highlighted.
Rotate MENU/SET until "ON" appears. Press it twice
to exit from the Recording Menu.
ENGAGE SELF-TIMER MODE
Press START/STOP. After 15 seconds, the beep
sounds and video recording starts. To stop Self-Timer
recrlrding, press START/STOP again. The camcorder
re-enters Record-Standby mode.
OR
Press PHOTO (SNAPSHOT). After 15 seconds, the
beep sounds and snapshot recording starts. After that,
the camcorder re-enters Record-Standby mode.
END SELF-TIMER RECORDING
Set the Oper_tion Switch to "1_" or set the Power
Switch to "(-)FF'. "SELF-TIMER" is automatically set
back to "OFF".
When START/STOP or
PHOTO (SNAPSHOT)
is pressed, the tally
[amp (hanges as shown:
I__
Begins blinking --_ Blinks quickly --_ Stops blinking
(Serf-Timer starts) (Serf-Timer shooting and stays on
I starts soon) [ (Self-Timer
_[ shooting starts)
After approx. 15 sec,