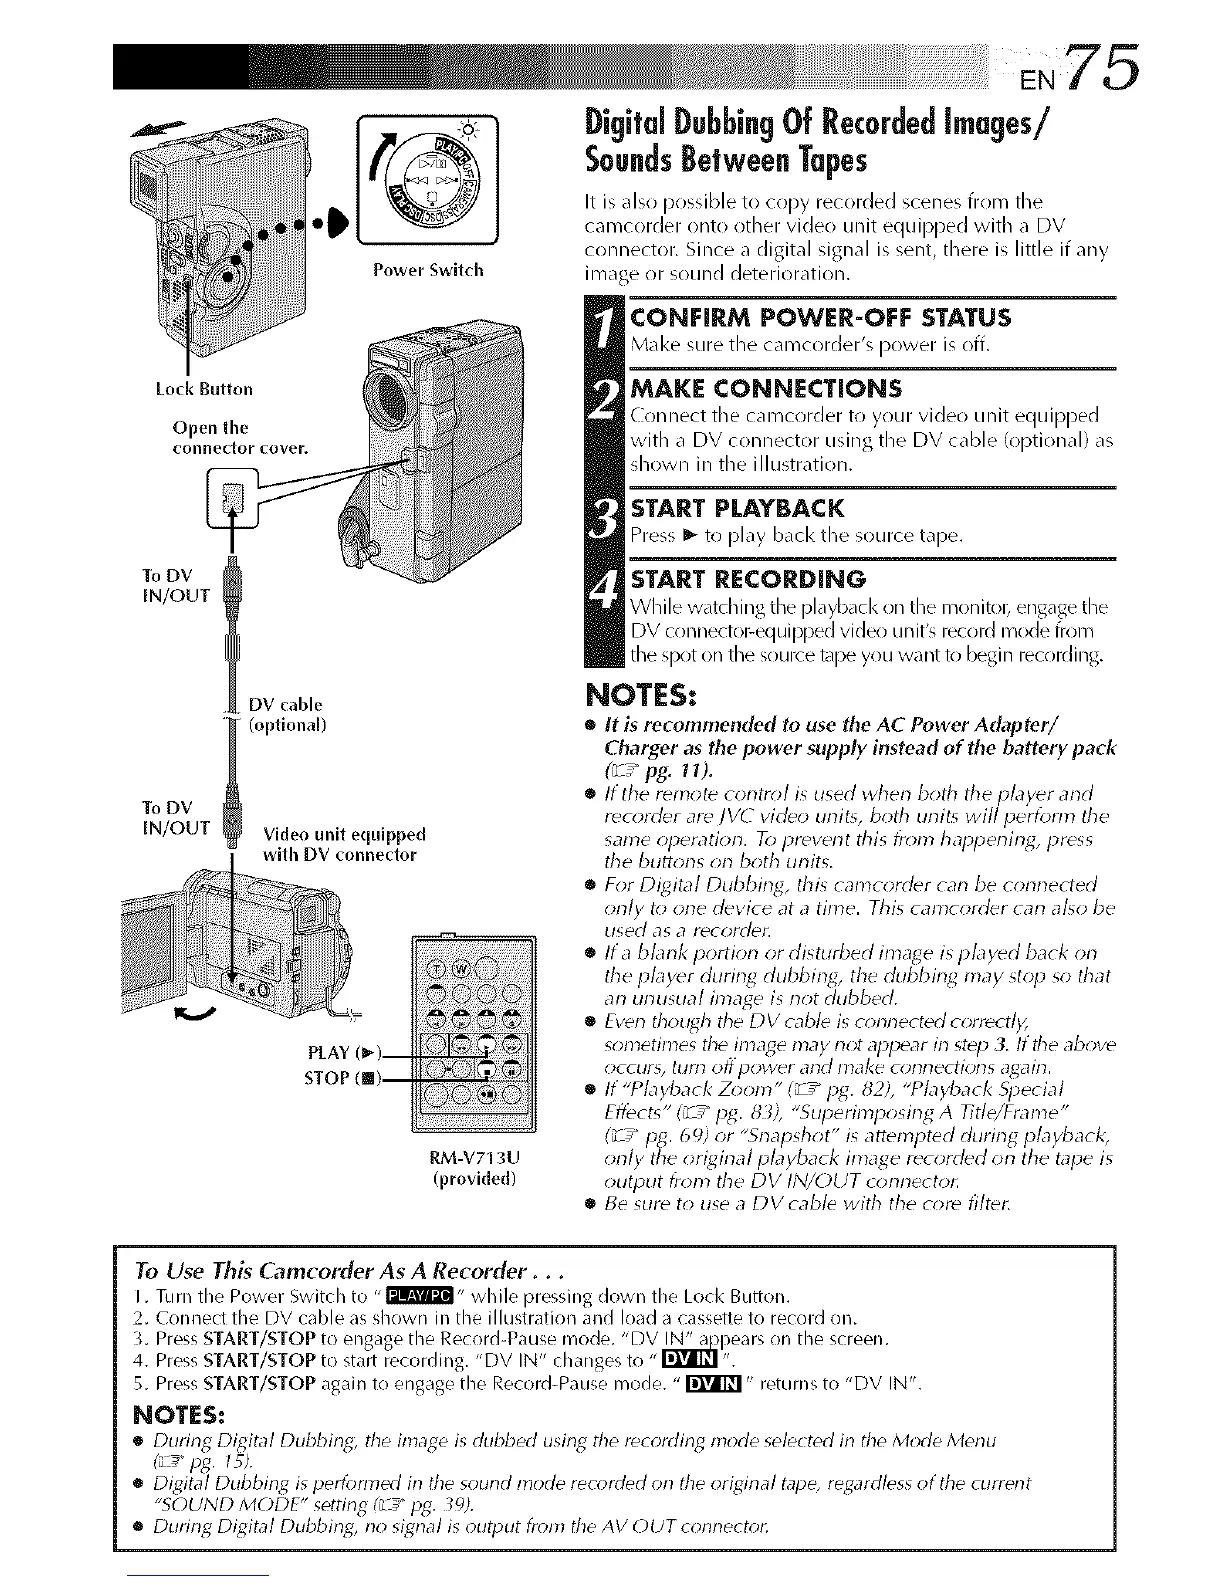
Lock Button
Open the
connector covef,
To DV
IN/OUT
DV cable
(optional)
To DV
IN/OUT
Power Switch
Video unit equipped
with DV connector
PLAY
STOP
RM-V71 3U
(provided)
Digi|dDubbingOf RecordedImages/
Soundsllelwee. Tapes
It is also possible to copy recorded scenes from the
camcorder onto other video unit equipped with a DV
connector. Since a digital signal is senL there is little if any
image or sound deteriorati(/n.
CONFIRM POWER-OFF STATUS
Make sure tile camcorder's power is off.
MAKE CONNECTIONS
Connect tile camcorder to your video unit equipped
with a DV connector using the DV cable (optional) as
shown in the illustration.
START PLAYBACK
Press _- to play back tile source tape.
START RECORDING
WMe w_tching the pl_ybacl<on the monito_ engagethe
DV connectol_equipped video unit'_ record mode from
tile spot on tile source tape you want k_ begin recording.
NOTES:
• It is recommended to use the AC Power Adapter/
Charger as the power supply instead of the battery pack
(_ / pg. 11%
• It the remote corltr_l is used lvherl both tile player arid
recorder are ]V(7 video unit% both unit_ will perfom_ tile
same operation. To preverlt this from happening4,press
tile butt<ms on both units.
• For Digital Dubbing, this camcorder cat-}be connected
only t_ one device at a time. This camcorder cat-}a[_o be
used as a Y(_coYddL
• Ita blank portion or disturbed image isplayed back on
the player during dubbing, the dubbing 17laystop so that
an unusual image is not dubbed.
• Eventhough tile DV cable is connected c_;rrectl);
son_etimes the image may not appear in step 3. If tile above
occur% till'f} Off pOWdr arid IDake cl_t-ll-lectiot-15 a_ait-L
• If "Pbyback Zoom" (_7_pg. 82), "Pbyback 5i_ecial
Effects" (_/ pg. 83), "Superimposir_g A Title/Frame"
(_/ pg. 69) or "Snapshot" isattempted during playback,
only the original playback image recorded on the tape is
output from the DV IN/OUT conrlector.
• Be sure to use a DVcabb with the core filter.
To Use This Camcorder As A Recorder...
I. Turn tile Power Switch to - I'Jil@'i- while pressing down tile Lock Button.
2. Connect tile DV cable as shown ill tile illustration and load a cassette to record on.
3. Press START/STOP to engage tile Reeord4_ause mode. "DV _pears on tile screen.
4. Press START/STOP to start recording. "DV IN" changes to "_ ".
5. Press START/STOPagain to engage tile Record-Pause mode. "_" returns to "DV IN".
NOTES:
• During Digital Dubbing_ tile image is dubbed using tile recording mode selected in tile Mode Menu
(_ pg. 15).
• Digital Dubbiog is performed in tile sound mode recorded orl tile original tape, regardless of tile current
"SOUND MODE" setting (__"pg. 39).
• During Digital Dubbing, rio signal is output from tile AV OUT corlrlectot:
 Loading...