EN 57
1
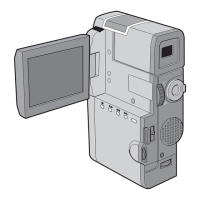
CONNECT AC CHARGER STATION
TO TV OR VCR
Connect as shown in the illustration
(Z pg. 56).
If Using A VCR ............................ go to step 2.
If not ........................................... go to step 3.
2
CONNECT VCR OUTPUT TO TV
INPUT
Refer to your VCR’s instruction manual.
3
TURN ON POWER
4
SELECT TV’S VIDEO MODE
Set the TV to the channel or mode appropriate
for video playback.
To choose whether or not the following displays
appear on the connected TV . . .
•Date/Time, Time Code
.... set to “ON” or “OFF” in the Playback Menu
(Z
pg. 52).
•Playback Sound Mode Display
.... set the Power Dial to “
M
”, press the MENU
button, and set “ON SCREEN” in the Date/
Time Menu (Z
pg. 11) to “ON” or “OFF”.
Then set the Power Dial back to “PLAY”.
NOTES:
●
Never connect any VIDEO/AUDIO cable or S-
VIDEO cable other than those provided to the
AC Charger Station’s connectors.
●
When using the provided VIDEO/AUDIO cable,
S-VIDEO cable or editing cable, make sure you
connect the end of the cable with the core filter to
the camcorder. The core filter improves perform-
ance of equipment.
●
Make sure you adjust the TV sound volume to its
minimum level to avoid a sudden burst of sound
when the camcorder is turned on.
●
To keep the camcorder’s display from appearing
on the TV screen during playback, press the
IND.ON/OFF button for longer than 1 second.