EasyManua.ls Logo

JVC GR-DVP7 - User Manual

JVC GR-DVP7
104 pages
Print Icon
To Next Page IconTo Next Page
Loading...
LYT0981-001A
Master Page: Cover1
GR-DVP7U_00-Cover.fm Page 2
EN
DIGITAL VIDEO CAMERA
ENGLISH
GR-DVP7
Automatic Demonstration 8
GETTING STARTED
9
VIDEO RECORDING &
PLAYBACK
18
DIGITAL STILL CAMERA
(D.S.C.) RECORDING &
PLAYBACK
26
ADVANCED FEATURES
37
REFERENCES
80
TERMS
102
Please visit our Homepage on the World Wide
Web and answer our Consumer Survey (in
English only):
For Accessories:
http://www.jvc-victor.co.jp/english/index-e.html
http://www.jvc-victor.co.jp/english/accessory
INSTRUCTIONS
For Customer Use:
Enter below the Model No. and Serial No. which is
located on the bottom of the camcorder. Retain this
information for future reference.
Model No.
Serial No.
GR-DVP7U_00-Cover.fm Page 2 Tuesday, March 5, 2002 11:49 AM
Downloaded From VideoCamera-Manual.com Manuals

Table of Contents

Questions and Answers

  • J
    jamesortizAug 21, 2025
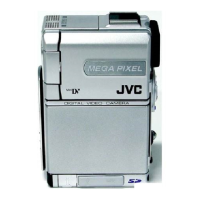
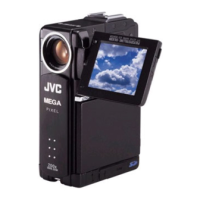
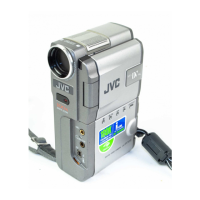
    Why isn't the CHARGE indicator lighting on my JVC Camcorder?
    • C
      Catherine BrownAug 21, 2025
      If the CHARGE indicator on the AC Power Adapter/Charger of your JVC Camcorder does not light, it could be due to the battery temperature being extremely high or low. To protect the battery, it is recommended to charge it in places with a temperature of 10°C to 35°C.
  • C
    cruzfrankSep 3, 2025
    Why is my JVC Camcorder Snapshot image too bright?
    • M
      Mark RoySep 3, 2025
      If the image taken using Snapshot on your JVC Camcorder is too bright, set “r PROGRAM AE” to “SPOTLIGHT”.
  • S
    Susan SmithSep 1, 2025
    Why are some MENU functions unavailable on my JVC Camcorder?
    • J
      jeromewheelerSep 1, 2025
      If some functions are not available using the MENU Button on your JVC Camcorder, set the Power Switch to “M”.
  • S
    Stephanie MarshAug 31, 2025
    Why is the LCD monitor hot on my JVC GR-DVP7?
    • M
      mary54Aug 31, 2025
      If the rear of the LCD monitor on your JVC Camcorder is hot, close the LCD monitor to turn it off or set the Power Switch to “OFF”, and let the unit cool down.
  • H
    halljenniferAug 29, 2025
    Why do images on my JVC Camcorder LCD look dark or whitish?
    • P
      Paul GalvanAug 29, 2025
      If the images on the LCD monitor of your JVC Camcorder appear dark or whitish, adjust the brightness and angle of the LCD monitor.
  • R
    richard64Aug 27, 2025
    Why is my JVC Camcorder not focusing automatically?
    • S
      Shane JordanAug 28, 2025
      If the focus on your JVC Camcorder does not adjust automatically, first, ensure that Focus is set to the Auto mode. If it is already on Auto mode, clean the lens and check the focus again.
  • K
    kimberly88Aug 26, 2025
    Why can't I record with my JVC Camcorder?
    • T
      Tiffany HarmonAug 27, 2025
      If your JVC Camcorder won’t record, ensure the Power Switch is set to “A” or “M”. Check that the tape’s erase protection tab is set to “REC”. Also, verify that the VIDEO/MEMORY Switch is set to “VIDEO”. If “TAPE END” appears, replace the cassette. Finally, make sure the cassette holder cover is closed. If the VIDEO/MEMORY Switch is set to “VIDEO”, set the VIDEO/MEMORY Switch to “MEMORY”.
  • B
    bmillerAug 25, 2025
    How to troubleshoot no power on JVC Camcorder?
    • T
      teresadavenportAug 25, 2025
      If no power is supplied to your JVC Camcorder, make sure the AC Power Adapter/Charger is securely connected. Also, check if the battery is dead; if so, replace it with a fully charged one. Ensure that the LCD monitor is fully open or the viewfinder is pulled out when recording.
  • H
    hernandezlouisAug 23, 2025
    Why does my JVC GR-DVP7 say “SET DATE/TIME!”?
    • J
      Julie HansenAug 23, 2025
      If your JVC Camcorder displays “SET DATE/TIME!”, this indicates that the built-in clock’s rechargeable lithium battery is discharged or the previously set date/time is erased. To resolve this, connect your camcorder to an AC outlet using the AC Power Adapter/Charger for over 24 hours to charge the clock’s lithium battery.

Summary

Safety Precautions

Using This Instruction Manual

Guidance on how to use the manual effectively.

Important Product Safety Instructions

Essential safety warnings and advice for installation and use.

Getting Started

Power and Battery Management

Details on power sources, charging, and battery usage.

Loading Media

Procedures for inserting and removing cassettes and memory cards.

Basic Operations

Covers basic recording, playback, and connections.

Video Recording & Playback

Basic Recording

Step-by-step guide for basic video recording operations.

Normal Playback

Instructions for playing back recorded video tapes.

Connections To A TV Or VCR

How to connect the camcorder to external video devices.

Digital Still Camera Features

Basic Shooting (D.S.C. Snapshot)

How to take still photos with the camcorder.

Image Playback and File Management

Viewing images and managing files on the memory card.

Initializing Memory Card

How to format or initialize a memory card.

Advanced Features & Remote Control

Menu System and Settings

Overview of the camcorder's menu system for detailed settings.

Using The Remote Control Unit

Operating the camcorder using the remote control.

Dubbing and Editing

Procedures for dubbing audio and editing video content.

System Connections & References

Computer Connectivity

Connecting the camcorder to a PC via USB or DV cable.

Troubleshooting and Cautions

Solutions for problems, safety warnings, and maintenance.

Specifications and Index

Technical details and an index of controls and features.

JVC GR-DVP7 Specifications

General IconGeneral
Recording MediaMini DV
Image SensorCCD
Optical Zoom10x
DisplayLCD
Audio FormatPCM
LCD Screen Size2.5 inches
Effective Pixels680, 000 pixels

Related product manuals