EN
26
9
!
FOR RECORDING
Self-Timer (GR-DX300 only)
Once the camcorder is set, the camcorder operator can
become part of the scene in a more natural way, adding
the final touch to a memorable picture.
1 Set the Power Switch @ to “ ” while pressing
down the Lock Button $ located on the switch. Pull out
the viewfinder fully or open the LCD monitor fully.
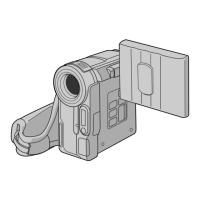
•You can tilt the LCD monitor upward to 180° so that it
faces forward and view yourself while self-recording
with the viewfinder pushed back.
2 Press MENU 4. The Menu Screen appears.
3 Press + or – 5 to select “ (MANUAL)”, and press
SELECT/SET 3.
4 Press + or – 5 to select “SELF-TIMER”, and press
SELECT/SET 3. The Sub Menu appears. Press + or –
5 to select “ON ”, and press SELECT/SET 3.
Selection is complete. Press + or – 5 to select
“ RETURN”, and press SELECT/SET 3 twice to
close the Menu Screen.
When the Recording Start/Stop
Button
! or SNAPSHOT 9 is pressed,
the tally lamp
^ changes as shown:
5-Second Recording
(GR-DX300 only)
Record a vacation or an important event in 5-second
clips to keep the action moving. This function is
available only for tape recording.
1 Set the Power Switch @ to “ ” while pressing
down the Lock Button $ located on the switch. Open
the LCD monitor fully or pull out the viewfinder fully.
2 Press MENU 4. The Menu Screen appears.
3 Press + or – 5 to select “ (MANUAL)”, and press
SELECT/SET 3.
4 Press + or – 5 to select “5S”, and press SELECT/
SET 3. The Sub Menu appears.
5 Press + or – 5 to select “5S”, and press SELECT/
SET 3. Selection is complete. Press + or – 5 to select
“ RETURN”, and press SELECT/SET 3 twice to
close the Menu Screen.
• “5S” 0 appears.
6 Press the Recording Start/Stop Button !. The tally
lamp ^ lights and beep sounds to indicate the start of
recording, and after 5 seconds the camcorder enters
Record-Standby mode.
• Even if you press the Recording Start/Stop Button !
again within 5 seconds after recording starts, Record-
Standby mode is not engaged.
7 To exit the 5S mode, select “OFF” in step 5.
To Take A Snapshot In The 5-Second Recording
Mode . . .
..... instead of pressing the Recording Start/Stop
Button ! in step 6, select the desired Snapshot
mode in the Menu Screen, then press SNAPSHOT
9. The camcorder records a 5-second still
(墌 pg. 29). When “5S” is set to “Anim.” (墌 pg. 33)
this function is not available.
NOTE:
When “5S” is set to “Anim.” in the Menu Screen the
5-second recording mode is not available. Animation
recording of a few frames only is taken instead (墌 pg. 33).
5 To engage the Self-Timer for video recording, press
the Recording Start/Stop Button !. After 15 seconds,
the beep sounds and video recording starts. To stop
Self-Timer recording, press the Recording Start/Stop
Button ! again. The camcorder re-enters Record-
Standby mode.
OR
Press SNAPSHOT 9. After 15 seconds, the beep
sounds and snapshot recording starts. After that, the
camcorder re-enters Record-Standby mode.
6 To end Self-Timer recording, select “OFF” in step 4.
NOTE:
If “BEEP” and “TALLY” are set to “OFF” (墌 pg. 34), the
beep does not sound and the tally lamp
^ does not light.
Blinks quickly
(Self-Timer shooting starts soon)
Stops blinking and stays on
(Self-Timer video recording starts)
Begins blinking
(Self-Timer starts)
After approx. 15 sec.
Turns off
(Self-Timer snapshot recording starts)



 To Next Page