EN
5
NOTE:
In order to maintain optimum performance of the camcorder, provided cables may be equipped with one or more core
filter. If a cable has only one core filter, the end that is closest to the filter should be connected to the camcorder.
S-Video/Audio/
Video/Editing Cable
Grip Belt
(Already attached
to the camcorder)
Memory Card 8 MB
(Already inserted in
the camcorder)
USB Cable
Battery Pack BN-V107U or
BN-V107U-S
AC Adapter AP-V13A or AP-V11E, AP-V13E
Lens Cap
(See below for
attachment)
PROVIDED ACCESSORIES
CD-ROM
Power Cord
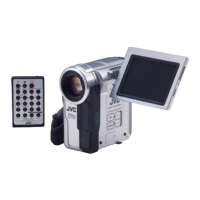
Remote
Control Unit
RM-V717U
AAA (R03) Battery x 2
(for remote control unit)
To protect the lens, attach the provided lens cap to the camcorder as shown in the illustration.
NOTE:
To confirm the lens cap is on correctly make sure the cap is flush to the camera.
HOW TO ATTACH THE LENS CAP
1
2
3
Core Filter x 2
(for provided S-Video/Audio/
Video/Editing Cable and
AC Adapter’s cord
墌 pg. 6
for attachment)
None
or
Editing
Extension Cable
+
–
+
–
1
3
2
AAA (R03)
Battery x 2
Tab
Core Filter
(for provided USB
Cable 墌 pg. 6 for
attachment)
 Loading...