1
2
3
1
1
1
2
3
1
2
3
1
RM-V705U
(provided with
GR-FX43)
RM-V700U
(provided with GR-FX53,
optional for GR-FX43/FX33/FX23)
Lock hole
Release
tab
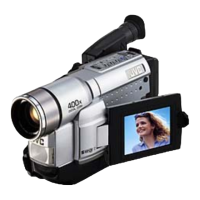
The Full-Function Remote Control Unit can operate this camcorder from a distance as well as the basic
operations (Playback, Stop, Pause, Fast-Forward and Rewind) of your VCR. The remote control unit makes
additional recording functions possible.
Buttons
1 Infrared beam
transmitting window
2 ZOOM (T/W) Buttons
3 PLAY Button
4 STOP Button
5 REW Button
6 INSERT Button
7 START/STOP Button
8 INT. TIME Button
9 REC TIME Button
0 PAUSE Button
! FF Button
@ A.DUB Button
# PAUSE IN Connector
$ MBR SET Button
% VISS Button
^ VCR CTL Button
& R.A.EDIT Buttons
Functions
With the camcorder’s Power Switch set
to “CAMERA”, “AUTO” or “PRO.”.
Transmits the beam signal.
Zoom in/out (Z pg. 14)
—
—
Retake (rewind)/Quick Review (
Z
pg. 15)
—
Functions same as the Recording Start/Stop button on the camcorder.
Self-Timer/Time-Lapse (Z pg. 41)
Animation/Time-Lapse (Z pg. 41)
—
Retake (forward) (Z pg. 15)
—
—
—
Ineffective
—
—
With the camcorder’s Power Switch set
to “PLAY”.
—
Playback start (Z pg. 34)
Stop (Z pg. 34)
Rewind, Reverse Shuttle Search
(Z pg. 34, 36)
Insert Editing (Z pg. 46)
—
—
Pause (Z pg. 36)
Fast-Forward, Forward Shuttle Search
(Z pg. 34, 36)
Audio dubbing (Z pg. 47)
Z pg. 43
Z pg. 42
Z pg. 42
Z pg. 44
# — & : RM-V700U only.
Installing The Battery
The remote control uses one lithium battery
(CR2025).
1
PULL OUT BATTERY HOLDER
: Pull out the battery holder by inserting
a pointed instrument into the slot.
: Pull out the battery holder while
sliding the lock hole.
: Pinch the release tab and pull out the
battery holder.
2
INSERT BATTERY IN HOLDER
Insert the battery in the holder, and be sure
to have the “+” mark visible.
3
RE-INSERT HOLDER
Slide the holder back in until you hear a
click.
•Read the caution concerning lithium
batteries (Z pg. 2).
Slot