EN9
䊳
R
I
T
T
D
J
D
䊳
T
E
N
E
I
A
L
E
R
O
C
T
L
T
T
I
M
E
.
E
L
E
P
O
T
C
T
E
/
U
S
A
I
T
M
T
I
M
R
Y
M
M
I
A
L
I
D
O
N
S
E
E
M
C
A
M
D
T
R
E
R
N
E
N
E
E
A
O
G
O
M
.
.
M
M
E
E
N
O
O
O
F
0
O
N
U
F
F
F
R
6
F
U
F
F
F
E
F
NCH
䊳
F
E
M
T
O
X
.
O
C
P
W
U
O
.
S
S
S
B
C
Y
U
.
A
S
R
M
T
E
E
E
R
M
A
M
M
E
E
N
A
A
A
N
U
U
U
U
U
T
T
T
O
O
O
䊳
R
D
N
E
.
E
C
X
Z
T
M
O
S
O
O
Y
D
M
S
E
TEM ME
S
5
N
P
0
U
x
Y
M
D
T
E
E
O
A
I
X
A
N
Y
M
I
R
T
E
T
H
DATE / T IME
2
2
0
0
:
0
2
2
1
6
8
0
24-hour
indication
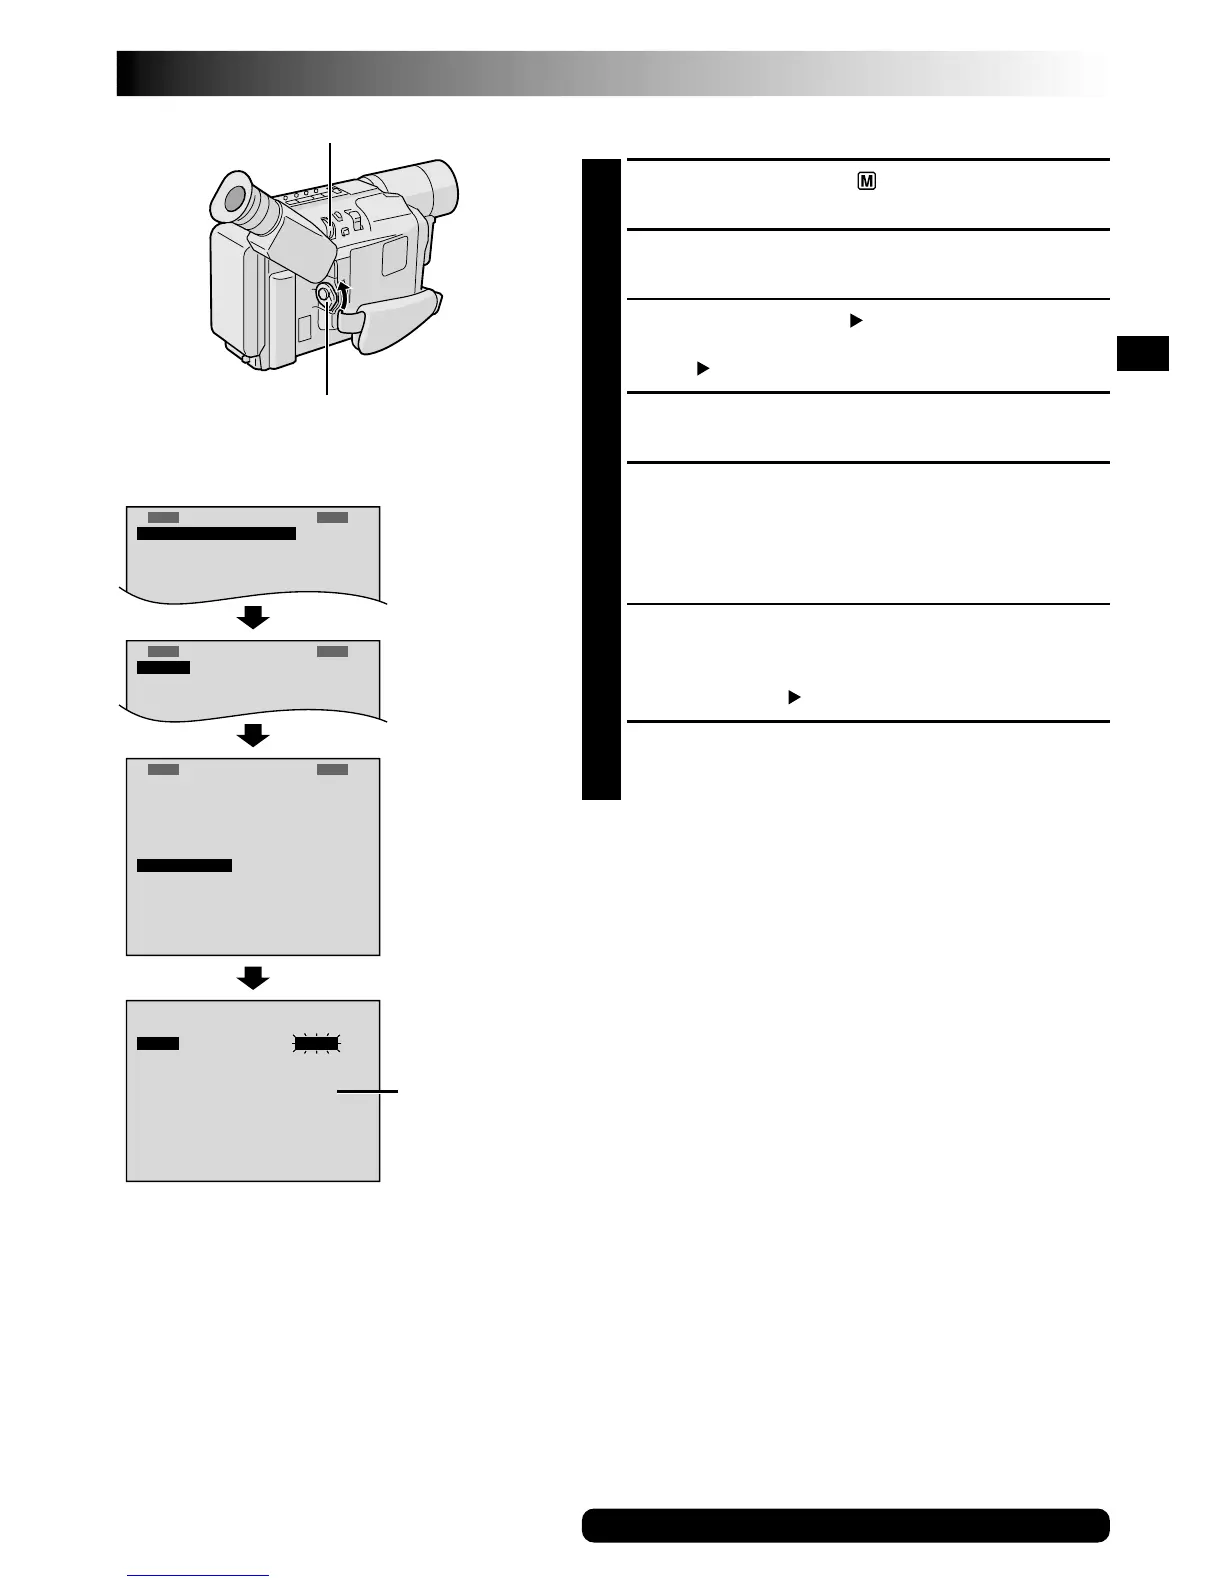
Menu Screen
DATE/TIME Menu
MENU Wheel
Power Switch
Display
Date/Time Settings
1
Set the Power Switch to “ ”. The power lamp
comes on.
2
Press MENU. The Menu Screen appears.
3
Rotate MENU to select “ TO SYSTEM MENU” and
press it to display SYSTEM MENU. Rotate MENU to
select “ NEXT” and press it to display the next page.
4
Rotate MENU to select “DATE/TIME” and press it.
The DATE/TIME Menu appears.
5
To set “YEAR”, “MONTH”, “DAY” or “TIME” (hour/
minute), rotate MENU to select the desired item, and
press it. When the setting begins blinking, rotate
MENU until the correct setting appears and then
press it. The setting stops blinking.
6
When none of these settings (“YEAR”, “MONTH”,
“DAY”, “TIME”) blinks, rotate MENU to select “EXIT”,
and press it. The Menu Screen reappears with the
highlight bar on “ RETURN”.
7
Press MENU to close the Menu Screen.
NOTE:
To display the date and time in the camcorder’s display and
on a connected TV, see “Date/Time Insert” (
墌
pg. 25).
For other notes, 墌 pg. 35



 To Next Page