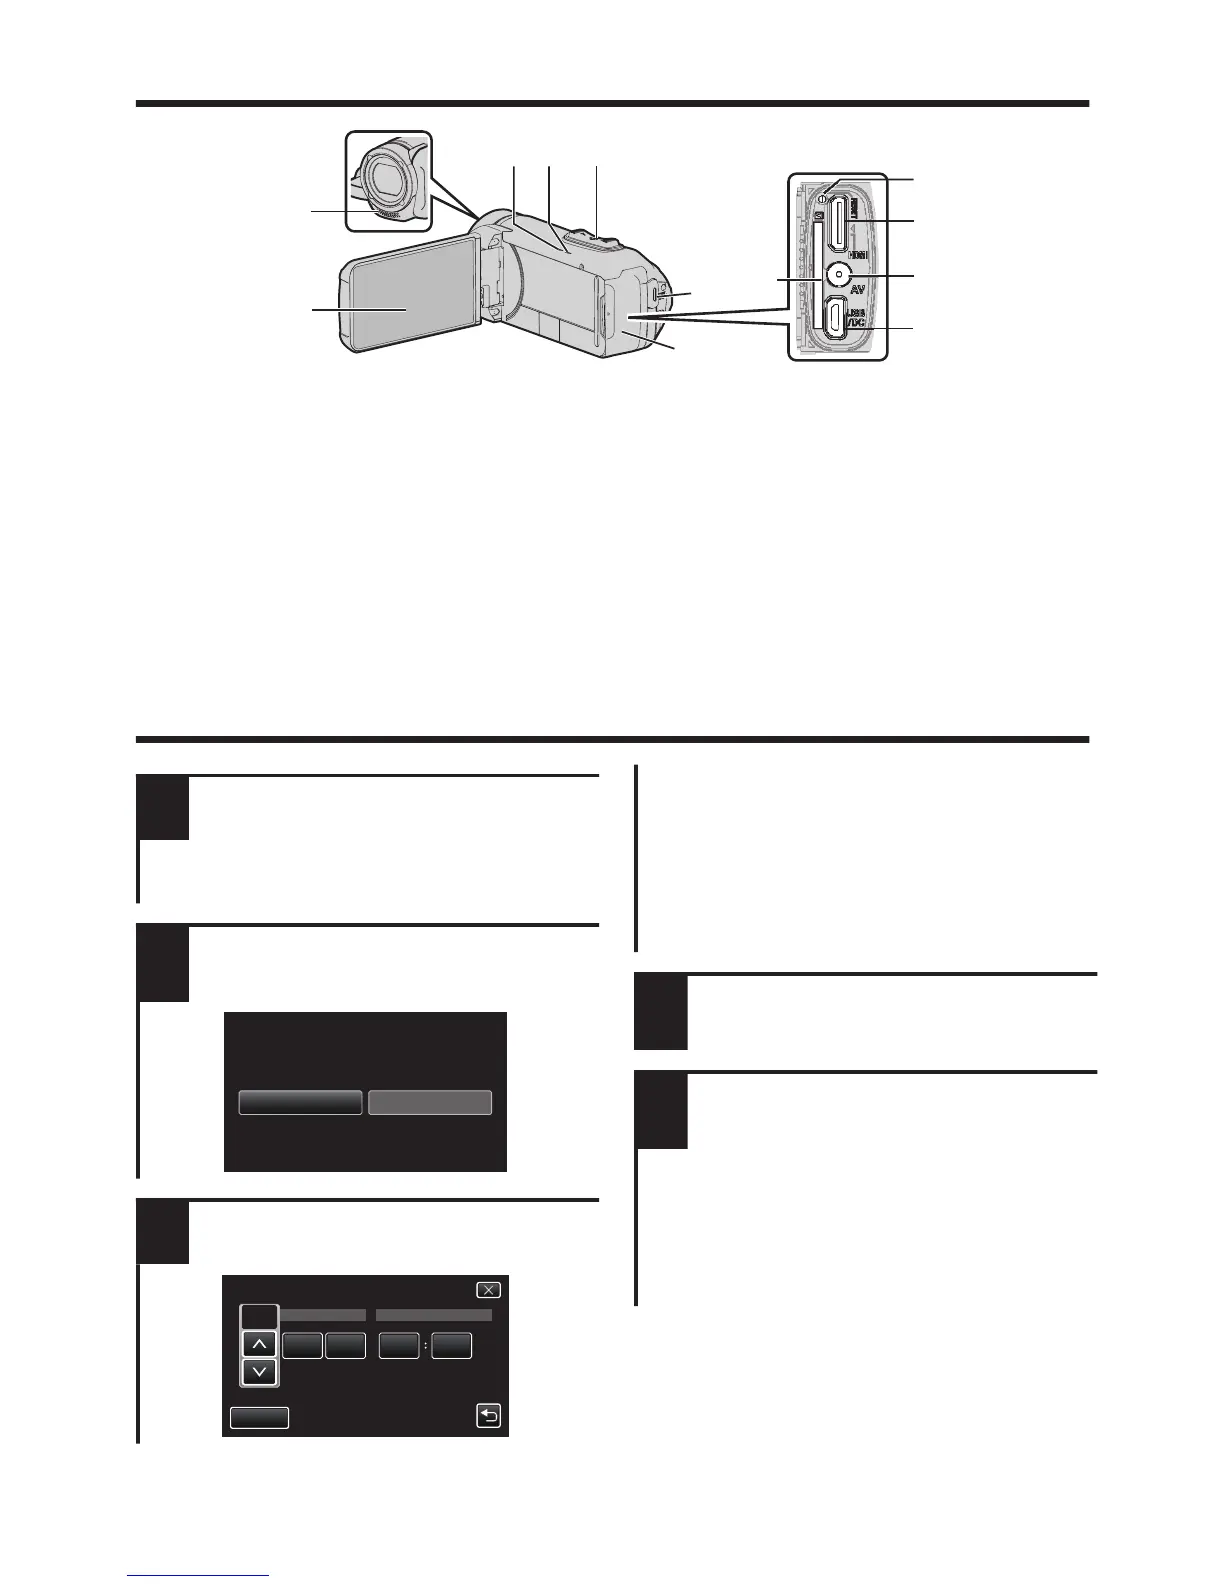
A
Stereo Microphone
B
LCD Monitor
C
CHARGE (Charging) Lamp (p. 8)
D
POWER/ACCESS (Power/Access) Lamp
E
Zoom/Volume Lever (p. 10, 12)
F
START/STOP (Video Recording)
Button (p. 10)
G
Terminal Cover
H
SD Card Slot (p. 9)
I
Reset Button
J
HDMI Mini Connector
K
AV Connector
L
USB Connector
Date and Time Setting
1
Open the LCD monitor.
0
The unit turns on. When the LCD
monitor is closed, the unit turns off.
2
Tap [YES] when [SET
DATE/TIME!] is displayed.
.
0
When the day, month, year, hour, or
minute item is tapped, 3 and 2 will
be displayed.
Tap 3 or 2 to adjust the value.
0
Repeat this step to input the day,
month, year, hour, and minute.
4
After setting the date and
time, tap [SET].
5
Select the region where you
live and tap [SAVE].
0
Time difference between the
selected city and the GMT
(Greenwich Mean Time) is
displayed.
0
Tap 0 or 1 to select the city name.
6 EN

 Loading...