K
Kenneth StantonAug 1, 2025
What to do if the JVC HR-J672EU VCR remote control won’t function?
- KkimjayAug 1, 2025
If the remote control for your JVC VCR isn't working, the batteries may be dead. Try replacing them with new ones.

What to do if the JVC HR-J672EU VCR remote control won’t function?
If the remote control for your JVC VCR isn't working, the batteries may be dead. Try replacing them with new ones.
How to troubleshoot no power to my JVC HR-J672EU VCR?
If your JVC VCR isn't getting any power, make sure the mains power cord is properly connected.
Why is the JVC VCR playback picture blurred?
If the playback picture on your JVC VCR is blurred, interrupted, or if you see a "USE CLEANING CASSETTE" message, the video heads may be dirty. Use a dry cleaning cassette TCL-2UX or consult your JVC dealer.
What to do if the JVC HR-J672EU playback picture does not appear?
If you don't see a playback picture on your JVC VCR while the tape is running, here's what to check: * If using an RF connection: Ensure your TV receiver is set to the correct video channel and that the recorder’s video channel is correctly set. * If using an AV connection: Make sure your TV is set to AV mode.
| Type | VCR |
|---|---|
| Video Format | PAL |
| Tuner | Yes |
| Number of Heads | 4 |
| Remote Control | Yes |
| Power Supply | AC 220-240V, 50Hz |
| Playback System | PAL |
| Connections | SCART |
| Fast Forward/Rewind Time | Approx. 2.5 minutes (for E-180 tape) |
Important safety warnings and precautions to prevent fire, shock, or hazard when using the video recorder.
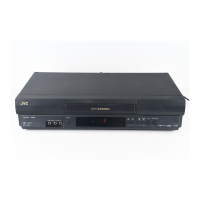
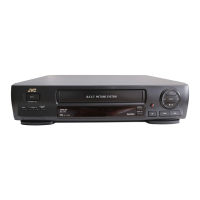
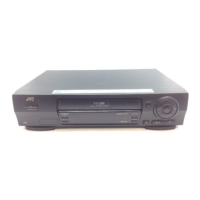
Diagram identifying controls and indicators on the front panel of the video recorder.
Diagram identifying connectors and ports on the rear panel of the video recorder.
Explanation of the B.E.S.T. Picture System for checking tape condition.
Description of various mode indicators displayed on the front panel during operation.
Explanation of on-screen display indicators and their meanings during operation.
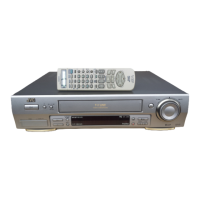
Basic instructions on operating the video recorder using the remote control.
Instructions for operating a TV set with the JVC video recorder's remote control.
Step-by-step guide for connecting the video recorder to a TV and power source.
Procedure for automatic setup of the recorder, including language and country selection.
Guide to downloading program numbers automatically via Auto Set Up or Preset Download.
Steps to navigate the recorder's menu to select language settings.
Procedure to access the country selection menu for setting the recorder.
Instructions for selecting the correct country from the list for proper operation.
Steps to choose the desired language for on-screen messages and menus.
How to exit the menu system and return to normal operation.
Guide for setting up the recorder to control a satellite receiver for recording.
Procedure to access the initial setup screen for the satellite receiver.
Steps to navigate to the satellite control settings menu.
Instructions for entering the brand name of the satellite receiver for compatibility.
How to select the correct channel for the satellite receiver to tune into.
Explanation of the NextView Link feature for timer-programming TV.
Information on the TV auto power-on feature when the recorder is used.
Details on the VCR auto standby function for power saving.
Instructions for direct recording from a connected device.
Step-by-step instructions to play back recorded tapes on the video recorder.
Information on the types of VHS cassettes compatible with the recorder.
How to pause and play back tapes frame by frame for detailed viewing.
Instructions for playing back tapes in slow motion.
Guide to fast-forward and reverse searching through tape content.
Explanation of how to adjust playback speed for faster searching.
How to manually adjust tracking for optimal picture quality during playback.
Procedure to revert from manual to automatic tracking control.
Explanation of the Instant Review feature for quick access to recorded programs.
How to use index codes to quickly locate specific parts of a recording.
Instructions for skipping unwanted sections of a tape during playback.
Setting up the recorder for automatic operations after rewinding.
How to set the recorder to automatically replay a tape multiple times.
How to select different audio tracks (Hi-Fi, Bilingual) during playback.
Step-by-step instructions for recording TV programs or other sources.
Information on how the recorder resumes recording after a power interruption.
Easy method for recording programs for a set duration up to 6 hours.
Instructions for recording one program while viewing another on TV.
How to set and display the recording time counter.
Procedure to reset the elapsed time counter to zero before recording.
How to display the remaining tape time and switch display modes.
Instructions for recording stereo and bilingual broadcasts automatically.
Guide to recording NICAM stereo and bilingual broadcasts.
Explanation of the B.E.S.T. system during recording and its function.
How the B.E.S.T. system adjusts picture quality during playback.
Important notes regarding the operation of the B.E.S.T. system.
Guide to programming timer recordings using the SHOWVIEW system.
Prerequisites and checks before starting SHOWVIEW timer programming.
Steps to access the SHOWVIEW programming interface.
Instructions for entering the SHOWVIEW program number.
Procedure to access the program schedule screen for timer recording.
How to select the tape speed (SP or LP) for timer recordings.
How to set the VPS/PDC recording mode for program identification.
Steps to exit programming modes and return to the normal viewing screen.
How to activate the timer recording mode for unattended recording.
Specific instructions for timer-recording satellite broadcasts via SHOWVIEW.
Setting the Guide Program number for satellite broadcasts.
Prerequisites for setting up express timer recordings.
Steps to access the SHOWVIEW programming interface for express timing.
How to input the desired start time for an express timer recording.
Instructions for entering the date for an express timer recording.
How to select the channel position for timer recordings.
How to select the tape speed (SP or LP) for express timer recordings.
How to set the VPS/PDC recording mode for program identification.
Steps to exit programming modes and return to the normal viewing screen.
How to activate the timer recording mode for unattended recording.
Specific instructions for timer-recording satellite broadcasts using Express Timer.
Procedure to verify if the broadcast station transmits a VPS/PDC signal.
How to deactivate the timer recording mode.
Steps to view the list of programmed timer recordings.
Instructions for cancelling or modifying existing timer recordings.
How to exit the programme check screen and return to timer mode.
How to confirm overlapping program settings on the TV screen.
Instructions for selecting specific programs to modify or adjust.
How to cancel or change overlapping program recordings.
Prerequisites for setting up automatic satellite program recording.
How to select the L-2 safety setting for satellite recordings.
How to select the tape speed (SP or LP) for automatic satellite recordings.
How to activate the automatic satellite recording mode.
Guide for connecting a camcorder and editing recorded footage.
Instructions for connecting camcorder audio/video outputs to the recorder.
How to select the correct input source for editing from a camcorder.
Instructions for setting the desired edit mode for camcorder footage.
How to start the camcorder to begin the editing process.
How to start the recorder to begin the editing or dubbing process.
Guide for connecting another video recorder for editing or dubbing.
How to select the input source for recording from another deck.
Instructions for setting the desired edit mode for dubbing.
How to start the source player for editing or dubbing.
How to start the recording deck to begin the dubbing process.
Instructions for connecting the video recorder to a satellite receiver.
Key considerations when connecting to a satellite receiver.
How to set the input mode for connecting a decoder.
Instructions for physically connecting a decoder to the recorder.
Procedure for setting the tuner for receiving scrambled broadcasts.
Guide for connecting the video recorder to a Hi-Fi stereo system.
Important warnings regarding audio connection and speaker placement.
How to change various mode settings on the recorder.
Steps to access the recorder's main menu for settings.
Procedure to access the mode selection screen.
How to choose and change the desired operating mode.
How to adjust or change the specific setting within a selected mode.
How to exit the menu system and return to normal operation.
Options for enabling or disabling the B.E.S.T. Picture System.
Adjustments for Picture Control: AUTO, EDIT, SOFT, SHARP.
Options for enabling or disabling the Auto Timer function.
Options for enabling or disabling the On-Screen Display.
Options for enabling or disabling the Direct Record function.
Enabling/disabling automatic switching from SP to LP mode during timer recording.
Options for enabling or disabling the Power Save mode.
Selecting the L-2 connector for AV2 (IN/DECODER) or SAT.
Options for PAL/NTSC or MESECAM colour systems.
Steps to perform if Auto Channel Set was not set correctly or area changed.
Automatically assigns receivable stations to channel positions.
Procedure to power on the recorder before setting up channels.
Steps to access the recorder's main menu for settings.
Procedure to access the Auto Channel Set screen.
Instructions for selecting the correct country for channel tuning.
How to choose the desired language for the Auto Channel Set screen.
Notes and important information regarding Auto Channel Set performance.
Details on automatic fine-tuning during channel setup.
How to select the broadcast band (VHF/UHF) for tuning.
Steps for manually setting channels when auto-tuning is insufficient.
Steps to access the recorder's main menu for manual channel setup.
Procedure to access the confirmation screen for manual channel setup.
How to select the desired channel position for manual tuning.
Procedure to remove a selected channel from the recorder's memory.
How to select the decoder mode for receiving scrambled broadcasts.
Procedure to access the confirmation screen for decoder settings.
How to select the channel position for scrambled broadcasts.
How to change the decoder setting for optimal reception.
How to return to the confirmation screen after setting decoder.
How to select the station item to be set.
Procedure to access the manual channel set screen.
How to select a new station for programming.
How to switch between programmed stations.
How to exit the confirmation screen after setting stations.
How to select the name for a station being programmed.
How to select a channel for fine-tuning.
Procedure to access the manual channel set screen for fine-tuning.
How to perform manual tuning for a selected channel.
How to exit the confirmation screen after fine-tuning.
Steps to perform if interference occurs or connections change.
How to access the video channel set mode.
Instructions for setting the RF output system for video channels.
How to set the video channel for output.
How to exit the video channel set mode.
Conditions where SHOWVIEW setup may not work correctly.
Setting the Guide Program number for satellite broadcasts.
Steps to access the recorder's main menu for SHOWVIEW setup.
Procedure to access the initial set screen for SHOWVIEW setup.
How to access the Guide Program Set screen for SHOWVIEW setup.
Instructions for entering the Guide Program number for SHOWVIEW.
How to exit the menu system and return to normal operation.
Conditions where clock setting might not perform correctly.
Procedure to power on the recorder before setting the clock.
Steps to access the recorder's main menu for clock settings.
Procedure to access the initial set screen for clock settings.
How to access the clock set screen for setting the time and date.
Instructions for setting the current date and time.
How to set the Just Clock function to ON or OFF.
How to set the channel position for clock data reception.
How to start the clock operation and its automatic adjustments.
Troubleshooting common power-related issues with the recorder.
Troubleshooting common problems related to tape transport.
Troubleshooting common issues encountered during playback.
Troubleshooting why recordings cannot be initiated.
Troubleshooting issues with recording TV broadcasts.
Troubleshooting problems with tape-to-tape editing.
Troubleshooting issues with recording from a camcorder.
Troubleshooting why timer programming is not functioning correctly.
Information about the status of ongoing timer programming.
Troubleshooting blinking indicators during timer recording.
Troubleshooting cassette ejection and blinking indicators.
Troubleshooting timer mode disengagement issues.
Troubleshooting automatic cassette ejection after tape end.
Troubleshooting SHOWVIEW system timer recording failures.
Troubleshooting audio noise during camcorder recording.
Troubleshooting skipped channels during scanning.
Troubleshooting issues with changing TV channels.
Troubleshooting manually set channel changes.
Troubleshooting missing stored channels in the recorder.
Answers to common questions regarding playback operations.
Answers to common questions regarding recording operations.
Answers to common questions regarding timer recording operations.
General specifications of the video recorder, including power, dimensions, and weight.
Specifications related to video signal processing and recording.
Specifications for tuner capabilities and timer functions.
List of provided and optional accessories for the recorder.