(No.49793)1-11
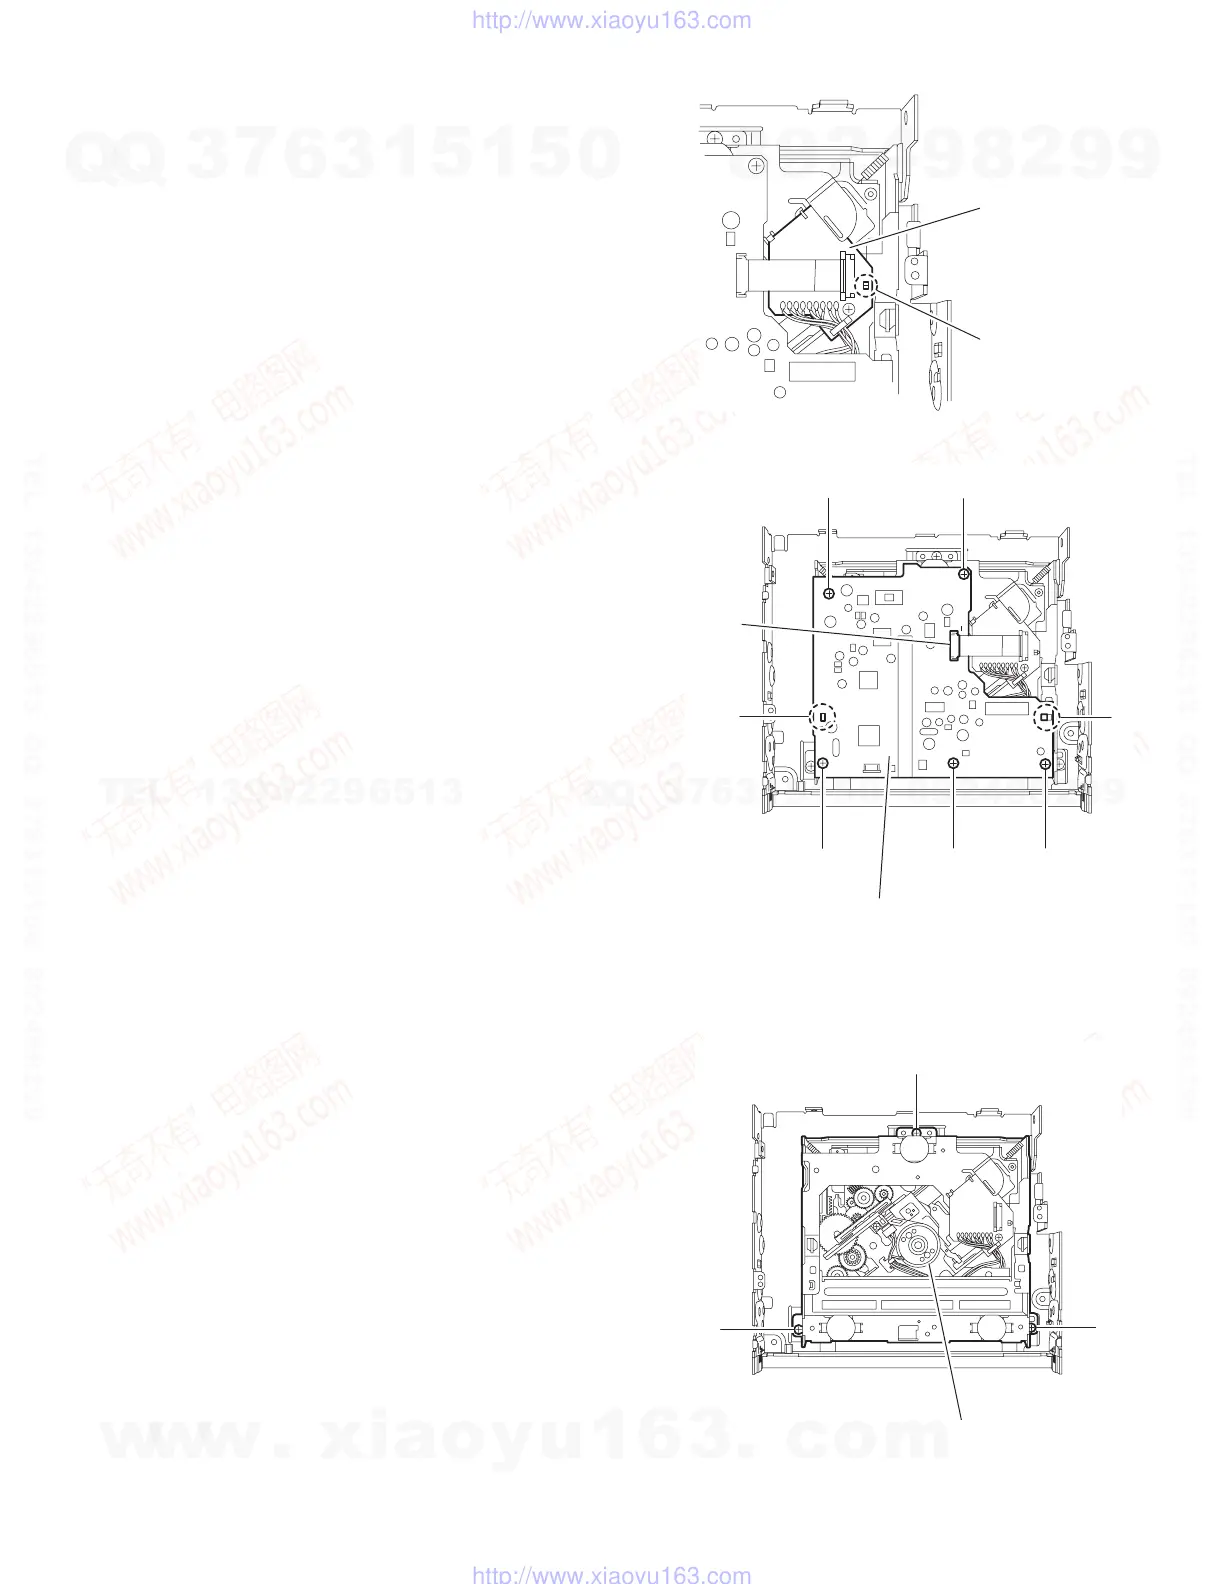
2.1.9 Removing the MP3 board assembly
(See Fig.20,21)
• Prior to performing the following procedure, remove the top
chassis.
Caution:
Before disconnecting the card wire from connector CN601 on
the MP3 board, solder the short-circuit point on the connector
board in the CD mechanism assembly (Refer to Fig.20).
(1) Disconnect the card wire from connector CN601 on the
MP3 board assembly.
(2) Remove the five screws O attaching the MP3 board as-
sembly and release the joint d and e.
Caution:
When reattaching the MP3 board, connect the card wire ex-
tending from the connector board to connector CN601 and un-
solder the short-circuit point (Refer to Fig.21).
Fig.20
Fig.21
2.1.10 Removing the CD mechanism assembly
(See Fig.22)
(1) Remove the three screws P and the CD mechanism as-
sembly from the top chassis.
Fig.22
Connector board
Soldering
e
d
OO
OOO
CN601
MP3 board
P
P
P
CD mechanism assembly
w
w
w
.
x
i
a
o
y
u
1
6
3
.
c
o
m
Q
Q
3
7
6
3
1
5
1
5
0
9
9
2
8
9
4
2
9
8
T
E
L
1
3
9
4
2
2
9
6
5
1
3
9
9
2
8
9
4
2
9
8
0
5
1
5
1
3
6
7
3
Q
Q
TEL 13942296513 QQ 376315150 892498299
TEL 13942296513 QQ 376315150 892498299
http://www.xiaoyu163.com
http://www.xiaoyu163.com
 Loading...