ENGLISH
33
Data Size: B6L (182 mm x 128 mm)
Book Size: B6L (182 mm x 128 mm)
Display Settings
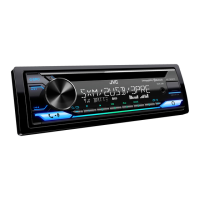
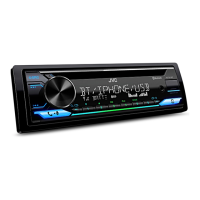
[COLOR] (for KD-T925BTS/KD-T920BTS)
[PRESET] Selects illumination colors for the buttons on different zones separately.
1
Select a zone ([ZONE1], [ZONE2], [ALLZONE]). (See the illustration on
page 32.)
2
Select a color for the selected zone.
• [COLOR01] to [COLOR49]
• [USER]: The color you have created for [DAYCOLOR] or
[NIGHTCOLOR] is shown.
• [COLORFLOW01] to [COLORFLOW03]: Color changes at different
speeds.
• [CRYSTAL]/[FLOWER]/[FOREST]/[GRADATION]/[OCEAN]/[RELAX]/
[SUNSET]: The selected color pattern is shown.* (Selectable only when
[ALLZONE] is selected in step 1.)
[DAYCOLOR] Stores your own day and night illumination colors for different zones.
1
Select a zone ([ZONE1], [ZONE2]). (See the illustration on page 32.)
2
[RED]/[GREEN]/[BLUE]: Select a primary color.
3
[00] to [31]: Select the level.
Repeat step 2 and step 3 for all the primary colors.
• Your setting is stored to [USER] in [PRESET].
• [NIGHTCOLOR] or [DAYCOLOR] is changed by turning on or off your
car’s headlights.
[NIGHTCOLOR]
[COLOR GUIDE]
[ON]: The illumination color of [ZONE1] and [ZONE2] change to white
color when settings are performed on menu and list search, except in color
setting mode. ; [OFF]: Cancels.
* If one of these color patterns is selected, the [ZONE1] and [ZONE2] illumination colors will
change to the default colors.
References
Maintenance
Cleaning the unit
Wipe off dirt on the faceplate with a dry silicone or soft cloth.
Cleaning the connector
Detach the faceplate and clean the connector gently
with a cotton swab. Be careful not to damage the
connector.
Handling discs
• Do not touch the recording surface of the disc.
• Do not stick tape etc. on the disc, or use a disc with tape stuck on it.
• Do not use any accessories for the disc.
• Clean from the center of the disc and move outward.
• Clean the disc with a dry silicone or soft cloth. Do not use any solvents.
• When removing a disc from this unit, pull it out horizontally.
• Remove burrs from the center hole and disc edge before inserting a disc.
More information
For: – Latest firmware updates and latest compatible item list
– JVC original application
– Any other latest information
Visit <https://www.jvc.net/cs/car/>.
General
• This unit can only play the following CDs:
Connector (on the reverse
side of the faceplate)
KD_T925BTS_K_B5A-3880-00_EN_2nd Draft.indd 33KD_T925BTS_K_B5A-3880-00_EN_2nd Draft.indd 33 5/7/2021 10:55:05 AM5/7/2021 10:55:05 AM