3
Adjustable items on the monitor menu / Butir yang dapat disesuaikan pada menu monitor
BRIGHT:
Adjust this if the picture is too bright or too dark.
• Adjustable range: –10 to +11
• Initial level: 0 (center)
Sesuaikan jika gambar terlalu cerah atau terlalu gelap.
• Rentang yang dapat disesuaikan: –10 hingga +11
• Tingkat awal: 0 (tengah)
CONTRAST:
Control the degree of difference between the lightest and darkest parts of the picture.
• Adjustable range: –10 to +11
• Initial level: 0 (center)
Kendalikan tingkat perbedaan antara bagian paling terang dan bagian paling gelap dari
gambar.
• Rentang yang dapat disesuaikan: –10 hingga +11
• Tingkat awal: 0 (tengah)
TINT:
Adjust this if the human skin color is unnatural.
• Adjustable range: –10 to +11
• Initial level: 0 (center)
Sesuaikan jika warna kulit manusia tidak alami.
• Rentang yang dapat disesuaikan: –10 hingga +11
• Tingkat awal: 0 (tengah)
COLOR:
Adjust the color of the picture—lighter or darker.
• Adjustable range: –10 to +11
• Initial level: 0 (center)
Sesuaikan warna gambar – lebih terang atau lebih gelap.
• Rentang yang dapat disesuaikan: –10 hingga +11
• Tingkat awal: 0 (tengah)
DIMMER:
Adjust the light of the screen when you turn on the headlights.
• Adjustable range: –5 to +5
• Initial level: 0 (center)
Sesuaikan cahaya layar sewaktu anda menghidupkan lampu besar.
• Rentang yang dapat disesuaikan: –5 hingga +5
• Tingkat awal: 0 (tengah)
AUTO OPEN/
CLOSE:
Set to “ON” to open/close the monitor automatically when turning on/off the power.
• Selectable settings: ON, OFF
• Initial setting: ON
Setel ke “ON” untuk membuka/menutup monitor secara otomatis sewaktu
menghidupkan/mematikan daya.
• Penyetelan yang dapat dipilih: ON, OFF
• Penyetelan awal: ON
SLIDE
POSITION:
Adjust the monitor position.
• Selectable settings: FORTH, BACK
• Initial setting: FORTH
Sesuaikan posisi monitor.
• Penyetelan yang dapat dipilih: FORTH, BACK
• Penyetelan awal: FORTH
BLUE LED:
Light on or off the blue LED when you turn on the monitor.
• Selectable settings: ON, OFF
• Initial setting: ON
Hidupkan atau matikan LED biru sewaktu monitor dihidupkan.
• Penyetelan yang dapat dipilih: ON, OFF
• Penyetelan awal: ON
BEEP TONE:
Set to “ON” to beep when you operate the unit.
• Selectable settings: ON, OFF
• Initial setting: ON
Setel ke “ON” agar mengeluarkan bunyi bip sewaktu unit dioperasikan.
• Penyetelan yang dapat dipilih: ON, OFF
• Penyetelan awal: ON
AV2 SETUP
*2, *3
:
Select the use of AV INPUT2 jack.
• Selectable settings: NORMAL, CAMERA, CAMERA REV
NORMAL: Select this when connecting an AV component such as a VCR.
CAMERA: Select this when connecting the rear view camera. The rear view
automatically displayed when you change the gear to the back position.
CAMERA REV
*4
: Select this when connecting the rear view camera. The mirror image
of the rear view automatically displayed when you change the gear to the back position.
• Initial setting: NORMAL
Pilih penggunaan tusuk kontak AV INPUT2.
• Penyetelan yang dapat dipilih: NORMAL, CAMERA, CAMERA REV
NORMAL: Pilih ini sewaktu menghubungkan komponen AV seperti VCR.
CAMERA: Pilih ini sewaktu menghubungkan kamera pandangan belakang.
Pandangan belakang secara otomatis ditampilkan sewaktu roda-gigi diganti ke posisi
mundur.
CAMERA REV
*4
: Pilih ini sewaktu menghubungkan kamera pandangan belakang.
Gambar kaca pandangan belakang secara otomatis ditampilkan sewaktu roda-gigi
diganti ke posisi mundur.
• Penyetelan awal: NORMAL
TV SETUP
*1
:
Adjust the TV tuner settings. See “Adjusting TV SETUP settings” (page 4) for details.
Mengatur penyetelan tuner TV. Lihat “Mengatur penyetelan TV SETUP” (halaman 4)
untuk rinciannya.
*2
: Selecting “CAMERA” or “CAMERA REV” also makes the picture from AV OUT the rear
view when changing the gear to the back position.
*3
: When selecting “CAMERA” or “CAMERA REV”, the functions below does not work in
AV2:
• indicating the source name
• changing menu settings and aspect ratio
• changing the playback source (when changing the gear to the back position to display
the rear view).
*4
: The picture from AV OUT does not become the mirror image.
*2
: Dengan memilih “CAMERA” atau “CAMERA REV” juga membuat gambar dari
pandangan belakang AV OUT sewaktu roda-gigi diganti ke posisi mundur.
*3
: Sewaktu memilih “CAMERA” atau “CAMERA REV”, fungsi berikut tidak bekerja di AV2:
• menunjukkan nama sumber
• merubah penyetelan menu dan rasio aspek
• merubah sumber playback (sewaktu roda-gigi diganti ke posisi mundur untuk
menampilkan pandangan belakang).
*4
: Gambar dari AV OUT tidak menjadi gambar kaca.
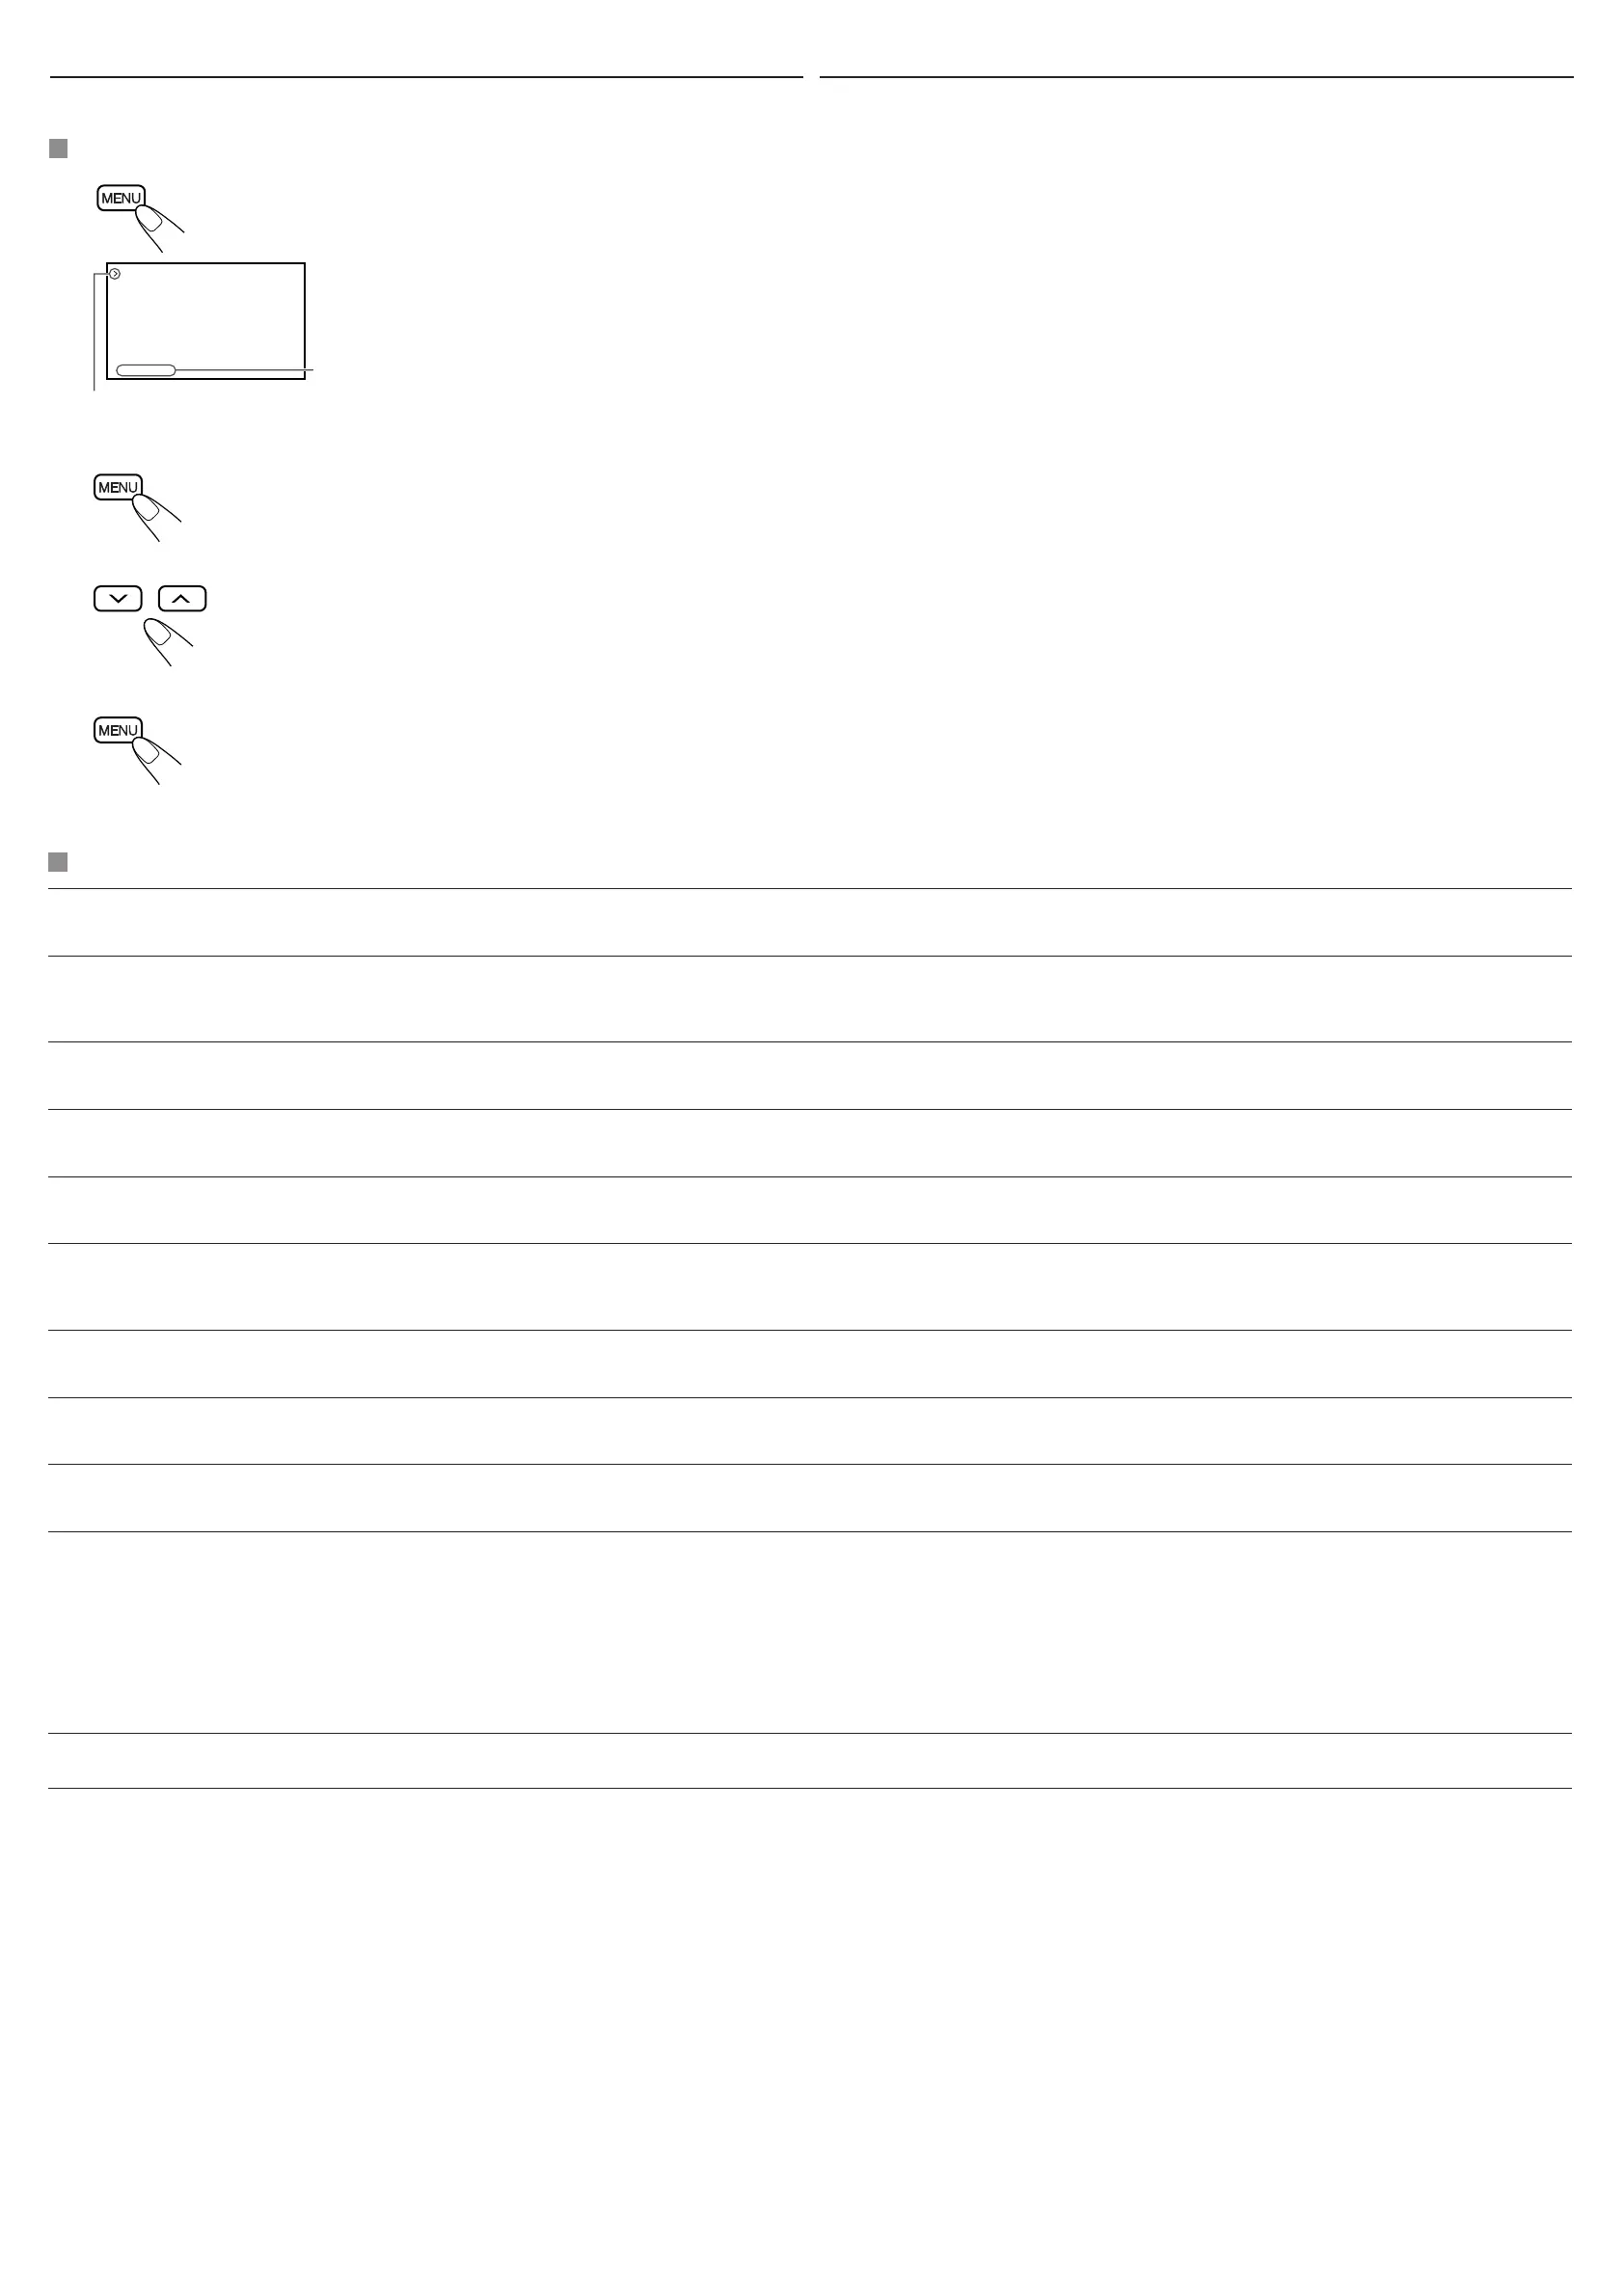
Basic procedure / Prosedur dasar
11
Call up the menu.
• Menu selection goes off if other operations
are done or no operation is done for about 5
seconds.
*1: Appears only when the TV tuner KV-C1001
or KV-C1008 is connected and TV is
selected as the source (see page 2).
1 Memanggil menu.
• Pemilihan menu akan hilang jika dilakukan
operasi lain atau tidak ada operasi yang
dilakukan selama kira-kira 5 detik.
*1: Muncul hanya bila tuner TV KV-C1001 atau
KV-C1008 dihubungkan dan TV dipilih
sebagai sumber (lihat halaman 2).
22 Select an item you want to adjust.
• When adjusting the TV SETUP settings, see
“Adjusting TV SETUP settings” (page 4).
2 Pilih butir yang hendak disesuaikan.
• Sewaktu mengatur penyetelan TV SETUP,
lihat “Mengatur penyetelan TV SETUP”
(halaman 4).
33 Adjust the level of the selected item
(or select an appropriate setting for
the selected item).
3 Setel tingkat dari butir yang dipilih
(atau pilih penyetelan yang sesuai
untuk butir yang telah dipilih).
44 Exit from the menu.
Press the button repeatedly until the menu
disappears.
4 Keluar dari menu.
Tekan tombol berulang kali hingga menu lenyap.
Using the monitor menu
You can make your own display adjustments using the menu.
• For the adjustable items, see below.
Current menu item
Butir menu sekarang
BRIGHT
CONTRAST
TINT
COLOR
DIMMER
AUTO OPEN/CLOSE ON
SLIDE POSITION FORTH
BLUE LED ON
BEEP TONE ON
AV2 SETUP NORMAL
TV SETUP >>
*
1
Dengan menggunakan menu monitor
Penyetelan tampilan dapat dilakukan sendiri dengan menggunakan menu.
• Mengenai butir-butir yang dapat disesuaikan, lihat keterangan di bawah.
KV_M705_706UN.indd 3KV_M705_706UN.indd 3 7/6/05 8:59:20 AM7/6/05 8:59:20 AM
 Loading...