1
2
3
4
5
6
EXT-1
EXT-2
EXT-3
EXT-4
HDMI
PC
EXT Mode
0
AV
>
EXT-1
Dubbing
EXT-2
EXT-4
EXT-3
EXT Setting
TV
>
EXT-1
Dubbing
EXT-2
EXT-4
EXT-3
EXT Setting
TV
>
EXT-1
Dubbing
EXT-2
EXT-4
EXT-3
EXT Setting
TV
ID List
VHS
S-VHS
DVC
CAM
SAT
STB
GAME
DVD
DVR
>
EXT-1
Dubbing
EXT-2
EXT-4
EXT-3
EXT Setting
TV
ID List
VHS
S-VHS
DVC
CAM
SAT
STB
GAME
DVD
DVR
>
EXT-1
Dubbing
EXT-2
EXT-4
EXT-3
EXT Setting
TV
>
EXT-1
DVD
Dubbing
EXT-2
EXT-4
EXT-3
EXT Setting
TV
>
EXT-1
Dubbing
EXT-2
EXT-4
EXT-3
EXT Setting
TV
>
EXT-1
Dubbing
EXT-2
EXT-4
EXT-3
EXT Setting
TV
Set Up
Auto Program
Component Auto Select
Off
Off
HDMI Setting
Edit/Manual
Decoder(EXT-2)
EXT Setting
Language
PC Position
Set Up
Auto Program
Component Auto Select
Off
Off
HDMI Setting
Edit/Manual
Decoder(EXT-2)
EXT Setting
Language
PC Position
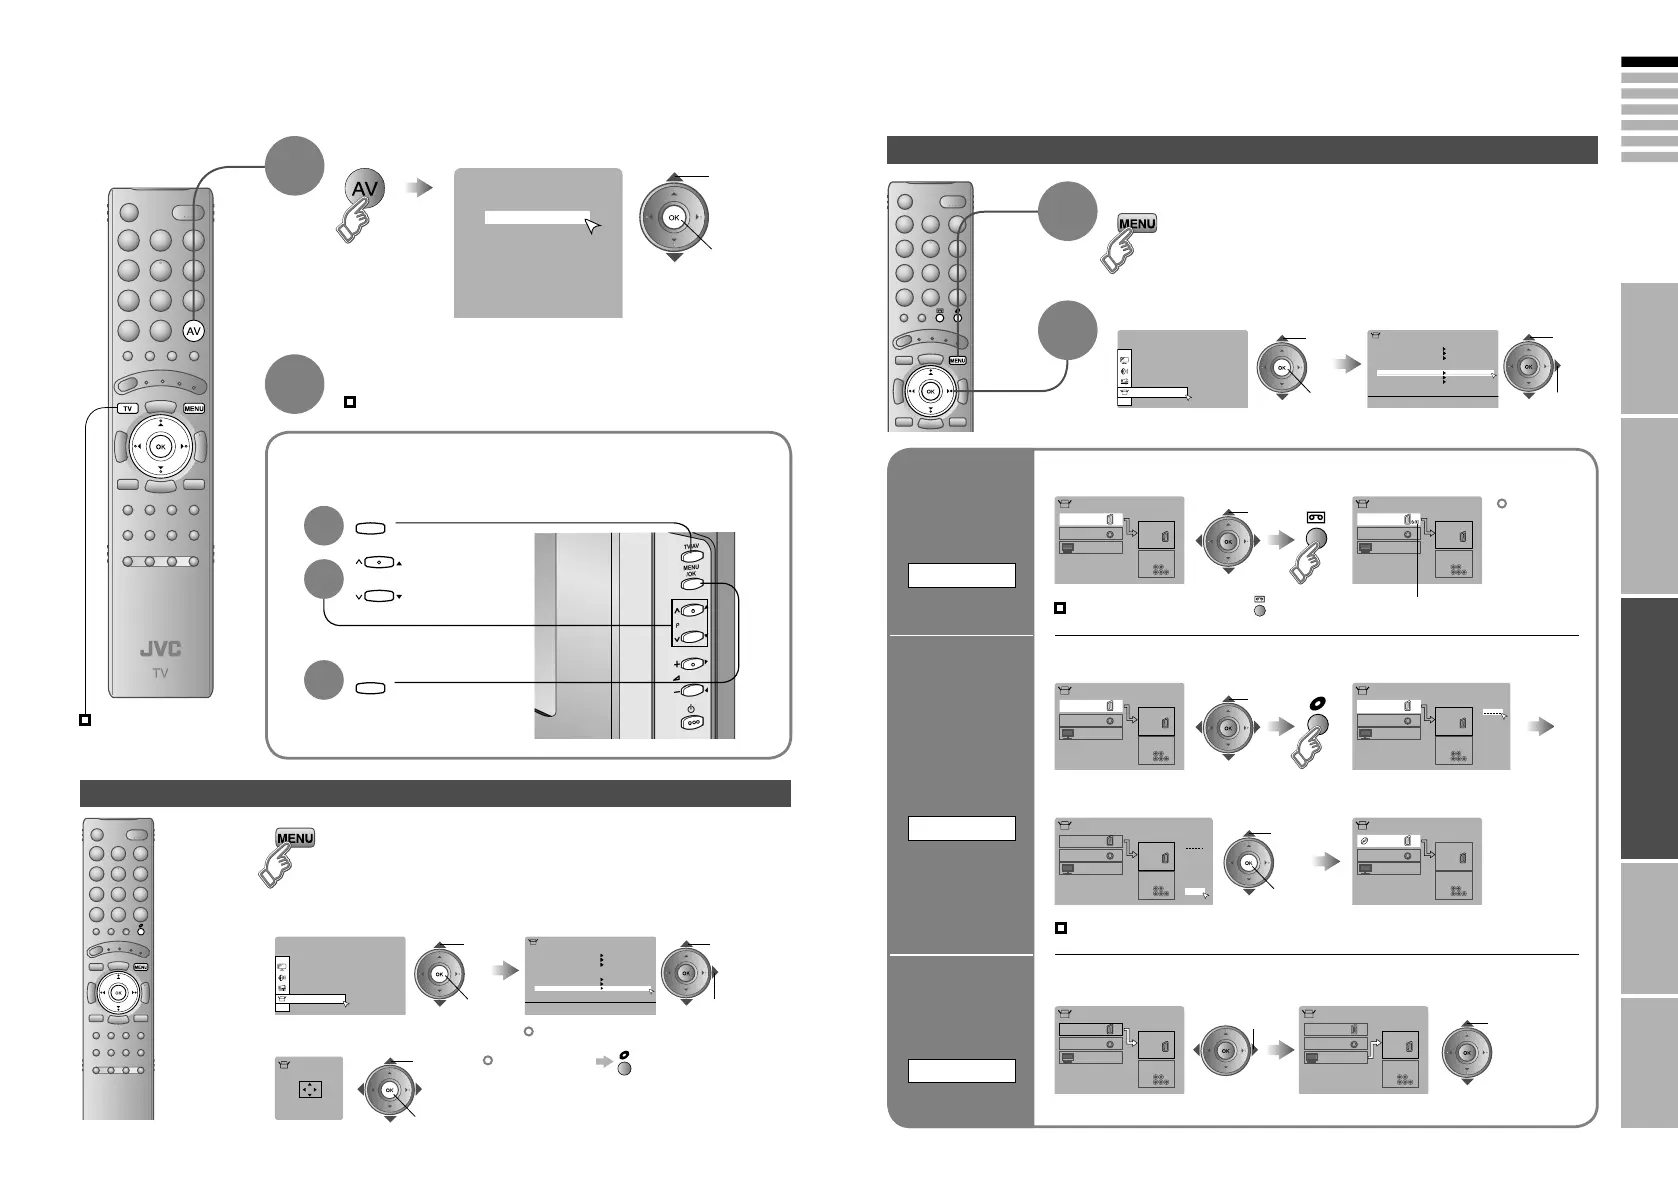
IMPORTANT! PREPARE USE
SETTINGS
TROUBLE?
Operate the connected device and play a video
Select the video source
E.g. For EXT-1
1
Watching videos / DVDs
To TV
2
Display the menu bar
select
Select “Set Up”
Select “EXT Setting”
1
Switch
to S-VIDEO
input
S-IN
2
The device
selection
display will
change from
“E1” to “S1”.
Cancel this mode
Set up
dubbing on
“EXT-2”
DUBBING
Edit names
of connected
devices
ID LIST
1
Select the “EXT” connected to S-VIDEO
2 Set the S-VIDEO mode
1 Select an “EXT” to assign a name to 2 Show the name list
1 Select the arrow 2 Select the dubbing source
3 Select a name from the list
select
select
2 set
1 select
select
y
1 select
2 next
1 select
2 next
Press “ ” in 2 again
Clear the name
Select the blank space in 3
Advanced functions
Operate JVC recorders and other devices (P. 25)
Select the video source using
the side buttons
1
Select the
video source
2
3
2 watch
1 select
PC position adjustment
Display the menu bar
1
Select “Set Up” Select “PC Position”
2
1 select
2 next
1 select
2 next
Shown only when “PC” is selected.
3
2 set
1 adjust
Reset position
 Loading...