1-8 (No.MB707<Rev.002>)
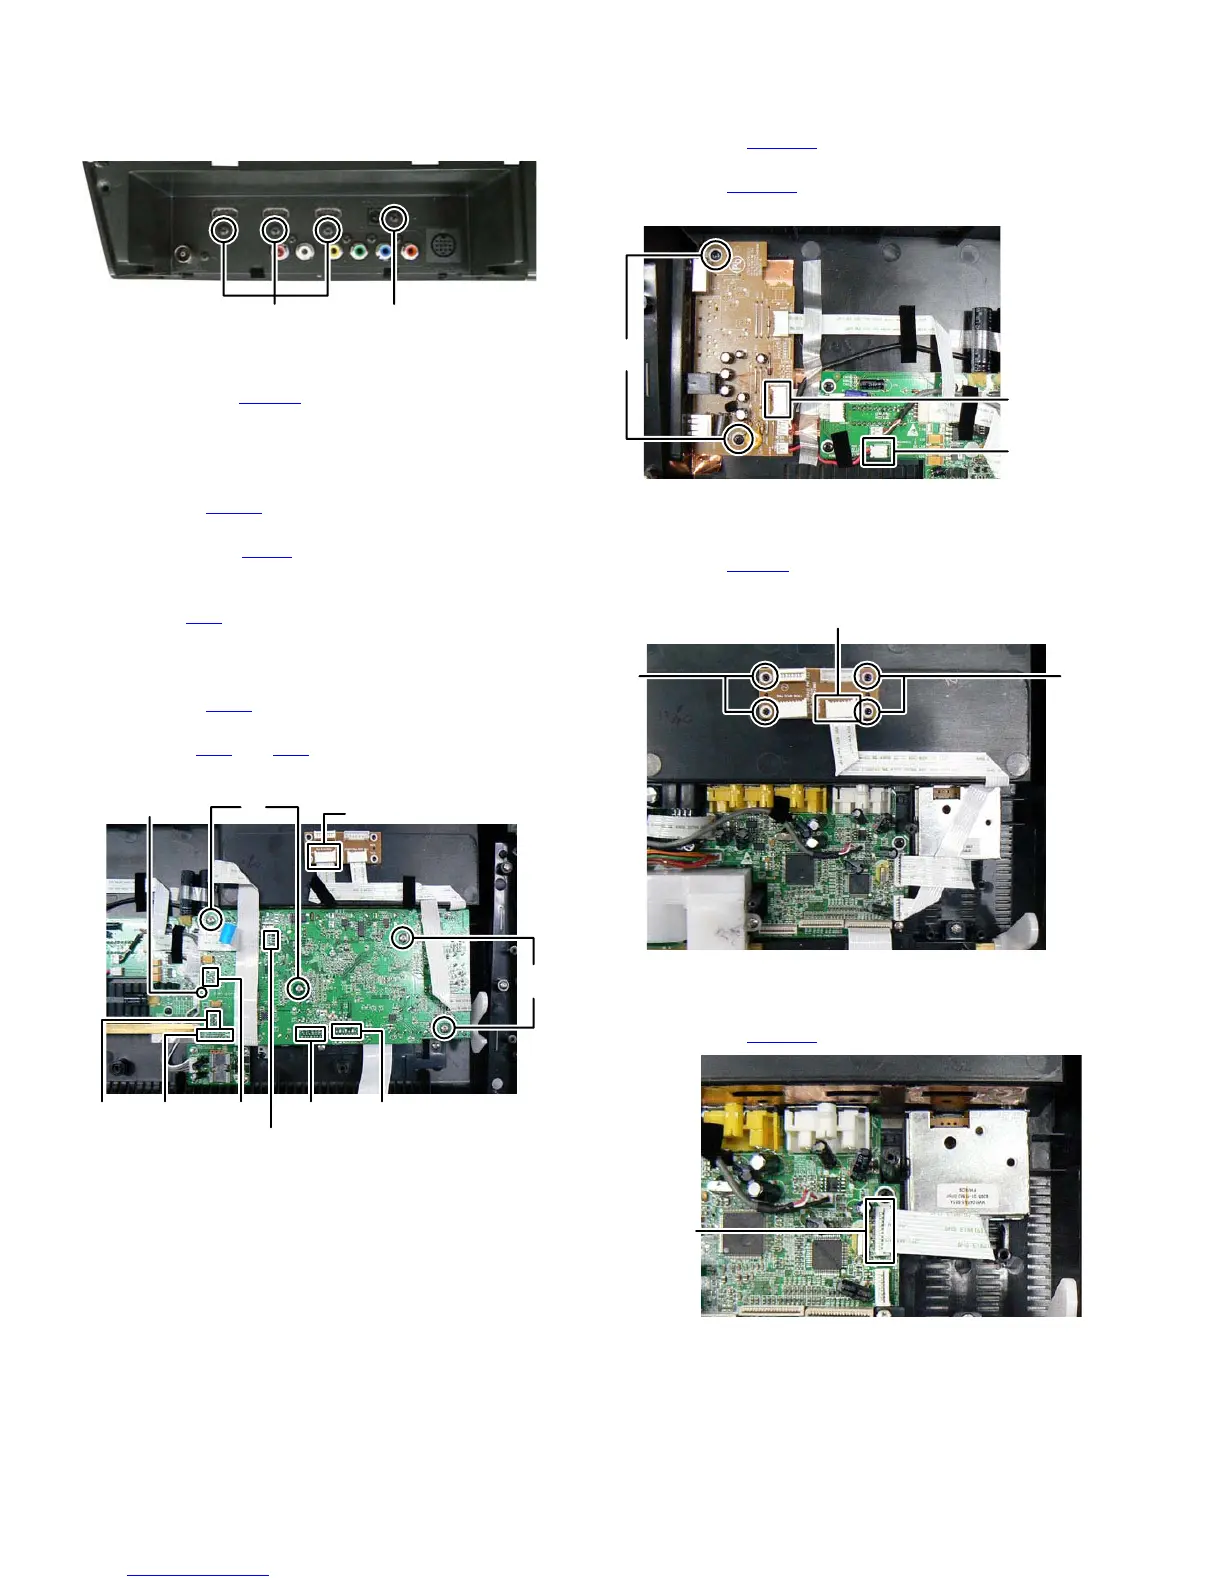
3.1.5 Removing the DVD mechanism (See Fig.7, 8, 9)
(1) Remove the three screws G and one screw H attaching the
DVD MPEG board. (See Fig.7)
Fig.7
(2) Disconnect the card wire from DVD MPEG board connect-
ed to connector SCON3
of the UP GRADE board. (See
Fig.8)
(3) Remove the four screws J attaching the DVD MPEG
board. (See Fig.8)
(4) Disconnect the connector wire from Main board connected
to connector CN100
of the DVD MPEG board. (See Fig.8)
(5) Disconnect the connector wire from DVCC board connect-
ed to connector CON1 of the DVD MPEG board. (See
Fig.8)
(6) Disconnect the card wire from Main board connected to
connector CN2
of the DVD MPEG board. (See Fig.8)
(7) Disconnect the earth wire from Main board connected to
post pin of the Main board. (see Fig.8)
(8) Disconnect the connector wire from USB board connected
to connector CN82
of the DVD MPEG board. (See Fig.8)
(9) Disconnect the card wires from Main board connected to
connectors CN8 and CN9 of the DVD MPEG board. (See
Fig.8)
Fig.8
3.1.6 Removing the USB board (See Fig.9)
(1) Disconnect the connector wire from USB board connected
to connector CON103
of the Main board.
(2) Disconnect the card wire from Main board connected to
connector CON504
of the USB board.
(3) Remove the two screws K attaching the USB board.
Fig.9
3.1.7 Removing the UP GRADE board (See Fig.10)
(1) Disconnect the card wire from Main board connected to
connector SCON1
of the UPGRADE board.
(2) Remove the four screws L attaching the UP GRADE board.
Fig.10
3.1.8 Removing the FM tuner module (See Fig.11, 12)
(1) Disconnect the card wire from FM tuner module connected
to connector CON603
of the Main board. (See Fig.11)
Fig.11
G H
SCON3
GND3
CN100 CN2 CN8 CN9
CN82
CON1
J
J
CON103
CON504
K
L
L
SCON1
CON603
 Loading...