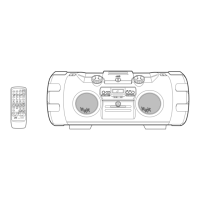
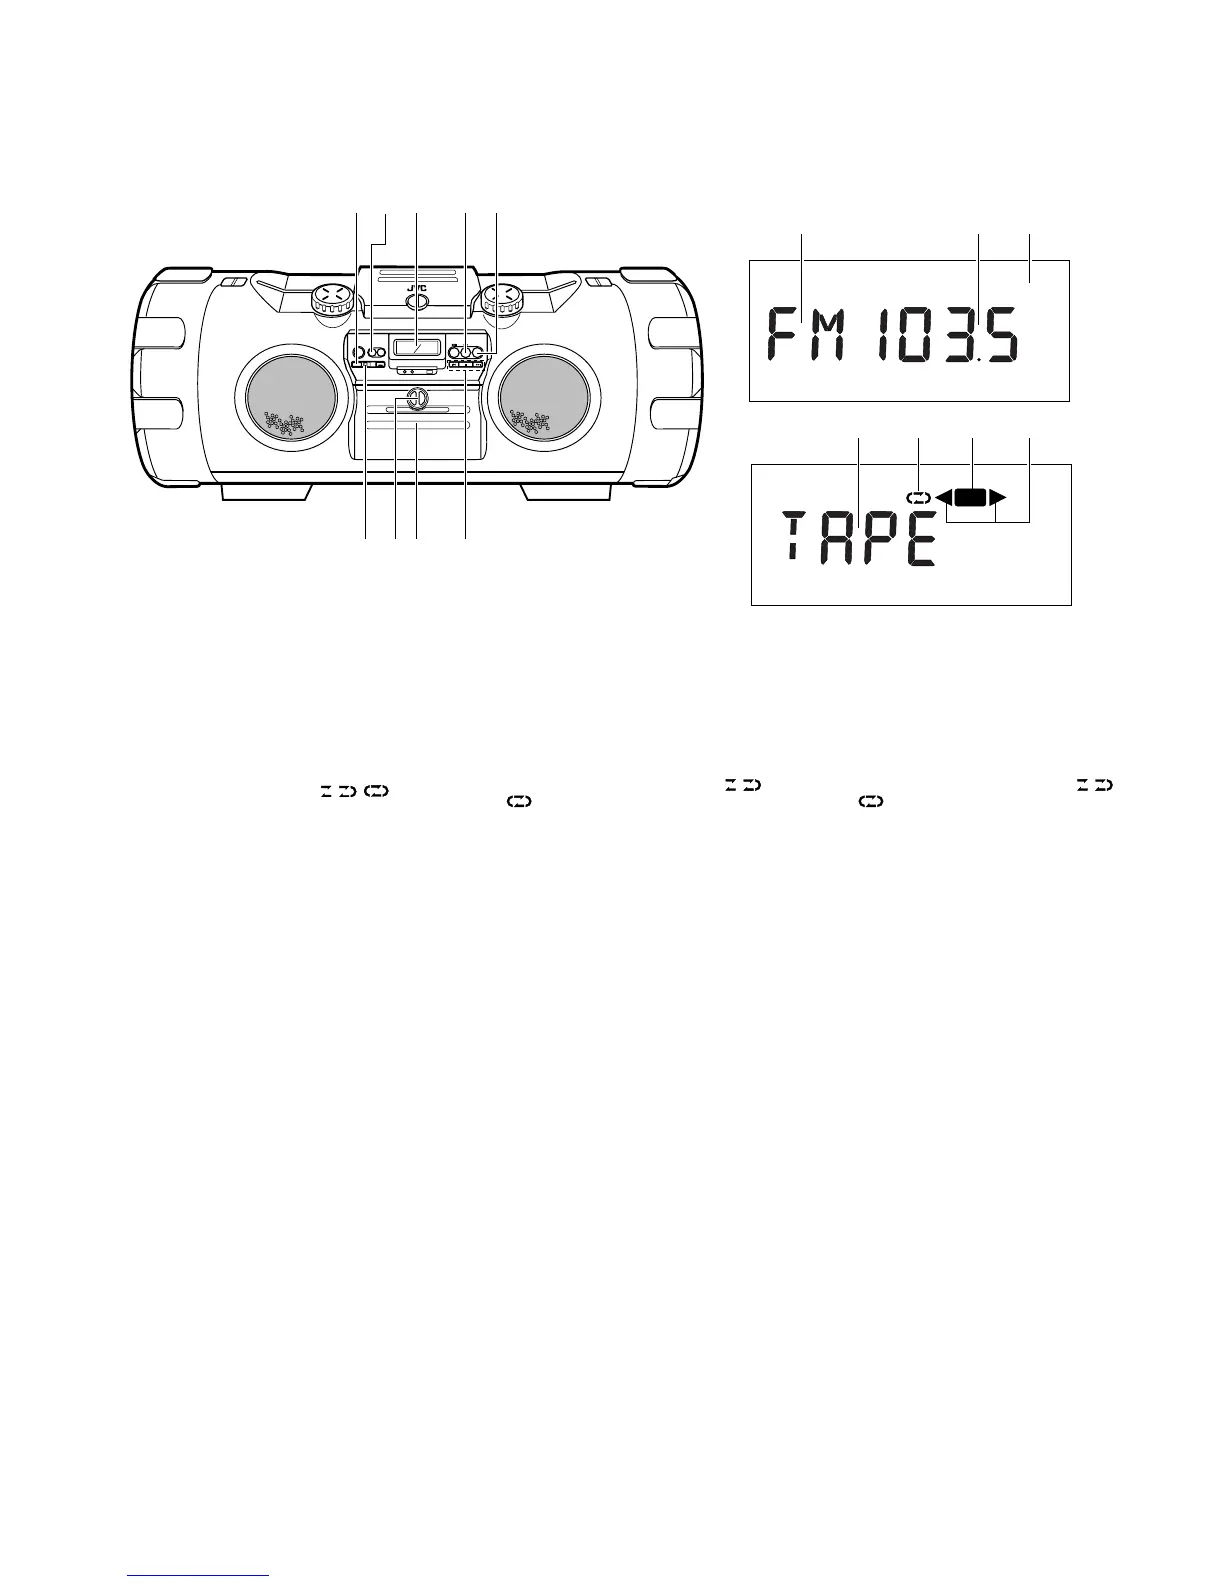
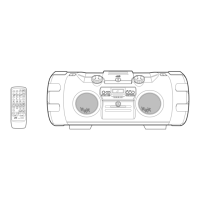
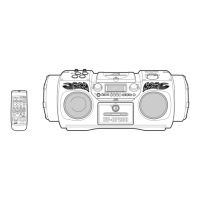
12
Tuner/Deck section Sección sintonizador/platina Section syntoniseur/platine
1
PRESET TUNING/BEAT CUT button
2 AUX button
3 Display window
1 Band display
2 Radio frequency display
3 Mode display during FM broadcast
(STEREO/MONO)
4 Tape display
5 Reverse mode indicator ( / / )
6 Recording indicator (REC)
7 Tape direction indicators (2/3)
4 TAPE 23 button
Press to select the tape mode.
Press to select the tape direction.
Press to turn the power on.
5 TUNER BAND/FM mode button
Press to select the tuner mode.
Press to select the band.
Press to turn the power on.
6 ONE TOUCH REC button
7 LOCK/RELEASE knob
LOCK: To secure the cassette holder.
RELEASE: To open the cassette holder.
8 Cassette holder
9 MULTI CONTROL button
(When the mode is set to TAPE)
4 REW : Press to rewind the tape.
7 STOP : Press to stop the tape.
¢ FF: Press to fast-forward the tape.
(When the mode is set to TUNER)
4/¢ : Auto tuning/Manual tuning.
MHz
STEREO
MONO
REC
12
3
3
4
5
6
78 9
1
2
3
456
7
1
Touche PRESET TUNING/BEAT CUT
2
Touche AUX
3
Fenêtre d’affichage
1
Affichage de la gamme
2
Affichage de la fréquence radio
3
Affichage du mode pendant une
émission FM (STEREO/MONO)
4
Affichage de la bande
5
Indicateur de mode d’inversion ( / /
)
6
Indicateur d’enregistrement (REC)
7
Indicateurs de sens de défilement de la
bande (
2
/
3
)
4
Touche TAPE
23
Appuyer pour sélectionner le mode
cassette.
Appuyer pour sélectionner le sens de
défilement de la bande.
Appuyer pour mettre l’alimentation en
marche.
5
Touche de mode TUNER BAND/FM
Appuyer pour sélectionner le mode
syntoniseur.
Appuyer pour sélectionner la gamme.
Appuyer pour mettre l’alimentation en
marche.
6
Touche ONE TOUCH REC
7
Bouton LOCK/RELEASE
LOCK: Pour bloquer le porte cassette.
RELEASE: Pour ouvrir le porte cassette.
8
Porte cassette
9
Touche MULTI CONTROL
(Lorsque le mode est réglé sur TAPE)
4
REW: Appuyer pour rebobiner la
bande.
7
STOP: Appuyer pour arrêter la
bande.
¢
FF: Appuyer pour l’avance rapide
de la bande
(Lorsque le mode est réglé sur TUNER)
4
/
¢
: Syntonisation automatique/
syntonisation manuelle.
1 Botón PRESET TUNING/BEAT CUT
2 Botón AUX
3 Ventanilla de indicación
1 Indicación de banda
2 Indicación de frecuencia de radio
3 Indicación de modo durante una
radiodifusión de FM (STEREO/MONO)
4 Indicación de cinta
5 Indicador de modo de inversión ( / /
)
6 Indicador de grabación (REC)
7 Indicadores de sentido de la cinta (2/3)
4 Botón TAPE 23
Presione para seleccionar el modo de cinta.
Presione para seleccionar el sentido de la
cinta.
Presione para conectar la alimentación
5 Botón de modo TUNER BAND/FM
Presione para seleccionar el modo de
sintonizador.
Presione para seleccionar la banda.
Presione para conectar la alimentación.
6 Botón ONE TOUCH REC
7 Perilla LOCK/RELEASE
LOCK: Para cerrar el portacassette
RELEASE: Para abrir el portacassette
8 Portacassette
9 Botón MULTI CONTROL
(Cuando el modo está ajustado en TAPE)
4 REW: Presione para rebobinar la
cinta.
7 STOP: Presione para parar la cinta.
¢ FF: Presione para avanzar
rápidamente la cinta.
(Cuando el modo está ajustado en TUNER)
4/¢: Sintonización automática/
manual