Do you have a question about the JVC RD-D328B and is the answer not in the manual?
The unit must be placed on a flat stable surface and should not be subjected to vibrations. Do not place on sloped or unstable surfaces.
Avoid extreme temperatures. Prevent risk of electric shock or fire hazard due to overheating. Never place naked flames near the unit.
Always disconnect the unit from the mains supply before moving. Batteries used in the remote control are easily swallowed by young children.
Children should be supervised. Class 1 Laser Product may result in hazardous radiation exposure. Do not let children push objects into openings.
Ensure unit is unplugged before cleaning. Wipe with a moist, lint-free cloth. Do not touch playback side of disc. Do not store discs in humid or dusty places.
To reduce the risk of electric shock, do not remove screws. The unit contains no user-serviceable parts. Leave maintenance to qualified personnel.
Remove all items from the packaging. Retain the packaging. Dispose of packaging according to local regulations.
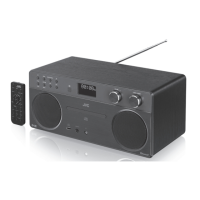
The following items are included: Main Unit, Mains Cable, 3.5mm to 3.5mm stereo audio cable, Remote Control, Instruction Manual.
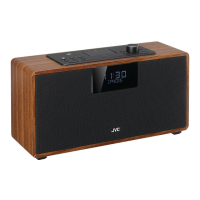
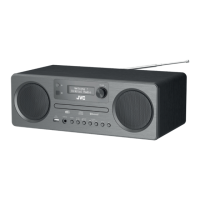
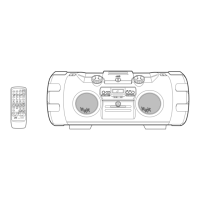
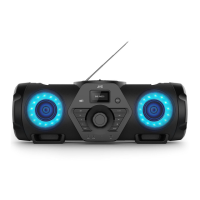
Identifies the Display and Speaker on the front of the unit.
Details the NFC Sensor, USB Socket, Docking station, AUX Socket, EQ Button, Aerial, Preset Buttons, Standby, Source, CD Compartment, and Volume Dial.
Identifies the AC~ Socket on the bottom of the unit.
Details all buttons on the remote control for power, mode selection, playback, volume, and settings.
Remove the protective tab to activate the remote control battery for first-time use.
Instructions for pulling out the battery tray, removing the old battery, and inserting a new CR2025 battery with correct polarity.
Advice on handling the remote control to prevent damage or injury, such as not dropping it or spilling liquids.
The remote control sensor operates up to 5 metres away within a 40° arc, varying with room brightness.
Connect auxiliary equipment to the AUX socket using a 3.5mm stereo audio cable.
Extend aerial, connect mains cable to unit and socket. Clock synchronizes automatically in STANDBY mode.
Extend aerial for DAB. Hook power cable into the groove at the bottom of the unit for tidy cable management.
The USB socket charges mobile devices (MP3, phone) with 5V DC at up to 1.3A. Use a USB cable (not included).
Use the STANDBY button on the unit or remote to switch the unit on or back to STANDBY mode.
Press SOURCE button to cycle through DAB, FM, BT, DISC, USB, DOCK, AUX. Use direct buttons on remote for faster selection.
Use VOLUME dial or buttons to adjust volume. Use EQ button for presets (CLASSIC, ROCK, JAZZ, FLAT, POP) and BASS button for Bass ON/OFF.
Clock can auto-set using DAB/FM signals. Leave unit on DAB or FM for a period for synchronization.
Press the DIMMER button repeatedly to select the LCD light level of the display.
In STANDBY mode, use CLOCK button and navigation buttons to set hour and minute digits.
Press and hold MENU to select ON/OFF for automatic time synchronization. Manual setting turns auto-sync OFF.
Set TIMER 1 or TIMER 2 with specified time, source (BUZZER, DISC, etc.), and volume level.
Select SET ON to activate the timer alarm. Press any button to enter SNOOZE mode when the timer rings.
Use the sleep timer to turn the system off after a set number of minutes (e.g., 15, 30, 60, 90) in play mode.
Reset the unit to factory settings by selecting SYSTEM > RESET > Y in FM or DAB mode.
Check the software version by navigating through MENU > SYSTEM > SW VER in FM or DAB mode.
Extend aerial before selecting DAB mode for an automatic scan of DAB radio stations in your area.
Initiate a FULL SCAN to search all DAB Band III channels. The first found station is automatically selected.
Manually tune DAB stations by selecting MANUAL and choosing stations from 5A to 13F.
Set DRC to adjust loud/quiet sounds. Store up to 3 favourite stations using Preset 1-3 buttons.
Recall stored preset stations by pressing the PRESET 1, 2, or 3 button.
Press INFO to cycle through display modes like DLS, Programme Type, Multiplex Name/Frequency, Signal Error, Bit Rate, Time, and Date.
View signal error, signal strength via a slide bar, and digital audio bit rate, codec, and channel configuration.
Perform auto scan by holding the track skip button. Manually tune frequency by repeatedly pressing the track skip button.
Choose to tune Strong Stations Only or All Stations. Select STEREO or MONO audio for clearer reception.
Store up to 3 favourite stations by pressing and holding the PRESET 1, 2, or 3 buttons for 2 seconds.
Recall stored preset stations by pressing the PRESET 1, 2, or 3 buttons.
Press INFO to cycle through display modes: Radio Text, Programme Type, Station Name/Frequency, Audio Mode, Clock, and Date.
View broadcast messages (Radio Text) and programme style/genre (Programme Type).
Display station name/frequency and the current audio mode (STEREO or MONO).
Supports CD-R, CD-RW (Audio/MP3), and AUDIO-CD formats.
Place CD in slot, unit reads and plays automatically. Use II/PAIR to pause/resume, MENU to stop, EJECT to remove.
Skip tracks using ◄ or ►►I buttons. Press and hold to search for a position.
Control track repeat (ONE, ALB, ALL), random playback (SHUFFLE), and intro playback (INTRO/SCAN).
Use INFO to view track number, elapsed time, remaining time. MP3 with ID3 shows filename scrolling.
Programme up to 20 tracks in desired order. Press PROG to enter MEMORY mode and select tracks.
Press ►II/PAIR to start programme play. Press I to stop, or ■ twice to clear the programme.
Lists compatible iPhone, iPod, and iPad models. Note: Not compatible with iPad Pro 12.9-inch.
Insert device into dock. Unit identifies and charges device. Playback starts automatically or manually.
Control playback using unit buttons (►II/PAIR, ◄►►I, VOL+/-). Menu navigation requires using the device itself.
Pair unit with Bluetooth device by selecting BT mode, activating device's Bluetooth, and entering '0000' if prompted.
Switch to another function or disable Bluetooth on the device. Press and hold II/PAIR to disconnect.
Activate NFC on mobile device and place near unit's NFC sensor to pair/disconnect Bluetooth connection.
Connect USB storage device to enjoy stored music. Select USB source and use playback controls.
Supports MP3 format only. Compatible with USB devices up to 32 GB. Compatibility with all devices is not guaranteed.
Connect external audio device to the AUX socket using a 3.5mm stereo audio cable. Operate audio device directly for playback.
Ensure unit is unplugged. Wipe case with a slightly moist, lint-free cloth. Do not use abrasive fluids or sprays.
Do not touch playback side of disc. Clean discs from centre outwards with a dry or slightly moist cloth. Avoid solvents.
Do not store discs in direct sunlight, near heat sources, or in humid/dusty environments. Avoid storing discs vertically or stacked.
Solutions for common issues like no power, remote control not functioning, no sound, or unit unresponsiveness.
Troubleshooting steps for discs not playing, skipping, or unit errors, including checking mode, disc cleanliness, and secure placement.
Tips for poor DAB/FM reception, including extending aerial, checking for interference, and adjusting position.
Ensure Bluetooth function is activated on your device and that the unit has been successfully paired.
Provides power requirements (AC220-240V), consumption (30W), output power (10W x 2), and frequency response (45Hz-20KHz).
Details Bluetooth version (V4.2), USB charging specs (5V 2.1A Max), and frequency bands (2402-2480 MHz).
Lists unit dimensions (340x108x182 mm), net weight (2.4 kg), and tuning ranges for FM and DAB.
Provides contact details for general information, hints, tips, and support calls for UK and Ireland.
Instructions on responsible disposal of the product and its packaging as household waste.
Lists trademarks for Bluetooth, Apple products (iPod, iPhone, iPad), and other registered marks.
| Brand | JVC |
|---|---|
| Model | RD-D328B |
| Category | Stereo System |
| Language | English |