1-14 (No.MB294)
3.2.4 Removing the front board
(See Figs.2 and 3)
• Prior to performing the following procedures, remove the oper-
ation board.
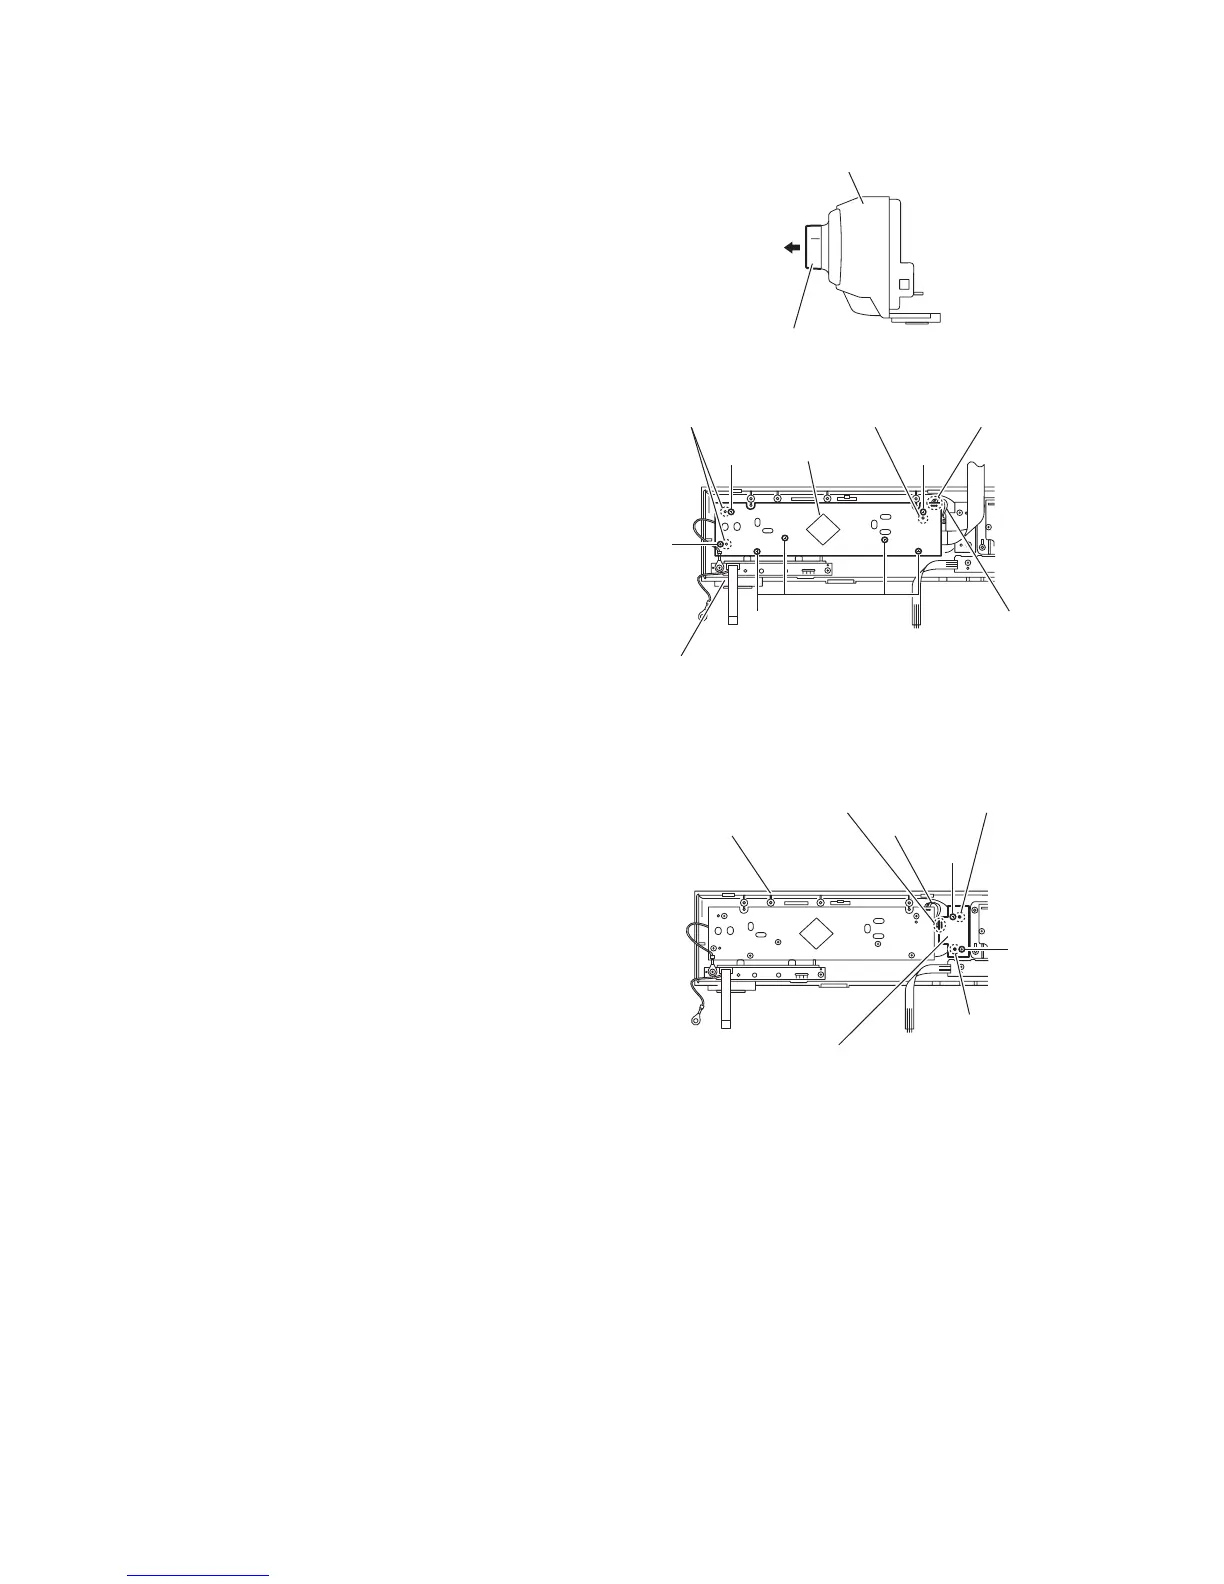
(1) From the front side of the front panel assembly, pull out the
volume knob in the direction of the arrow. (See Fig.2)
(2) From the inside of the front panel assembly, remove the
seven screws D attaching the front board. (See Fig.3)
Reference:
When attaching the front board, align the projections d of
the front panel assembly to the holes of the front board.
(See Fig.3)
(3) Take out the front board and remove the solder from the
soldered point e to remove the parallel wire. (See Fig.3)
Fig.2
Fig.3
3.2.5 Removing the power key board
(See Fig.4)
(1) From the inside of the front panel assembly, remove the
two screws E attaching the power key board.
Reference:
When attaching the power key board, align the projec-
tions f of the front panel assembly to the holes of the
power key board.
(2) Take out the power key board and remove the solder from
the soldered point g to remove the parallel wire.
Fig.4
Front panel assembly
Volume knob
D
Front panel assembly
D
D
D
Projections d Projection d Solder point c
Parallel wire
Front board
Front panel assembly Parallel wire
E
E
Projection
Solder poitn g
Power key board
Projection f
 Loading...


