1-14 (No.MB665<Rev.004>)
3.2 CD mechanism assembly
• Remove the CD mechanism assembly from main body.
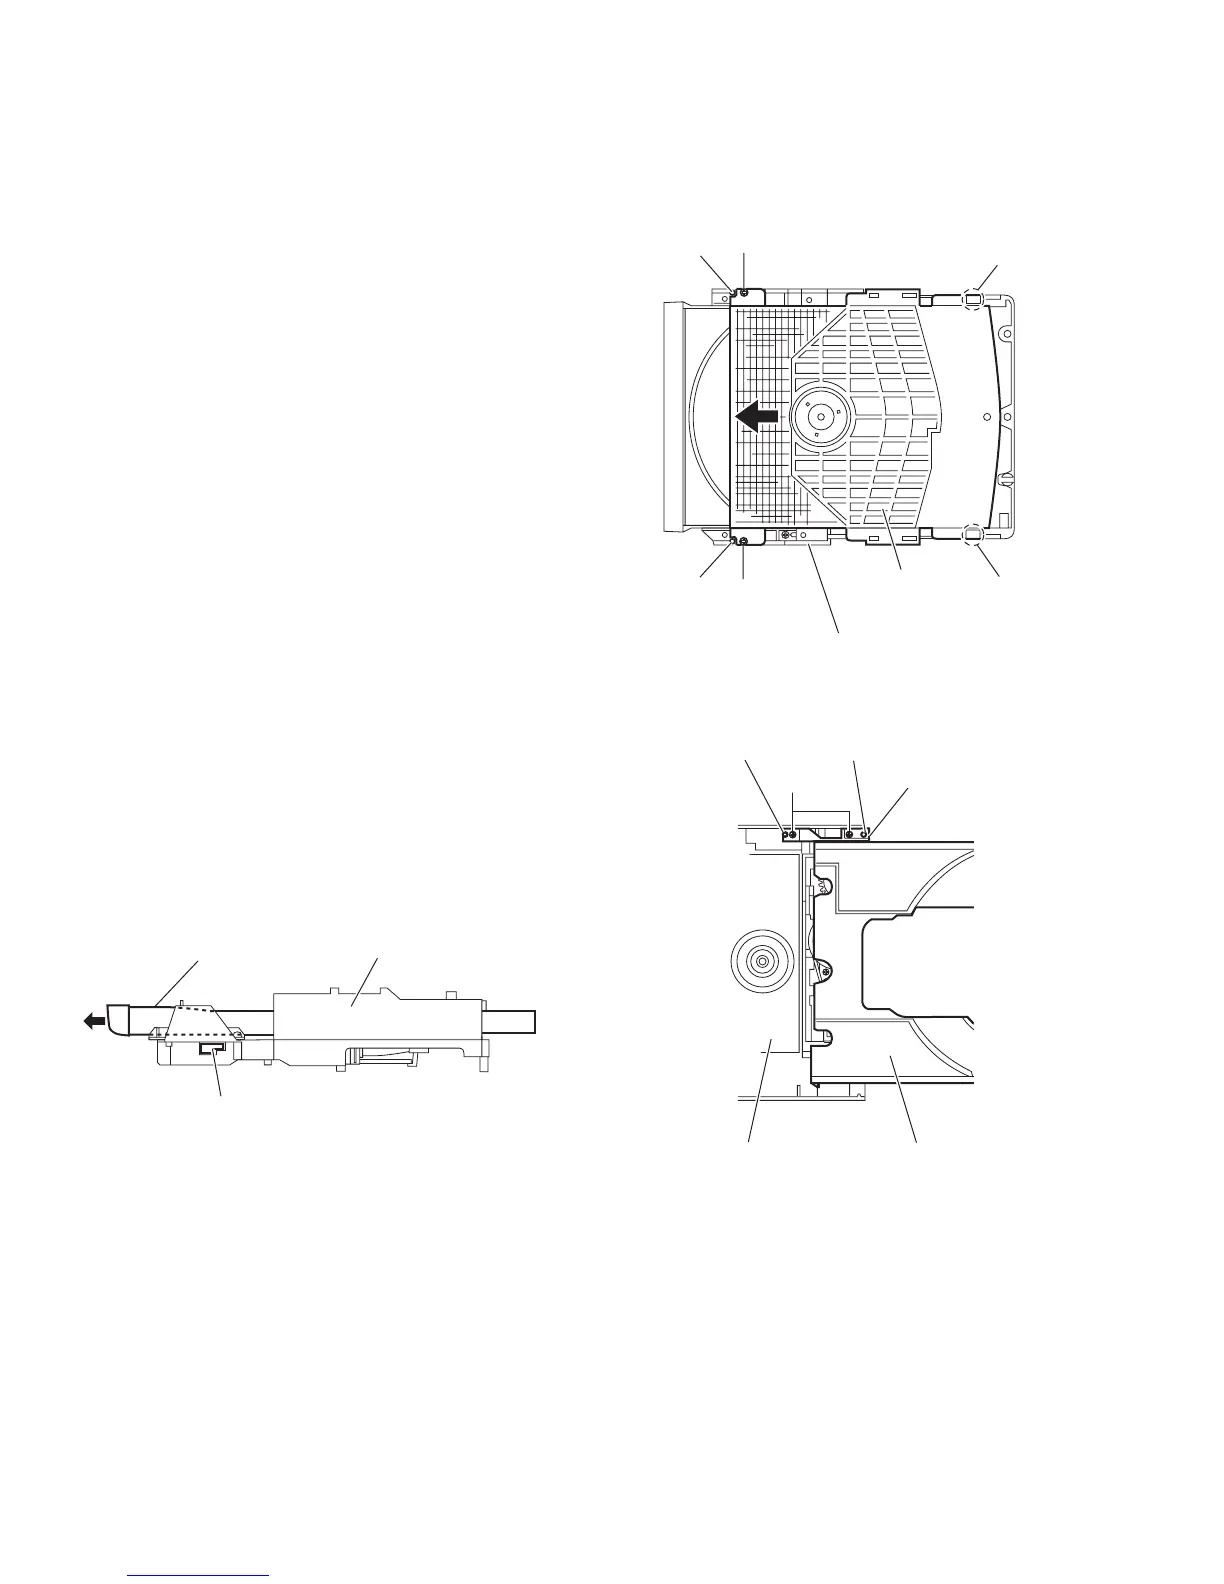
3.2.1 Removing the CD cover
(See Fig.1)
(1) Remove the two screws A attaching the CD cover from bot-
tom side of CD mechanism assembly.
(2) Lift up the CD cover from disengage boss a of the CD
mechanism assembly.
(3) Slide the CD cover to direction of the arrow and remove the
CD cover from fixing part of b.
(4) Remove the CD cover.
Fig.1
3.2.2 Removing the tray assembly
(See Fig.2 and 3)
• Remove the CD cover.
(1) Press slide cam and pull out the tray assembly to direction
of the arrow from right side of CD mechanism assembly.
(See Fig.2)
(2) Remove the two screws B attaching the tray assembly
from upper side of CD mechanism. (See Fig.3)
(3) Remove the bussing of the tray assembly from boss c of
the CD mechanism assembly and remove the tray assem-
bly. (See Fig.3)
Fig.2
Fig.3
A
A
CD cover
CD mechanism assembly
Boss a
Boss a
Fixing part b
Fixing part b
Tray assembly CD mechanism assembly
Slide cam
Bussing
Boss c
Tray assemblyCD mechanism assembly
Boss c
B
 Loading...