UX-A7DVD
(No.22013)1-19
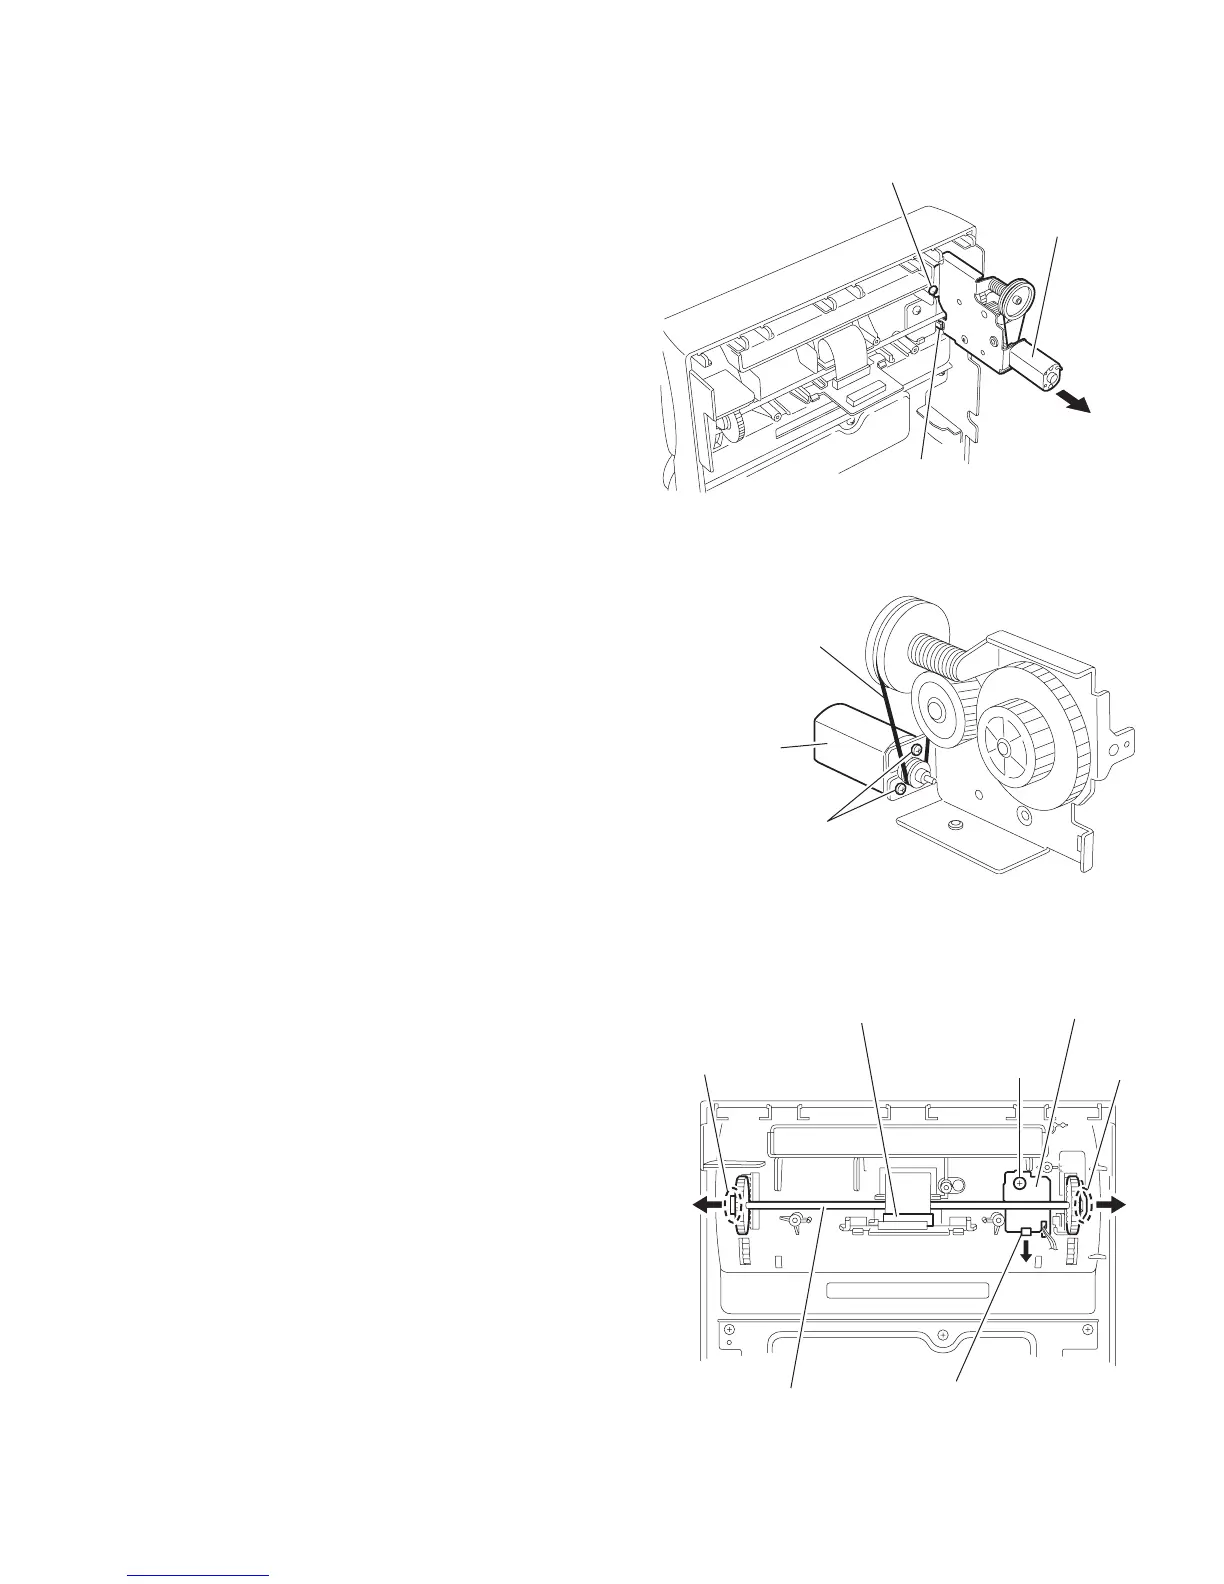
2.2.5 Removing the drive motor assembly
(See Fig.37,38,40)
(1) Remove the two screws Z and the screw AA attaching the
bracket (2) on the back of the front panel.
(2) Remove the screw AB attaching the drive motor assem-
bly. Release the joint tab i and pull out the drive motor as-
sembly.
Fig.40
2.2.6 Removing the belt / drive motor
(See Fig.41)
• Prior to performing the following procedure, remove the drive
motor assembly.
(1) Remove the belt from the pulley.
(2) Remove the two screws AC attaching the drive motor.
Fig.41
2.2.7 Removing the switch board.
(See Fig.42)
• Prior to performing the following procedure, remove the brack-
et (2) / drive motor assembly.
(1) Disconnect the card wire from connector CN441 on the FL
connection board (Do not fold down the card wire).
(2) Release the joint j and k in order on the right and left sides
of the shaft gear.
(3) Remove the screw AD attaching the switch board and re-
lease the joint tab k.
Fig.42
AB
i
Drive motor assembly
Belt
Drive motor
AC
AD
kj
Shaft gear
FL connection board
CN441
Switch board
Tab k
 Loading...