EasyManuals Logo

JVC UX-P30 Series Service Manual

JVC UX-P30 Series
59 pages
To Next Page IconTo Next Page
To Previous Page IconTo Previous Page
Page #11 background imageLoading...
Page #11 background image
(No.MB049)1-11
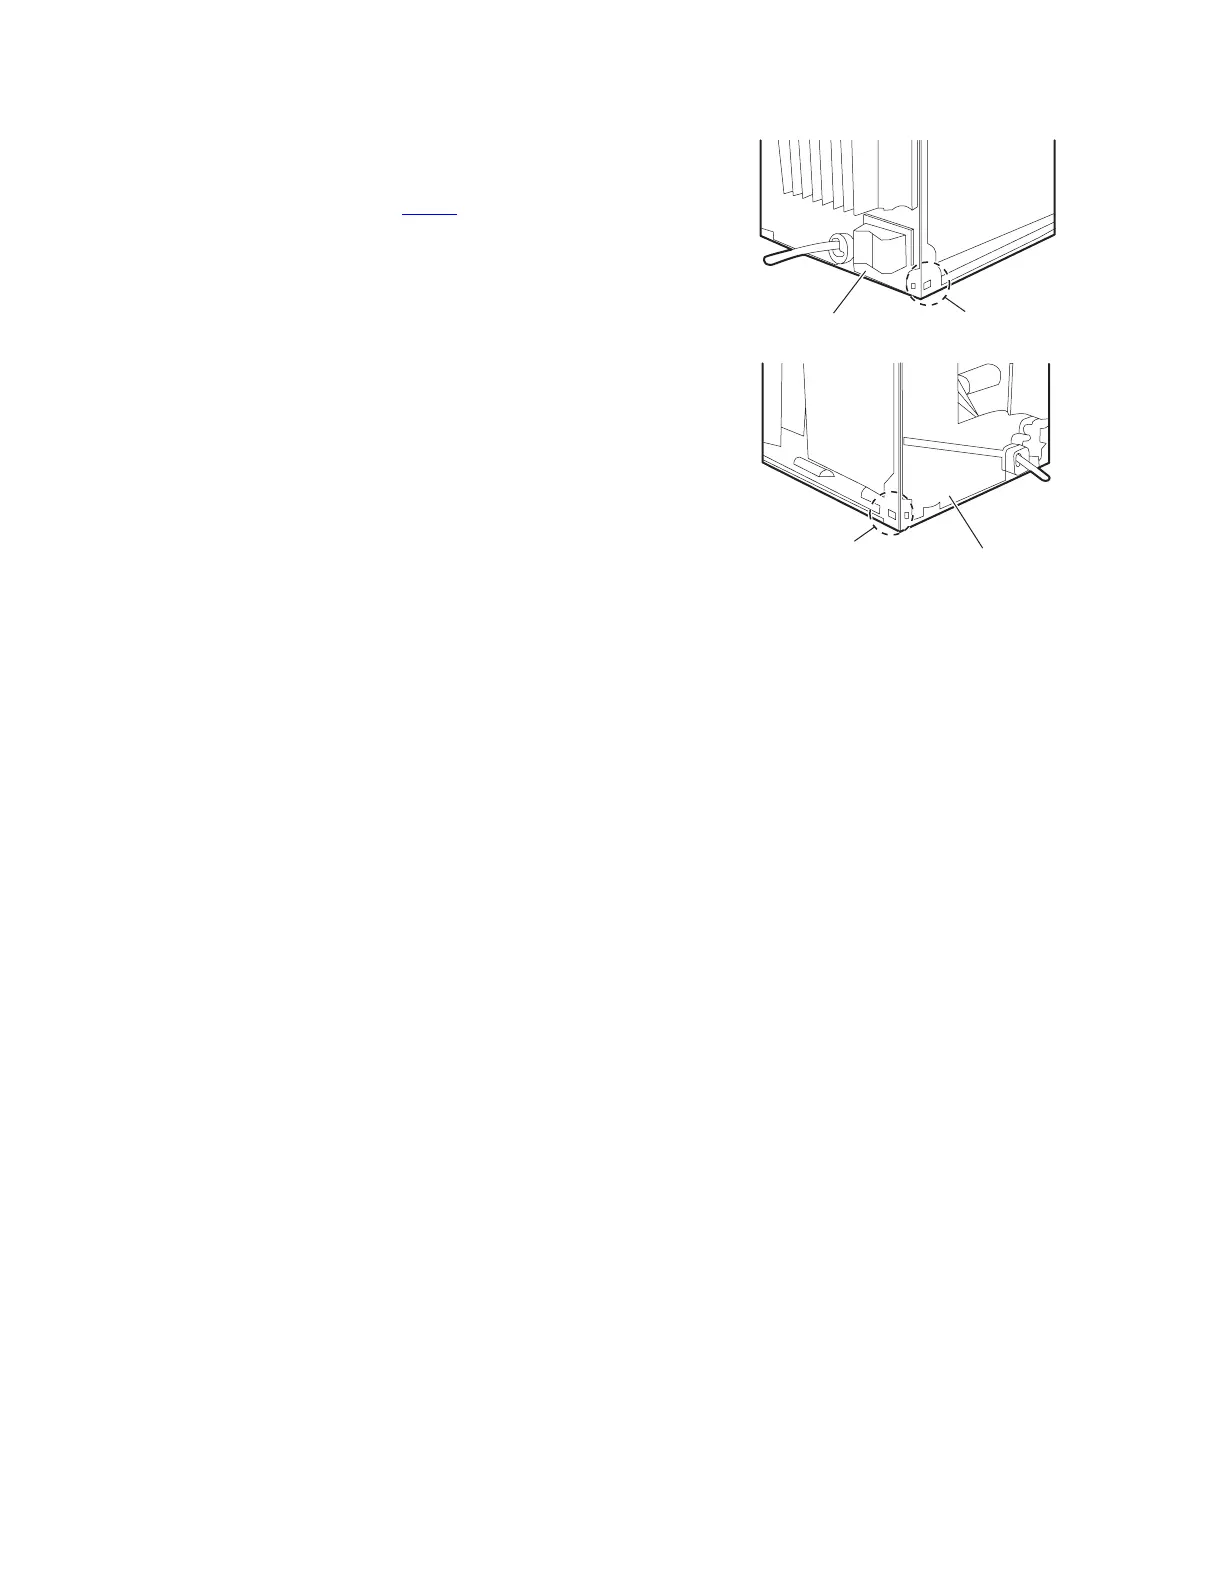
3.1.5 Remove the rear panel
(See Fig.8 to 10)
Prior to performing the following procedure, remove the metal
cover, rear cover and the CD mechanism assembly.
(1) Remove the five screws G attaching the rear panel.
(2) Disconnect the card wire from CN902
on the main board.
(3) Disengage the lower two joints b on each side of the rear
panel using a screwdriver and remove the rear panel
backward (The tuner board and the fan will be also
detached.Remove them as needed).
Fig.9
Fig.10
Joint b
Rear panel
Rear panel
Joint b

Other manuals for JVC UX-P30 Series

Questions and Answers:

Question and Answer IconNeed help?

Do you have a question about the JVC UX-P30 Series and is the answer not in the manual?

JVC UX-P30 Series Specifications

General IconGeneral
BrandJVC
ModelUX-P30 Series
CategoryStereo System
LanguageEnglish

Related product manuals