
J
James ThomasJul 28, 2025
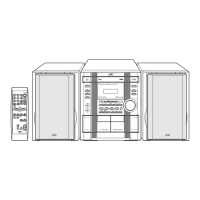
Why are there no remote control operations on my JVC XU-301 Stereo System?
- TtinasummersJul 28, 2025
If your JVC Stereo System remote control isn't working, first, replace the batteries with two new ones (R03 or size “AAA” or UM4). If that doesn't solve it, make sure the remote control sensor is not in direct sunlight or another strong light source. Try using the remote in a different location where it's not exposed to such intense light.