Do you have a question about the Kampa Rally and is the answer not in the manual?
Assemble flexible roof poles and steel legs, then slide awning beading through the caravan channel.
Insert and tension horizontal aluminium stretcher poles into retaining pockets and secure with tie tapes.
Peg rear corners vertically, then front corners diagonally for tension, adjusting leg height as needed.
Peg guylines to maintain tension without distorting shape, adjusting with runners.
Pull rear sealing bumper pads towards the caravan for an improved seal, using optional rear upright pole set.
Slide the supplied draught skirt through the awning rail at the bottom of your caravan.
Factory-taped seams help prevent leaks; consider treating remaining seams with sealant.
Designed for light/moderate weather; take down in strong winds or snow; for occasional use only.
Prolonged sunlight weakens fabric; ensure adequate ventilation to manage condensation.
Do not cook in the awning or use naked flames; read fire precautions label.
Reverse setup, ensure parts are clean and dry before packing. Store aired and dry.
Wash with clean water and soft brush; do not use detergents. Protect poles from damage.
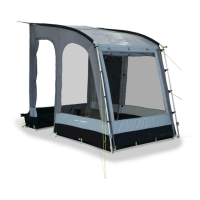
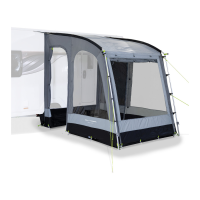
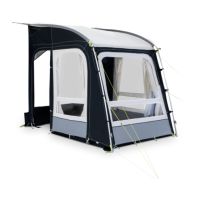
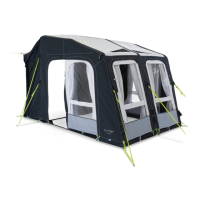
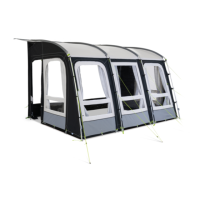
This document provides instructions for setting up, using, and maintaining a Kampa Rally Awning. The awning is designed to extend the living space of a caravan, offering a sheltered area for various activities.
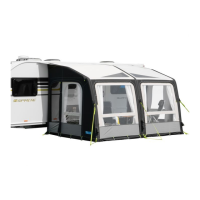
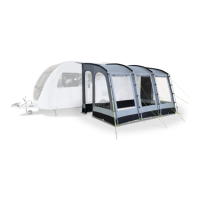
The primary function of the Kampa Rally Awning is to provide a temporary, sheltered outdoor space that attaches to a caravan. It serves as an extension of the caravan, offering protection from the elements and additional room for relaxation, dining, or storage. The awning is designed for occasional use during holidays and is suitable for light to moderate weather conditions. It is not intended for static, permanent, or commercial use.
Setting up the awning involves several steps to ensure stability and proper tension. The initial step is to choose a flat site, ideally protected from the wind, and position the awning with its doors facing away from the wind. It is recommended to lay a groundsheet or awning carpet before unpacking to protect the awning from dirt and damage.
The assembly process begins with identifying and separating the different parts. The flexible roof poles are shock-corded and slot together, with each pole fully inserted into its adjoining metal ferrule. The steel legs are spring-linked and also slot together, featuring an adjustable foot that should initially be in its lowest position.
To attach the awning to the caravan, the awning beading, located on the rear of the awning roof, is slid through the caravan awning channel until the awning is in the desired horizontal position on the caravan.
The flexible roof poles are then pushed into their respective pole sleeves, starting from one end of the awning. A steel leg is connected to the end of each roof pole, and the bottom of the leg is located onto a pin at the bottom of the awning. These pins are on adjustable webbing straps, which can be loosened for easier insertion and then tightened to tension the awning correctly. Plastic clips are then attached to the steel poles. Loosely guying out the two end poles can facilitate assembly.
Once the legs are assembled, two horizontal aluminium stretcher poles are inserted into retaining pockets at each end of the awning, one above the windows and another halfway up the roof. These poles are tensioned and secured with thumbscrews and tie tapes sewn into the roof.
For proper tensioning and sealing, all doors and entrances should be closed. The rear corners of the awning are pegged first, ensuring the awning wall is vertical and pulled slightly under the caravan to create a good seal. The pegging points offer a range of options to achieve tension without over-stressing the fabric. Subsequently, each front corner is pegged diagonally to create tension. The length of the legs may need adjustment. Intermediate pegging points are then secured, starting with those on either side of doorways, which should be cross-pegged. The goal is a taut awning with minimal creases, achieved by adjusting pegging and leg height as needed.
The awning comes with general-purpose wire pegs, suitable for many sites. However, different types of pegs may be required for various ground conditions, and these are available from retailers. For maximum effectiveness, pegs should be driven into the ground at a 45-degree angle away from the pegging point.
Pre-attached guylines are included and recommended for use at all times. These guylines should be pegged to tension the awning without distorting its shape and can be adjusted using runners. Suitable pegs should be used to secure the guylines.
Sealing bumper pads are sewn into the rear panels to create a seal between the caravan and awning. These pads are pulled towards the caravan using the rear pegging points. An optional rear upright pole set can further improve the seal; the top of each pole is inserted into a pocket in the top rear corner, adjusted for height to create tension, and then secured to the bumper pads with tie tapes.
A draught skirt is supplied and should be slid through the awning rail at the bottom of the caravan to prevent drafts.
The main seams of the awning are factory-taped to prevent leakage. However, depending on expectations or if taping is damaged, additional seam sealant may be necessary. Seam sealant can also be applied to areas where leaks have developed. McNett Seamsure is a recommended sealant.
Awning fabrics can be weakened by prolonged exposure to sunlight (UV degradation). While normal holiday use allows for long service, extended periods in strong sunlight will cause deterioration. In such cases, using a shaded site is advisable. UV degradation is not covered under the warranty, nor are awnings used on permanent sites, displays, or for commercial purposes.
Condensation can occur inside the awning due to the high proportion of synthetic materials and certain conditions. This is not a leak and can be improved by adequate ventilation. Condensation and its effects are not covered under the warranty.
For safety, cooking or using naked flames inside the awning is strictly prohibited. Users should read and understand the fire precautions label sewn inside the awning.
Dismantling involves reversing the set-up procedure. All parts should be clean before packing into the carry bag. If the awning is wet or damp, it must be fully dried as soon as possible to prevent mildew.
For care, awnings are best stored opened out, fully aired, and completely dry in a well-ventilated dry place. A wet or damp awning will quickly develop mildew. Dirty awnings can be cleaned with clean water and a soft brush; detergents should never be used, and scrubbing should be avoided.
Poles should be protected from damage and stored completely dry to prevent corrosion of the ferrules. Dynasteel poles can be coated with a light layer of petroleum jelly to protect them from corrosion, which must be completely removed before use. Damage due to improper use, wind damage, or neglect is not covered under the warranty. Any damage should be repaired promptly. Pole failures often result from incorrect use; ensure pole sections are fully inserted into adjoining poles and avoid over-stressing poles beyond their designed curve. Replacement poles are available from dealers.
Zips should be treated with care, using two hands to close and open, and never forced or trodden on.
It is strongly recommended to carry a comprehensive spares kit, including silicone waterproof spray, seam sealer, tape for repairing split poles, and spare guy ropes and pegs for extreme weather conditions.
Repairs to the flysheet should be made by a company recommended by Kampa or your supplying retailer.
| UV Protection | Yes |
|---|---|
| Type | Awning |
| Size | Various sizes available |
| Weight | Varies by size |
| Ventilation | Yes |
| Warranty | Manufacturer warranty included |