Assembly InstructionsWallaby II
13
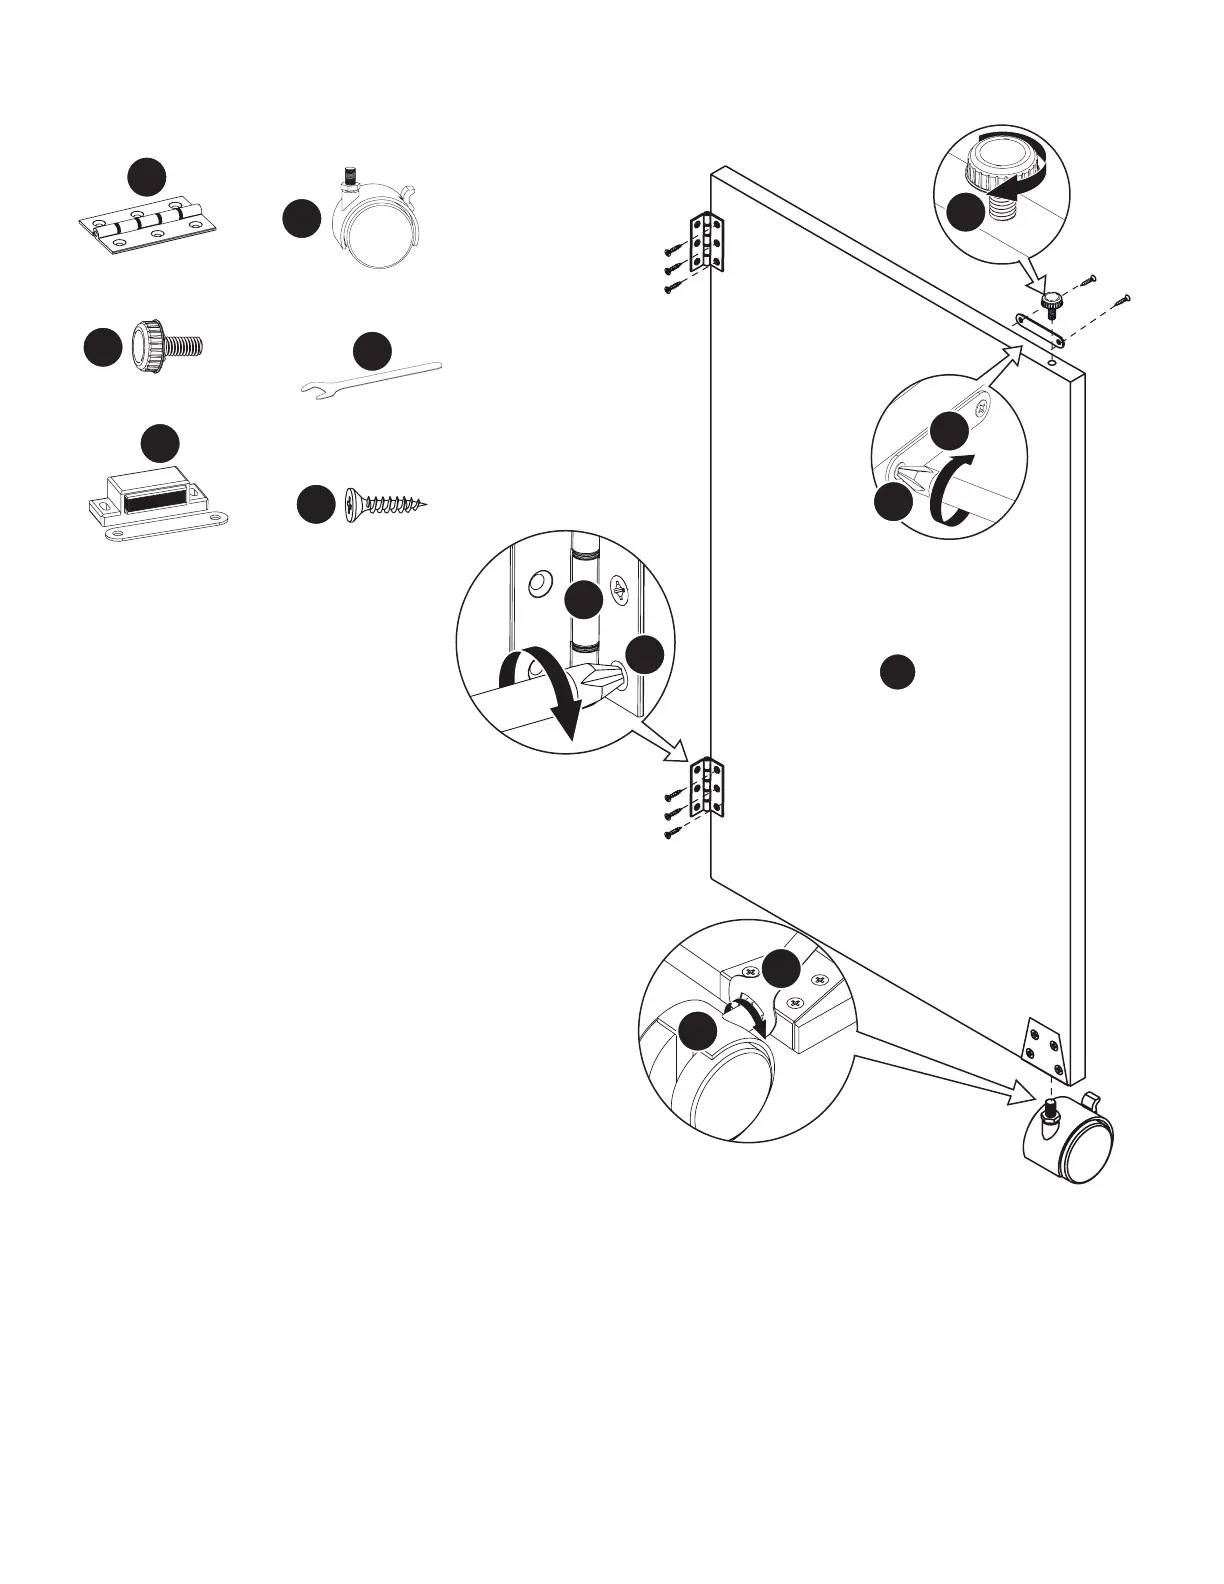
Step 4: Gate Leg and Quilt Panel
Butt Hinge x2
Alignment Pin x1
Catch Plate x1
Caster x1
14mm Wrench x1
Attach h1 Butt Hinges to Panel O1 with s1 Screws.
Insert the t1 Caster into the pre-installed caster bracket on
Panel O1 and tighten with r3 14mm Wrench.
Attach the m Catch Plate to Panel O1 using s1 Screws.
NOTE: The Catch Plate goes on the opposite side of Panel O1.
3.5x14 Screw x8