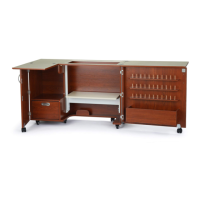
Assembly InstructionsWallaby II
12
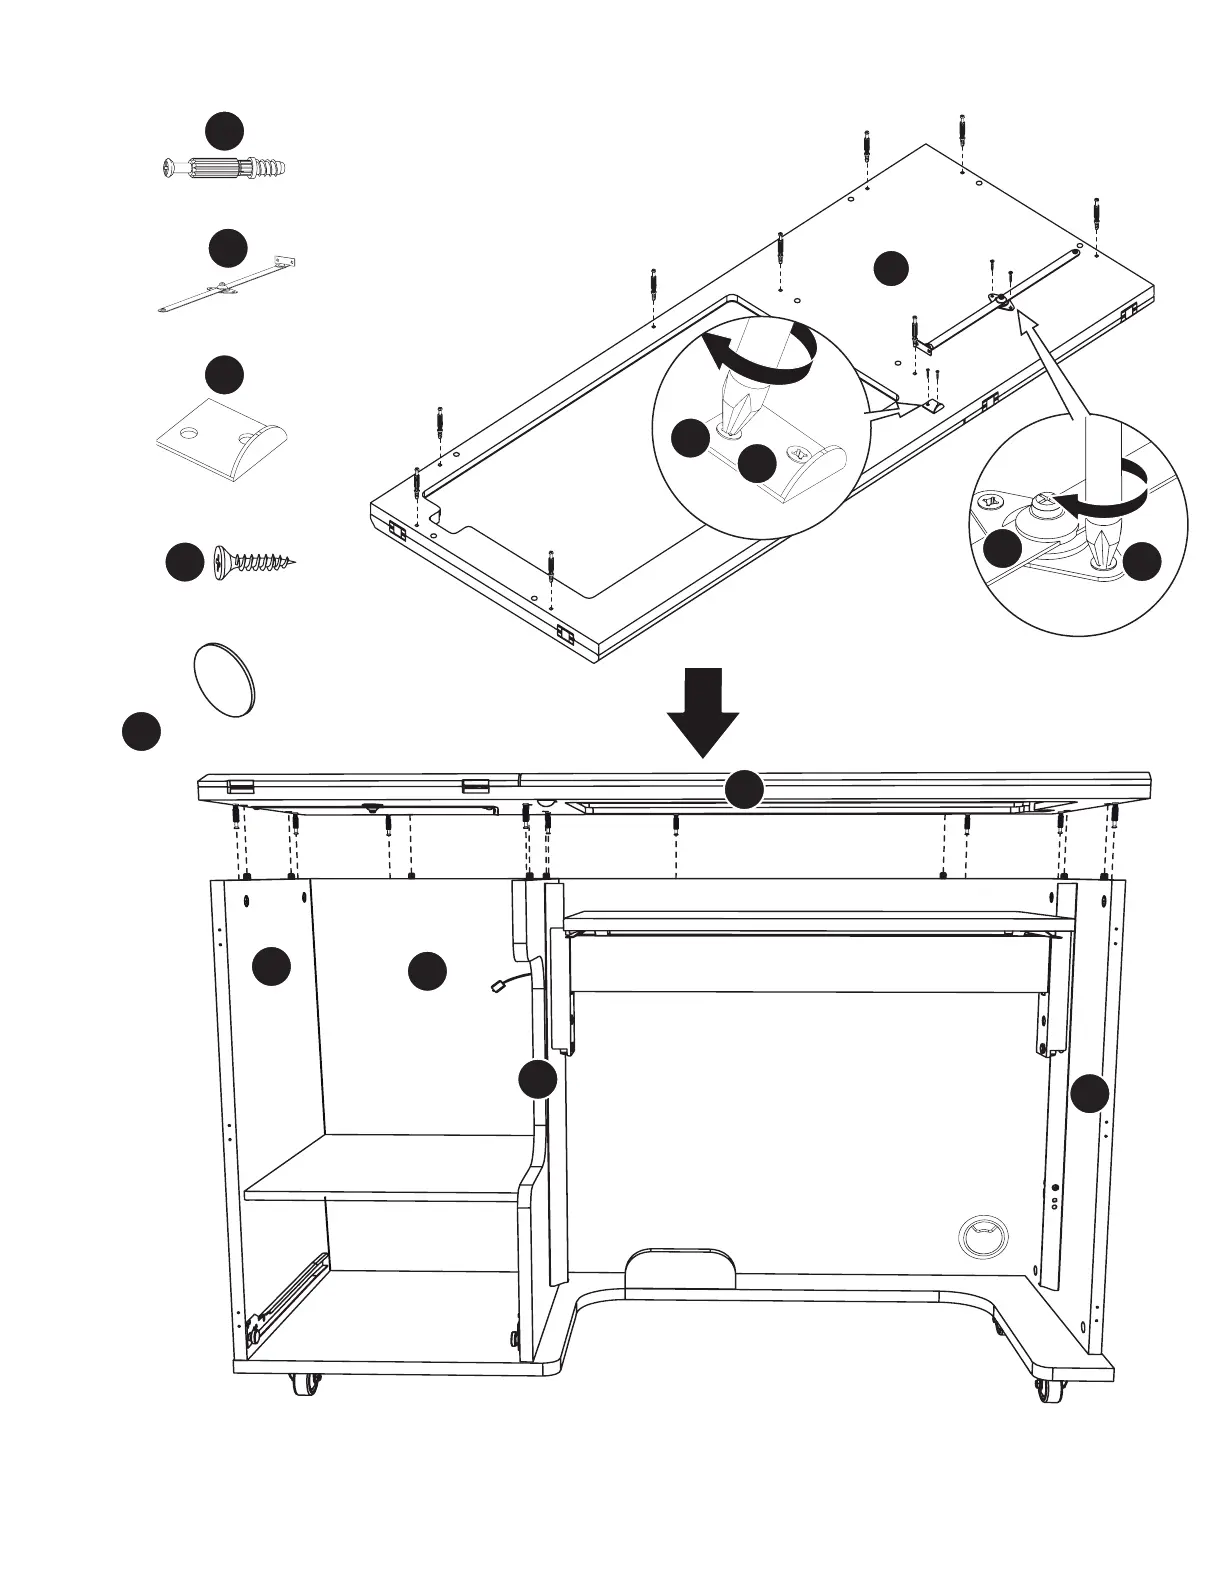
Step 4: Attaching the Top
6x35 Cam Bolt x9
Stay Arm x1
Lock Plate x1
3.5x14 Screw x4
Insert Cam Bolts into Panel A.
Attach Lock Plate to Panel A using s1 Screws,
making sure that the flat face of the Lock
Plate faces toward the front edge of Panel A.
Attach s Stay Arm with
s1 Screws.
Lower Panel A onto Panels X, D, Y and Z. Tighten Cam Locks and apply Cam Covers.
5
⁄
8
“ Cam Cover x9
Front Edge
A SPECIAL NOTE ABOUT USING TABLETOP LEAVES: Do NOT extend the leaves until you have support panels in
place. Doing so may damage the cabinet and void your warranty.