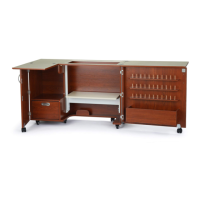
Assembly InstructionsWallaby II
16
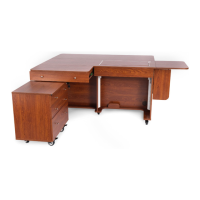
Step 5: Drawer
8x30 Dowel Pin x4
6x35 Cam Bolt x4
Install four c1 Cam
Bolts on Panel L
Insert two d1 Dowel Pins into the edge of Panel L1
Insert two d1 Dowel Pins into the edge of Panel L2
5
⁄
8
“ Cam Cover x4
Attach drawer front Panel L to side Panels L1 and L2 as
shown above. Tighten cams and apply covers.
Slide drawer bottom Panel L4 into the grooves on Panels
L, L1 and L2.