English 9
Filling with engine oil
Note
With new devices, there is no engine oil in the crank-
case of the engine, it is provided in a separate container.
ATTENTION
Risk of damage due to unsuitable oil or incorrect oil
level!
Operating the engine with unsuitable oil or too high or
too low an oil level can lead to increased wear and dam-
age.
Only fill with oil that complies with the specifications in
the operating instructions for the engine.
Ensure that the oil level is always within the designated
range between the MIN and MAX marks.
1. Fill the engine oil provided into the engine crank-
case using the funnel, see the operating instructions
for the engine.
Initial startup
Engine
Observe the safety instructions!
1. Before initial startup, read the operating instructions
for the engine and observe the safety instructions in
particular.
2. Check the general condition of the engine and at-
tachments, see the engine operating instructions.
3. Check the engine oil level and correct if necessary,
see the engine operating instructions.
Filling with fuel
1. Fill the fuel tank with suitable fuel, see the engine
operating instructions.
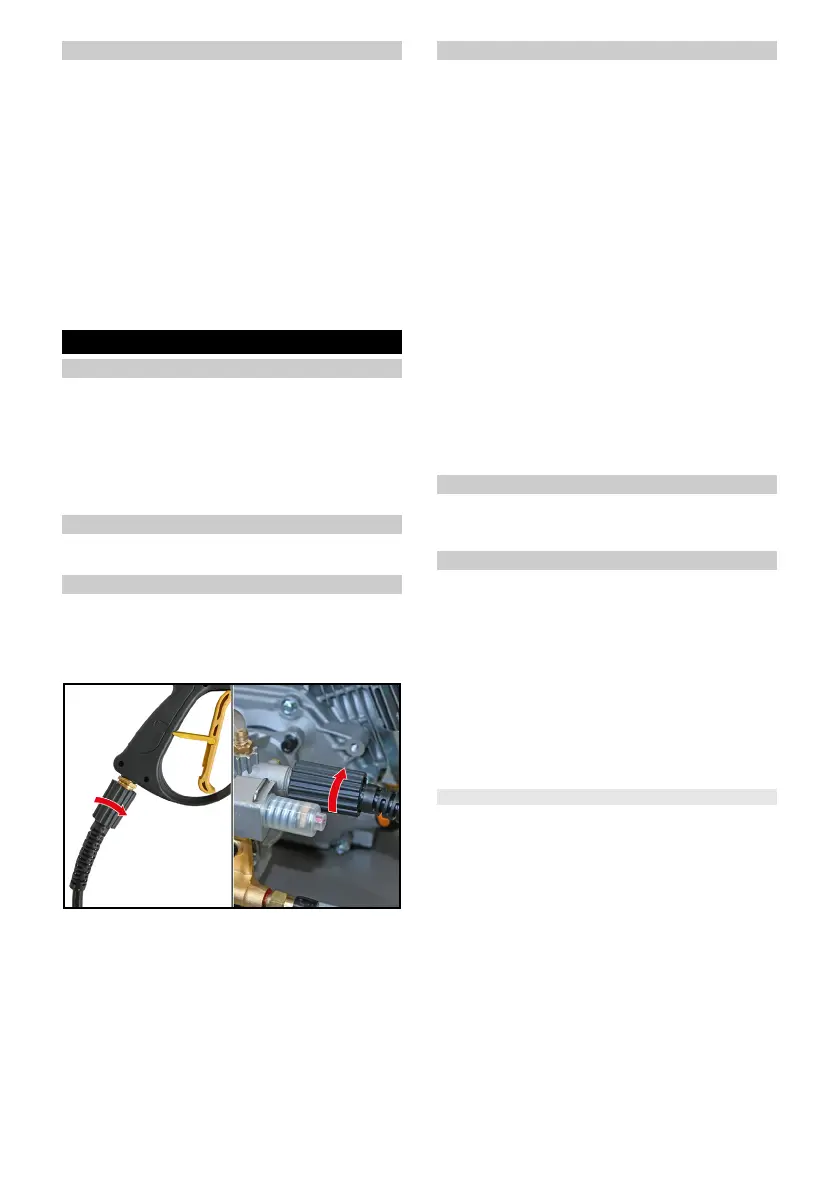
Mounting the high-pressure hose
1. Completely unroll the high-pressure hose.
2. Lay out the high-pressure hose without loops or
twists.
3. Fit the high-pressure hose into the high-pressure
gun and hand-tighten the union nut.
4. Device without a hose reel:
a Remove the cover on the high-pressure spigot.
b Fit the high-pressure hose into the high-pressure
spigot and hand-tighten the union nut.
Note
Removal is performed in the reverse sequence.
Selecting the jet nozzle
ATTENTION
Risk of damage due to point or rotating jet!
When using a jet nozzle with a point jet or rotary jet,
there is a risk of damage to sensitive surfaces!
Do not use the jet nozzles with point jets or rotary jets
for soft, sensitive or painted surfaces, vehicles, façades,
wood etc.
1. Select the jet nozzle suitable for the cleaning task.
Low-pressure jet:
● Black jet nozzle (SOAP)
For applying detergents and working at low pres-
sure.
High-pressure jet:
● White jet nozzle, 40° jet angle
For light soiling on large surfaces and working at
moderate pressure.
● Green jet nozzle, 25° jet angle
For heavier soiling on large surfaces and working at
high pressure.
● Yellow jet nozzle, 15° jet angle
For stubborn soiling and working at very high pres-
sure.
● Red jet nozzle, 0° jet angle, point jet
For the most stubborn soiling and work with maxi-
mum pressure.
Installing the jet nozzle
1. Mount a jet nozzle suitable for the cleaning task onto
the spray lance, see Selecting the jet nozzle and
Replacing the jet nozzle.
Connecting the water supply
ATTENTION
Risk of damage through contaminated water!
Contamination in the water can damage the high-pres-
sure pump and accessories.
Operate the device only with clear fresh water without
contamination or additives.
Never use contaminated water, waste water or salt wa-
ter.
1. Check the pressure, temperature and quantity of the
supply water for compliance with the requirements,
see Technical data.
Note
Observe the water distribution company regulations.
Connection to the water line
ATTENTION
Risk of damage when using a hose coupling with
"Aquastop" on the water connection of the device!
Using a hose coupling with "Aquastop" on the water
connection of the device can damage the high-pressure
pump.
Never use a hose coupling with "Aquastop" on the water
connection of the device.
You can use a hose coupling with "Aquastop" on the
tap.
1. Attach the coupling socket of the water hose to the
coupling plug.
2. Connect the water hose to the water tap of the water
line.
3. Open the water tap fully.
 Loading...