7
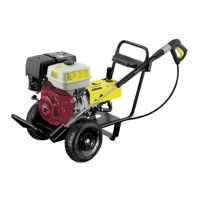
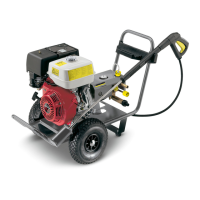
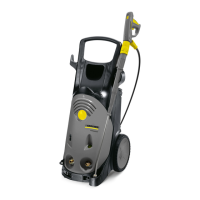
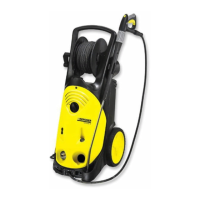
1. Starting
Note:
If you are using an extension cable, it should
always be completely unwound from the cable
drum and have a sufficient cross-sectional
area: 25 ft: 12 AWG, 50 ft: 10 AWG
(10 m = 1.5 mm², 30m = 2.5 mm²)
1.5 Connecting the water supply
••
••
•
See technical data for connected values.
••
••
•
Connect a water supply hose (not supplied) to
the appliance and the water pipe.
Note:
Dirt in the feed water could lead to the appliance
being damaged. To avoid this risk, we
recommend fitting a filter.
A suitable filter with 1" connection is available
under Order No. 2.638-270.
Suction
Observe the following if you are drawing water
from an open container:
– Attach a suction hose with filter (order no.
4.440-238) directly to the appliance.
– Allow the pump to operate without the high-
pressure hose until water appears at the high-
pressure outlet without any more bubbles.
– Then re-attach the high-pressure hose.
1.6 Purpose
••
••
•
Use the appliance to clean machines, vehicles,
buildings, tools, etc.
••
••
•
Clean facades, patios, garden implements,
etc. with the high-pressure spray only, i.e.
without detergent. We recommend the dirt
blaster, a special accessory, for stubborn dirt.
••
••
•
Engines must only be cleaned in places which
have appropriate oil traps (protection of the
environment).
••
••
•
If the machine is used at petrol stations or in
other hazardous areas, the appropriate safety
1.1 Unpacking the unit
••
••
•
If, while unpacking, you discover damage has
been caused in transit, please inform your
dealer immediately.
••
••
•
Do not simply discard the packing materials
with the house-hold waste. Take the packing
materials to the appropriate collection areas
for recycling.
1.2 Assembling the accessories
••
••
•
Attach the handle to the unit with the supplied
screws.
Note:
If the handle is too low for you, you can
change the height as follows:
– Remove the handle and hood.
– Unscrew the fastening nut for the detergent
tank and remove the tank.
– Unscrew the carry bar from the motor unit
(three screws) and remove to the rear.
– Turn over the carry bar so that the top and
bottom are interchanged.
– Screw the carry bar back onto the motor
unit using the three new fastening holes.
This way, the carry bar is about 85 mm
higher.
– Reattach the detergent tank, hood and
handle.
1.3 Checking the oil level
••
••
•
Unscrew both fastening screws from the left
and right side of the hood and remove the
hood.
••
••
•
Cut off the tip of the oil tank cap.
••
••
•
Check the oil level in the oil tank.
1.4 Connecting the power supply
••
••
•
See technical data of connected values.
••
••
•
Check whether the voltage shown on the
rating plate corresponds to that of the power
source.
 Loading...