10 English
32 **Microfibre floor cloth (2 x)
33 **Carpet glider
**Optional
Initial start-up
ATTENTION
Device damage due to calcification
The decalcification cartridge only works properly if you
adjust the device to the local water hardness before op-
erating it for the first time.
Set the device to the local water hardness.
Set the device to the current water hardness before us-
ing it in an area with a different water hardness (e.g. af-
ter a move)
1. Insert the decalcification cartridge into the opening
and push it so that it is firmly in place.
Illustration C
2. Set the water hardness, see chapter Setting the wa-
ter hardness.
Installation
Installing accessories
1. Insert and engage the steering roller and non-driven
wheels.
Illustration B
2. Push the open end of the accessory onto the steam
gun so that the unlocking button on the steam gun
engages.
Illustration H
3. Push the open end of the accessory onto the spot-
light nozzle.
Illustration I
4. Connect the extension tubes with the steam gun.
a Push the first extension tube onto the steam gun
so that the unlocking button on the steam gun en-
gages.
The connection pipe is connected.
b Push the second extension tube onto the
first extension tube.
The connection pipes are connected.
Illustration J
5. Push the accessory and / or the floor nozzle onto the
free end of the extension tube.
Illustration K
The accessory is connected.
Disconnecting accessories
1. Set the selector switch for the steam volume to the
rear.
The steam lever is locked.
2. Push the unlocking button and pull the parts apart.
Illustration N
Operation
Filling water
The water reservoir can be filled at any time.
ATTENTION
Damage to the device
Unsuitable water can block the nozzles or damage the
water level indicator.
Do not use condensation from the clothes dryer for fill-
ing.
Do not use collected rain water for filling.
Do not use cleaning agents or other additives (e.g.
scents) for filling.
1. Fill the water reservoir with a maximum of 1 l of tap
water.
Illustration D
Switch on the device
ATTENTION
Device damage due to incorrectly set water hard-
ness
The decalcification cartridge only works properly if the
device is adjusted to the local water hardness. The de-
vice may calcify if the water hardness is set incorrectly.
Adjust the device to the local water hardness before first
operation, see chapter Setting the water hardness.
Note
When steaming for the first time after removing and re-
inserting the decalcification cartridge, the steam jet may
be weak or irregular, and individual drops of water may
be expelled. The device requires a short running-in pe-
riod in which the decalcification cartridge fills with water.
The steam volume that is expelled increases constantly
until the maximum steam volume has been reached af-
ter approx. 30 seconds.
1. Place the device on a firm surface.
2. Connect the mains plug into a socket to a socket.
a Press the On switch.
Illustration E
3. The green indicator light lights up.
The device is ready for use after approximately 30
seconds.
Illustration F
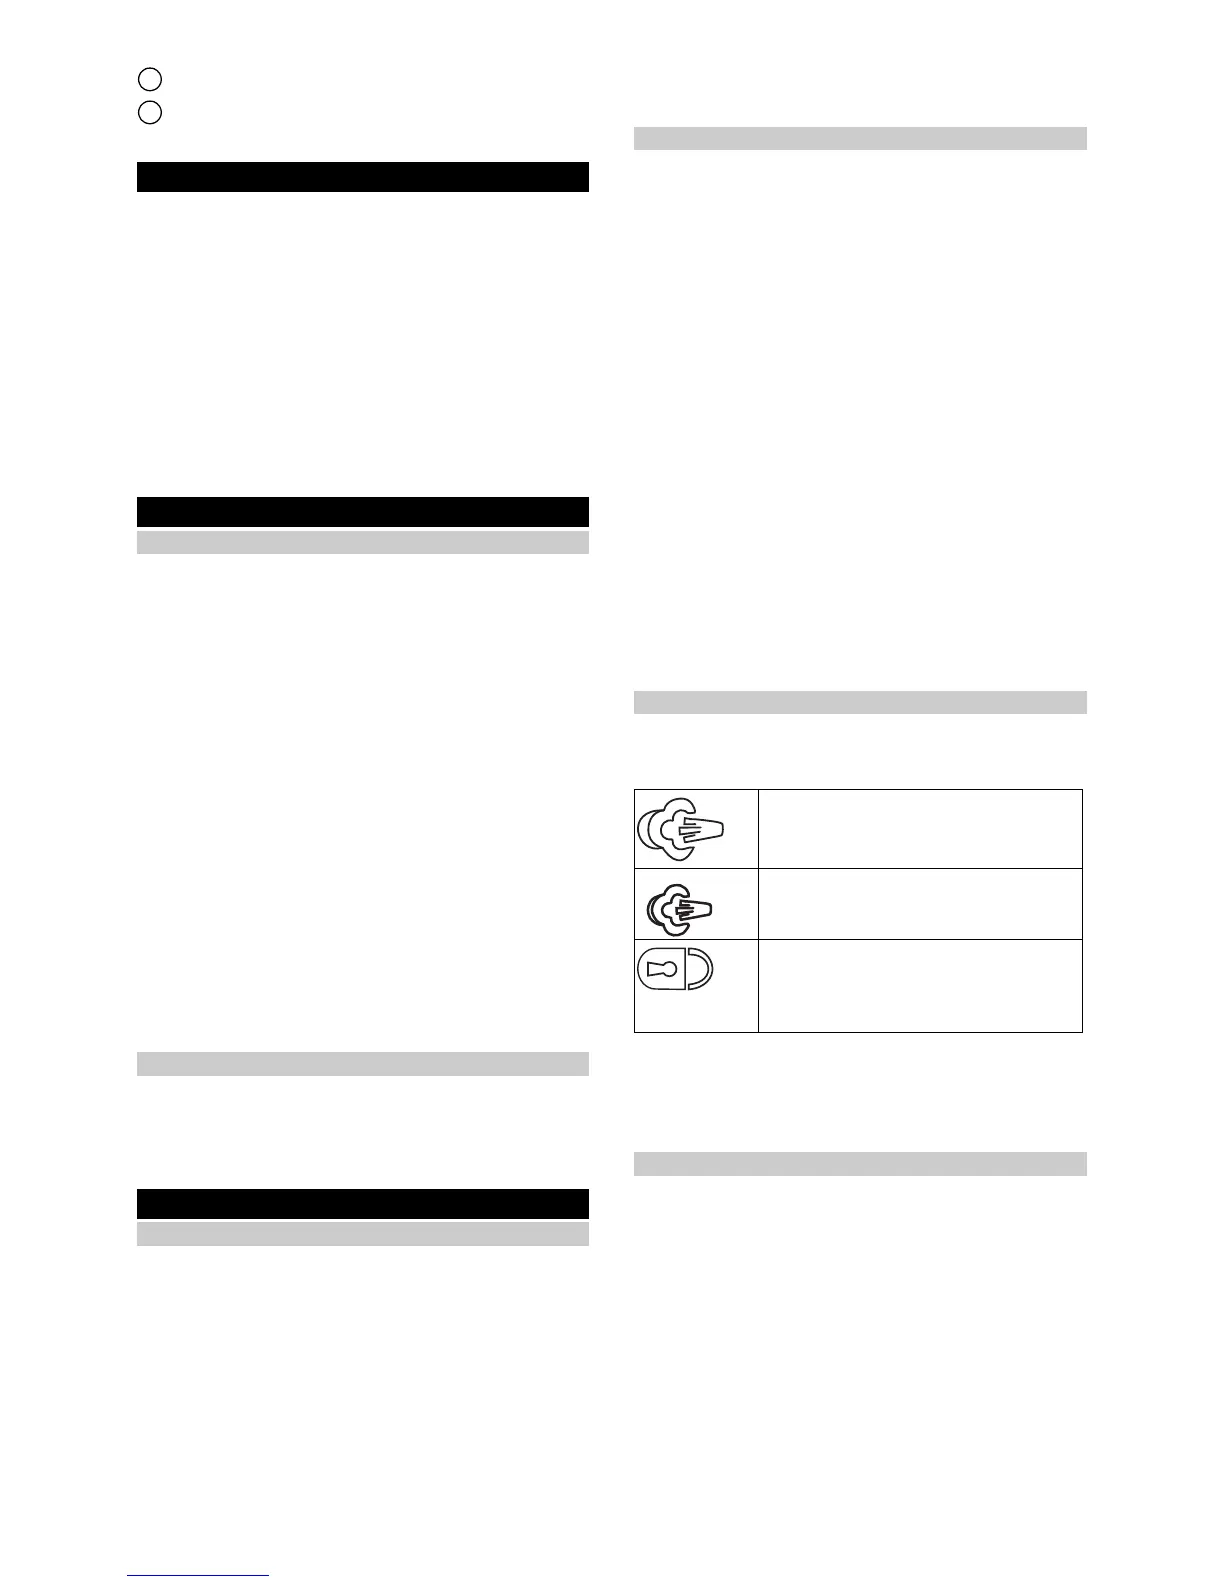
Regulating the steam volume
The expelled steam volume is regulated using the se-
lector switch for steam volume. The selector switch has
3 positions:
1. Set the selector switch for the steam volume to re-
quired steam volume.
2. Press the steam lever.
3. Before starting cleaning, point the steam gun at a
cloth until steam is expelled evenly.
Topping up the water
If there is a water shortage, the red water shortage indi-
cator light lights up constantly.
For constant steam output, the water has to be topped
up through the cover of the decalcification cartridge.
When topping up the water, the decalcification cartridge
remains secured in the device.
Note
The device is equipped with dry-run protection for the
pump. If the pump runs dry for a longer period, e.g. be-
cause the decalcification cartridge is not correctly in-
serted, the pump switches off and the red water short-
age indicator light flashes.
To be able to operate the device again, the device has
to be switched off and back on again. In the process,
you must make sure that the cartridge has been insert-
Maximum steam volume
Reduced steam volume
No steam - child lock
Note
In this position, the steam lever cannot
be operated.

 Loading...