This document provides comprehensive instructions for the Karinear Ceramic Hob, model KNC-D58404, covering installation, operation, maintenance, and safety warnings.
Function Description
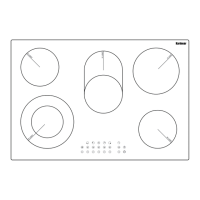
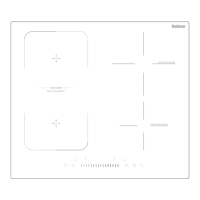
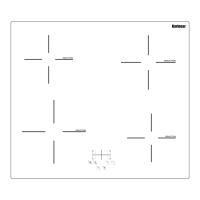
The Karinear Ceramic Hob is a microcomputer-controlled cooking appliance designed for modern families. It utilizes resistance wire heating and offers multi-power selection to meet various cuisine demands. The hob features a touch control panel for easy operation and is designed with safety and reliability in mind. It includes five cooking zones, each with adjustable power levels, and a timer function for precise cooking.
Important Technical Specifications
- Model: KNC-D58404
- Cooking Zones: 5 Zones
- Zone 1: 138/230mm, 1000/2200W
- Zone 2: 165mm, 1200W
- Zone 3: 200mm, 1800W
- Zone 4: 165mm, 1200W
- Zone 5: 165/270mm, 1100W/2000W
- Supply Voltage: 220-240V~, 50-60Hz
- Installed Electric Power: 8400W
- Product Size (L×W×H): 770mm × 520mm × 44mm
- Building-in Dimensions (A×B): 740mm × 490mm
- Control Type: Touch control
- Safety Features: Over-temperature protection, residual heat warning, auto shutdown, child lock, stop&go control.
Usage Features
The ceramic hob is operated via a touch control panel. Controls respond to touch without requiring pressure; users should use the ball of their finger. A beep confirms each touch. It is crucial to keep the controls clean and dry to ensure proper operation.
Starting to Cook:
- After power on, the buzzer beeps once, and all indicators light up for 1 second before going out, signifying standby mode.
- Touch the ON/OFF control; all indicators will show "--".
- Place a suitable pan on the desired cooking zone, ensuring the pan's bottom and cooking zone surface are clean and dry.
- Select the power level by touching the "+" or "-" buttons. If no heat setting is chosen within 1 minute, the hob automatically switches off. The heat setting can be modified at any time during cooking.
Finishing Cooking:
- Turn off the cooking zone by touching "-" until the display shows "0".
- "H" will appear on hot cooking zones, indicating residual heat. This can be used as an energy-saving function for heating further pans.
- Turn off the entire cooktop by touching the ON/OFF control.
Locking the Controls:
To prevent unintended use, especially by children, the controls can be locked. Touch the keylock control; the timer indicator will show "Lo". When locked, all controls except ON/OFF and stop&go are disabled. To unlock, ensure the hob is on, then touch and hold the keylock control for a while.
Stop&Go Controls:
This feature allows users to pause cooking. Touch the heating zone selection control, then the pause key. The heating zone will stop, and the LED will show "11". To restart, touch the pause key again.
Over-Temperature Protection:
A sensor continuously monitors the hob surface temperature. If it detects an excessively high temperature, the hob automatically switches off. It will become operational again once the temperature returns to normal.
Residual Heat Warning:
After prolonged use, cooking zones will retain heat. An "H" indicator will appear to warn users to keep away from the hot surface.
Auto Shutdown:
As a safety feature, the hob automatically shuts down if a cooking zone is left on for an extended period without user interaction. Default working timers vary by power level (e.g., 8 hours for power levels 1-3, 2 hours for power levels 7-9).
Using the Timer:
The timer can be set for one or more cooking zones, from 1 to 99 minutes.
- To set the timer for a single zone, turn on the heating zone and use the "+" or "-" controls to select the time. Touching once adjusts by 1 minute; touching and holding adjusts by 10 minutes.
- Touch the timer control; the indicator will show "30".
- To cancel the timer, hold "-" until "00" appears, then "--" will show.
- Once set, the timer counts down, and the indicator flashes for 5 seconds. A red dot next to the power level indicator shows the selected zone.
- When the timer finishes, the buzzer beeps for 30 seconds, and the indicator shows "--".
For multiple zones, the timer indicator shows the lowest set time. To check other zones' set times, touch "+" or "-". When a cooking timer expires, the corresponding zone switches off and shows "H".
Cooking Guidelines (For Reference Only):
- Cooking Tips: Reduce power once food boils, use lids to save energy, minimize liquid/fat, start on high and reduce heat.
- Simmering/Cooking Rice: Simmering occurs around 85°C. Some tasks like rice absorption may require higher settings.
- Searing Steak: Stand meat at room temperature, heat a heavy-based pan, oil the steak and pan, cook once per side (2-8 minutes depending on thickness), and rest before serving.
- Stir-frying: Prepare ingredients, use a flat-based wok or large frying pan, preheat with oil, cook meat first, then vegetables, add sauce, stir gently, and serve immediately.
Heat Settings Suitability:
- 1-2: Delicate warming, melting chocolate/butter, gentle simmering, slow warming.
- 3-4: Reheating, rapid simmering, cooking rice.
- 5-6: Pancakes.
- 7-8: Sauteing, cooking pasta.
- 9: Stir-frying, searing, bringing soup to boil, boiling water.
Maintenance Features
Care and Cleaning:
- Everyday Soiling (fingerprints, stains): Switch off the cooktop. Apply a ceramic cleaner while the glass is warm (not hot). Rinse and wipe dry with a clean cloth or paper towel. Switch power back on. Avoid heavy-duty scourers or harsh abrasives. Never leave cleaning residue.
- Boilovers, Melts, Sugary Spills: Immediately remove with a fish slice, palette knife, or razor blade scraper. Switch off power at the wall. Hold the blade at a 30° angle and scrape spills to a cool area. Clean with a dishcloth or paper towel. Follow steps for everyday soiling. Remove stains as soon as possible to prevent permanent damage. Be cautious of sharp scraper blades.
- Spillovers on Touch Controls: Switch off power. Soak up the spill. Wipe the control area with a damp sponge/cloth, then dry completely with a paper towel. Spills can cause beeping or malfunction. Switch power back on after drying.
Troubleshooting:
- Cooktop cannot be turned on: Check power supply, ensure it's switched on, and check for power outages. If issues persist, contact a qualified technician.
- Touch controls unresponsive: Unlock controls (refer to instructions).
- Touch controls difficult to operate: Ensure control area is dry and use the ball of your finger.
- Glass being scratched: Use cookware with flat, smooth bases. Avoid rough-edged cookware, unsuitable scourers, or abrasive cleaning products.
- Pans make crackling/clicking noises: This is normal and caused by the construction of cookware (layers of different metals vibrating).
Error Codes:
- E4: High temperature. Contact supplier: karinear_service@163.com.
- F4: Circuit open. Contact supplier: karinear_service@163.com.
Installation:
- Work Surface Preparation: Cut the work surface according to specified dimensions (740mm x 490mm). Ensure a minimum of 5cm space around the hole. The work surface thickness must be at least 30mm and made of heat-resistant material.
- Ventilation: Ensure the hob is well-ventilated, and air inlet/outlet are not blocked. The safety distance between the hotplate and the cupboard above should be at least 760mm.
- Fixing Brackets: Place the unit on a stable, smooth surface. Fix the hob to the work surface using four brackets on the bottom, adjusting their position for different work surface thicknesses.
- Electrical Connection: Installation must be performed by qualified personnel. The hob should not be mounted near cooling equipment, dishwashers, or rotary dryers. Ensure proper heat radiation. Walls and heating zones above the work surface must withstand heat. Sandwich layers and adhesives must be heat-resistant. Do not use a steam cleaner.
- Power Supply: Connect to a supply with system impedance no more than 0.427 ohm. The power supply should comply with relevant standards. Use a 40A 5X2.5mm2 power line. If directly connected to the mains, an omnipolar circuit breaker with a minimum 3mm gap between contacts is required. The cable must not be bent or compressed and should be regularly checked and replaced by a qualified person if damaged.
Environmental Protection:
Waste electrical products should not be disposed of with household waste. Recycle where facilities exist. The product packaging indicates it should be handed over to an electric and electronic equipment collection point for recycling. Proper disposal helps avoid negative environmental and public health consequences.