Page 40
Copyright © 2012 Kato Engineering, Inc. All rights reserved
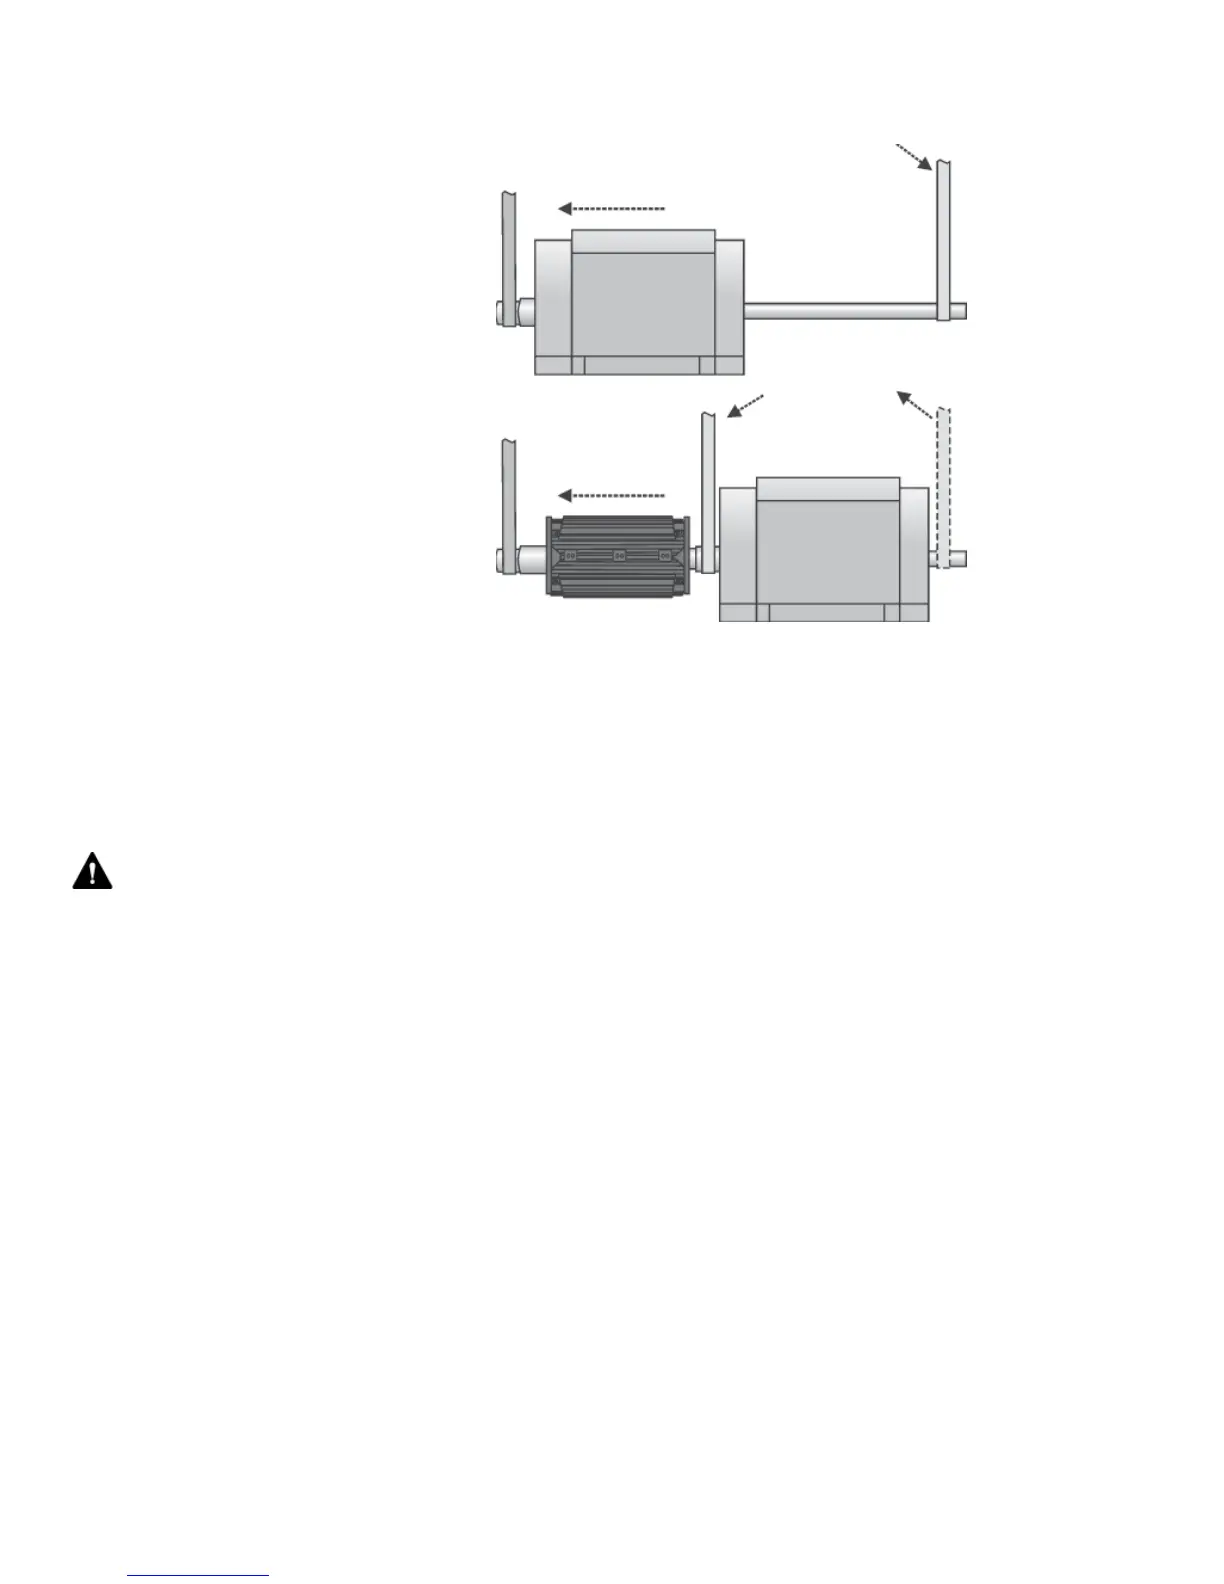
Exciter armature and PMG removal (see Figure 26)
1. Remove the exciter cover.
2. Remove the retaining bolt and washer.
3. Disconnect the fi eld wires on the rotating rectifi er assembly.
4. If the generator has a PMG rotor, pull it off separately using hand
force. Wrap the PMG rotor in plastic to avoid contamination with
metal fi lings. Notice: Some inboard PMG assemblies use a locknut to
secure the PMG rotor. See fi gure 28. To remove the PMG rotor with
a lock nut:
a) On the lockwasher, pry up the tab that is bent down in a notch of
the locknut. Then unscrew the locknut with a spanner wrench, and
remove the lockwasher.
b) Pull the PMG rotor straight back. Take care not to cock the PMA
when pulling it off.
c) Wrap the PMG rotor in plastic to avoid contamination with metal
fi lings.
5. Slowly pull the armature assembly off of the generator shaft. If the
exciter can not be pulled off by hand, use a hydraulic jack as shown
in Figure 27.
6. Remove the key from the keyway in the generator shaft.
NOTICE: Ensure the generator fi eld wires
are fl at in the wireway so they don’t tear
during pulling. Do not pull on the edges of
the heat sinks or on the exciter armature
windings.
WARNING: Strong Magnetic fi elds
- Pull the PMG off straightly. The assembly
may pull toward other steel components.
Be careful that your fi ngers or hands do
not get pinched. Stay clear if you have any
medically implanted devices, the strong
magnetic fi elds may cause medical device
failure resulting in death.
Figure 25: Floating the rotor