Page 44
Copyright © 2012 Kato Engineering, Inc. All rights reserved
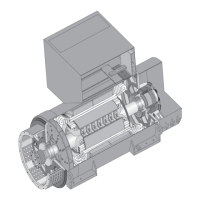
6. Connect the exciter armature wires to the rectifi er terminals.
7. If the generator has a PMG, place it onto the end of the exciter
sleeve. Make sure it is aligned with the pin slot in the end of the
exciter sleeve.
8. Install the retaining washer and bolt, and torque (60 ft-lbs for a 1/2-
inch diameter bolt; 200 ft-lbs for a 3/4-inch diameter bolt).
9. Install the exciter frame/stator and/or exciter-PMG frame/stator.
Install the clips securing the exciter fi eld leads to the exciter frame
and endbracket and connect the leads.
10. Measure the air gap between the exciter armature and exciter fi eld
and between the PMG rotor and PMG stator. If the air gap of the
armature is less than specifi ed in Table 5 or if the air gap of the PMG
is less than 0.020 inch, check 1) generator-engine alignment, 2)
check for bearing wear, 3) check for misalignment of the armature,
PMG or stator.
11. Install the exciter cover.
Exciter armature
diameter (in.)
0.014
0.014
0.018
0.035
Minimum air gap
(in.)
Table 5: Exciter air gap
5 3/4
9 7/8
12 1/2
16 1/4
IMPORTANT: To measure air gap, measure
completely around the gap between the
exciter armature and exciter fi eld with a
feeler gauge. Keep the gauge at the tightest
point, and turn the generator over to mea-
sure the air gap as the rotor turns.
WARNING: Do not pry on the genera-
tor fan blades. Blades can weaken which
could result in serious injury or death from
fl ying debris