4:32 pm would be 16.3 on
the controller’s display.
© Copyright 2016 KE2 Therm Solutions, Inc., Washington, Missouri 63090
Q.1.35 January 2016 supersedes Q.1.35 October 2015and all prior publications,
Q.1.35 January 2016
Page 20
s
d
i
2
St
STEP 1 - Press and hold the but-
ton, tS is displayed on the LEDs
d
d
p
60 00
STEP 2 - Press the up arrow until
dPd is displayed,
then press
, 6 (default) will be
displayed.
Press and hold the
button for 3
seconds until the dPd is displayed.
After the time is set, press and hold the
button for 3 seconds, until tod is
displayed
Use the
down arrow to set the de-
frost time.
Note: Defrost times may only be set on
the hour.
Example:
2:00 am would be 2
Once the correct time is displayed, press
and hold the
button until d1 is
displayed.
2d
2
d
1
STEP 6 - Repeat steps as necessary for
d2 to d12.
31
6
1
8
STEP 4 - Press the up arrow until tod
(time of day) is displayed,
d
t
o
Note: The time is displayed in military
time (24-hr clock) The 1st 2 digits are the
hour. The minutes are after the decimal.
Since there are only 3 digits, the time will
be set to the nearest 10 minutes. See ex-
amples below.
Examples:
8:10 am would be 8.1 on the
controller’s display
then press
Use the up arrow and down ar-
row to set the time.
STEP 7 - Press the
button to save
settings, and return to the main screen
(room temp will be displayed).
Custom Defrost Setup
The following steps will guide you
through the setup of the custom de-
frost feature.
Abbreviations: CUS = custom
d1 = custom defrost 1
diS = disabled
dPd = defrosts per day
ts = temperature setpoint
tod = time of day
Access Setpoint mode by pressing and holding the button until
tS (temperature setpoint) displays on the screen
ENTER
Use the up and down arrows to scroll through the available setpoints.
ENTER
Press to view the current setting.
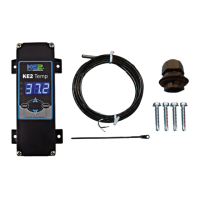
Indicator lights
Red light - Basic Menu - not used
Yellow light - non-critical alarm (system running)
Green light - compressor on
Green ashing - compressor waiting on timer to start/stop
Use the up and to change the setpoint
ENTER
Press to move between the digits to accelerate the changes.
ENTER
Press and hold to conrm each setpoint change
BACK
Press to escape.
thermsolutions
Energy Saving Refrigeration Controller
Adaptive
Control
.
d
d
p
d
t
o
1
d
S
C
U
STEP 3 - Press the up arrow until
CUS is displayed.
1
d
STEP 5 - Press the up arrow to dis-
play Defrost 1 (d1).
To set the rst defrost, press
button.
diS (disabled) will be displayed.
KE2 Therm Solutions
12 Chamber Drive . Washington, MO 63090
636.266.0140 . www.ke2therm.com
KE2 AdaptiveControl
Quick Start Guide

 Loading...